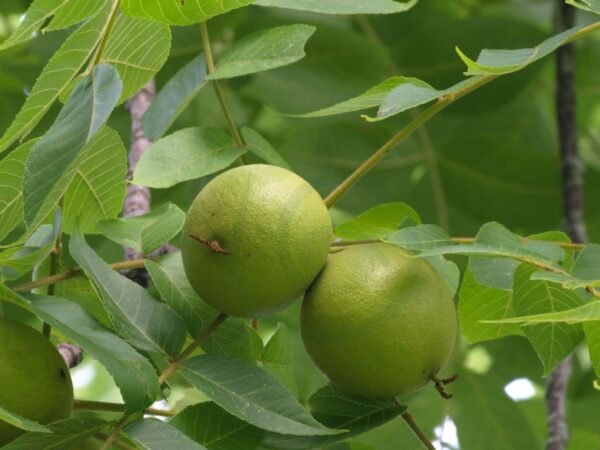
Are you wondering how to grow a black walnut tree from the nut? You're in the right place! I can guide you through the process step by step, ensuring success in cultivating your own black walnut tree right from the nut.
To grow a black walnut tree from the nut, start by collecting ripe nuts in the fall. Plant them immediately or store them in moist sand until spring. Select a sunny spot with well-drained soil and plant the nuts 2 inches deep. Keep the area free of weeds and water regularly. Be patient as it can take several years for the tree to produce nuts of its own, but the reward of harvesting your own black walnuts will be worth it!
Ready to embark on your black walnut growing journey? Keep reading to discover more tips and tricks to ensure your tree thrives and bears delicious nuts for years to come.
Key Takeaways
- Assess the viability of black walnut seeds before planting by conducting a float test to ensure successful germination.
- Prepare for germination by stratifying the seeds in a moist medium for a few months to break dormancy and enhance sprouting.
- Increase germination success by keeping the seeds moist, warm, and providing good air circulation during the germination process.
- Choose a suitable planting location for black walnut trees, considering factors like soil drainage, sunlight exposure, and adequate spacing for optimal growth.
- Plant black walnuts in well-draining soil, ensuring they are planted at the right depth and watered regularly to establish healthy root systems.
- Maintain the growth of black walnut trees by providing consistent watering, fertilizing appropriately, and protecting young trees from pests and diseases.
Assessing Seed Viability
Collecting Nuts
Gather walnuts after they fall from the tree, ensuring they are fresh and intact. Place the nuts in water to check their viability - sinkers are good, while floating nuts should be discarded.
Husking Walnuts
To husk walnuts, remove the outer husks carefully without damaging the nut inside. Use water to help separate the husks easily, focusing on selecting healthy, sunken nuts for planting.
Seed Viability Test
Conduct a simple test to determine the viability of walnut seeds before planting them. Check if the seeds show signs of life and have the potential to germinate, ensuring that only viable seeds are chosen for planting.
Preparing for Germination
Separating Husk
Separate the husk from the walnut shell carefully to avoid damaging the nut inside. Clean walnut shells thoroughly to remove any remaining husk remnants. Ensure that the nuts are husk-free before proceeding with the planting process.
Processing Nuts
Process the walnuts by removing any remaining debris or dirt on the surface. Check each nut for viability by conducting a float test in water; viable nuts will sink, while non-viable ones will float. Prepare the nuts by selecting only those that pass the viability test for planting.
Stratifying Walnuts
Stratify the walnuts by placing them in a container filled with moist peat moss or sand. Keep the nuts consistently moist throughout the stratification period, which typically lasts between 90 to 120 days. Monitor the stratification process closely to ensure that the walnuts are undergoing proper treatment for successful germination.
Germination Success Tips
Optimal Temperature
To ensure successful germination of black walnut trees, provide optimal temperature conditions. These trees require exposure to cold temperatures for the germination process to begin. By facilitating the right temperature range, you can promote healthy growth.
Moisture Control
Control moisture levels is crucial for the growth of black walnut trees from nuts. Expose walnuts to moist conditions while avoiding excessive water accumulation. Maintaining proper moisture levels is essential for the seeds to sprout and develop into healthy trees.
Light Conditions
When planting black walnut trees from nuts, choose sunny spots for optimal growth. Adequate sunlight is necessary for the seeds to germinate and thrive. By optimizing light exposure, you can ensure that your walnut trees grow strong and healthy.
Selecting Planting Location
Growing Zones Understanding
Understanding suitable growing zones for walnuts is crucial for successful growth. Choose zones that are optimal for walnut cultivation to ensure healthy trees. Ensure that the selected zones provide the necessary conditions for walnuts to thrive.
Soil Quality
Planting black walnut trees in well-drained soil is essential for their development. Maintain the soil pH levels between 6-7 to support optimal growth. Ensure that the soil quality is suitable for the specific requirements of walnut trees.
Sunlight Exposure
Providing black walnut trees with sufficient sunlight is vital for their overall health. Opt for planting locations that receive ample sunlight throughout the day. Ensure proper exposure to sunlight to promote robust growth and fruit production.
Planting Black Walnuts
Proper Depth
Plant walnuts at the correct depth to ensure successful growth. Ensure nuts are buried 1-2 inches deep in the soil. Following these guidelines is crucial for optimal development.
Spacing Guidelines
Maintain proper spacing between black walnut trees to allow ample room for growth. Follow recommended distance guidelines to avoid overcrowding and promote healthy tree development.
Care and Maintenance
Watering Needs
To water young black walnut trees properly, consider adjusting the quantity based on their size. Ensuring hydration is crucial for tree health.
Fertilizing Tips
Fertilize black walnut trees using compost and nitrogen-based products in the spring for optimal growth. Provide essential nutrients for healthy development.
Transplanting Seedlings
Ideal Timing
Harvest walnuts from mid-September to early November. Time harvesting based on hull condition for best results. Ensure optimal timing for walnut harvest to promote healthy growth.
Transplanting Steps
Follow steps for transplanting walnut trees carefully. Handle seedlings with care during transplanting to prevent damage. Secure successful transplanting of walnuts by providing proper care post-transplantation.
Pruning Techniques
Best Practices
When pruning a black walnut tree, it is vital to implement best practices to promote healthy growth. Ensure proper spacing between branches to allow for optimal sunlight exposure. Regularly remove dead or diseased branches to prevent the spread of infection. Follow recommended guidelines for care to maintain the tree's overall health and vigor. By adhering to these practices, you can encourage robust growth and bountiful nut production.
Seasonal Timing
Pruning activities for black walnut trees are best done in late winter when the tree is dormant. This timing helps minimize stress on the tree and reduces the risk of disease transmission. Address specific problems that may arise during different seasons, such as pests or nutrient deficiencies. Align seasonal tasks with key walnut growth stages, such as flowering and fruit development, to enhance overall tree health and productivity.
Harvesting and Usage
Wood Harvesting
Harvest walnut wood for various uses, including furniture making, flooring, and cabinetry. The wood's rich color and durability make it highly sought after in the woodworking industry. Utilize walnut wood for different purposes such as crafting decorative items, musical instruments, and gunstocks. Ensure proper harvesting techniques to maintain the quality of the wood, including cutting at the right time to preserve its moisture content.
Lumber Milling Varieties
Explore different varieties of walnut lumber available, such as black walnut and English walnut. Understand the characteristics of walnut lumber types, including grain patterns, color variations, and hardness levels. Choose suitable walnut lumber for specific needs based on factors like project requirements, budget constraints, and aesthetic preferences.
Summary
In growing black walnut trees from nuts, you've learned crucial steps: assessing seed viability, preparing for germination, selecting the right location, planting, caring, transplanting, pruning, harvesting, and usage. By following these guidelines meticulously, you enhance your chances of successful growth and a bountiful harvest. Remember to keep an eye on your seedlings' progress and provide the necessary care at each stage to ensure healthy development.
Now that you're equipped with the knowledge to grow black walnut trees successfully, it's time to put your newfound expertise into action. Get your hands dirty, follow the steps diligently, and watch as your black walnut tree flourishes before your eyes. Happy planting!
Frequently Asked Questions
How can I assess the viability of black walnut seeds?
To assess seed viability, place the nuts in water; viable seeds sink while non-viable float. Check for mold or damage on the shell, indicating potential issues with germination.
What are some tips for successful germination of black walnut seeds?
Ensure adequate moisture and warmth by using a damp paper towel in a plastic bag. Keep the seeds in a warm location and monitor for signs of germination like root emergence.
How do I select an ideal planting location for black walnut trees?
Choose a sunny spot with well-draining soil to plant black walnuts. Ensure the area has enough space for the tree to grow tall and wide without obstruction from buildings or other trees.
When is the best time to transplant black walnut seedlings?
Transplant seedlings in early spring before new growth appears. Make sure to carefully dig up and replant the seedling, ensuring it has enough space to establish its roots in the new location.
What are some key pruning techniques for maintaining black walnut trees?
Prune black walnut trees during dormancy to remove dead or diseased branches. Use sharp tools to make clean cuts at a slight angle near the branch collar to promote healing and prevent disease entry.
Image Source: Paid image from CANVA

