Rose stem propagation is an easy way to produce new rose plants from cuttings. This method of propagation consists of cutting healthy stems from current roses and coaxing them to grow roots.
Choose the best time to propagate roses—early spring or late summer. Follow the right rose propagation methods, and you’ll be on your way to growing stunning roses from stems in your very own backyard!
Using the right type of soil mix and rooting hormones can help increase the likelihood of success. This simple guide explains the most useful steps and techniques for guaranteed rose stem propagation.
In this way, anyone can become a rose propagator and quickly have more beautiful roses to brighten their days.
Key Takeaways
- Rose stem propagation is a simple, low-cost method to increase your garden’s stock of plants displaying the traits you’re after. Once you know what’s happening, it can make your home gardening experience even more rewarding.
- Choosing stems that aren’t diseased, their associated cuttings, and the appropriate varieties for a home garden is extremely important for successful rooting. Choose a type with strong growth and plan for the different needs of various types of roses.
- Collect tools and materials Gather your basic tools like sharp pruners, potting soil, and rooting hormone to make the process efficient. Having a clean, tidy work station will go a long way to making sure you’re efficient.
- Timing is everything. Have a plan to take your softwood cuttings in spring or hardwood cuttings in the fall when the plants are in their natural growth cycle. Pay attention to local climate and weather conditions for the best results.
- Step 4 — Provide the proper conditions Set your cuttings up in an environment with warm temperatures, high humidity, and bright, indirect light. A light, well-draining potting mix will aid in developing strong roots.
- Providing them the proper care and regularly monitoring your new cuttings is key! Foster your new starts with care. Water new starts in a gentle mist, inspect for pests, and harden off plants gradually to new outdoor conditions for success.
Understanding Rose Stem Propagation
Rose stem propagation is an effective, economical technique for producing new rose plants from existing healthy stems. This practice is an invaluable tool to gardeners. It allows them to create new roses with the traits they’re looking for, keep certain traits consistent, and increase the overall variety in their gardens.
With a little attention and care, successful propagation will produce healthy plants that flourish in specific local conditions, adding to the overall beauty of any landscape.
What Makes Rose Cuttings Successful?
When it comes to successfully rooting rose cuttings, there are a few important factors at work. Try to make your cuttings from this year’s new growth, preferably at the softwood stage in late spring. Each cutting should be 6-8 inches long with at least four nodes, giving it a good chance of producing roots.
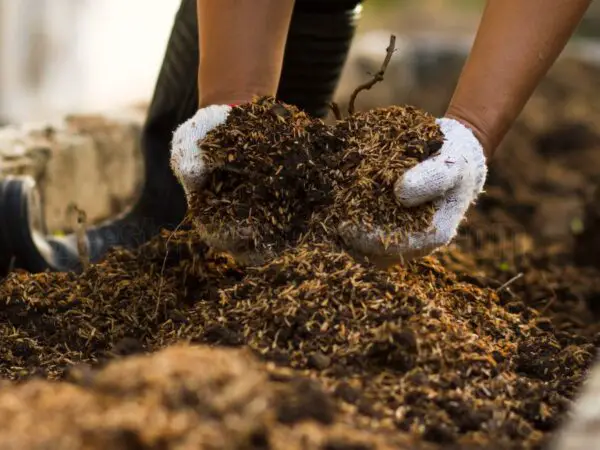
Environmental conditions are essential to the success of the rooting process. Planting in something porous, such as a mix of two-thirds perlite and one-third peat moss, will provide good air circulation around the cutting and prevent excess moisture.
Selecting the Right Rose Varieties for Propagation
Readily available varieties, such as hybrid tea roses, are great candidates for taking rose cuttings. Understanding the growth habits of these roses ensures compatibility with your garden's conditions, facilitating the nurturing of new plants and promoting vigorous rose growth.
Essential Tools and Materials Needed
Having the right tools and materials on hand makes the propagation process much smoother. Sharp pruners or scissors are key for making clean cuts, and pots with the moistened soil mix are required for planting.
Keeping your workspace organized will help you cut and plant more efficiently, giving any cutting the best possible chance for success.
Timing Your Cuttings
Learning when to take rose cuttings, particularly softwood rose cuttings, and doing so at the right time is key to successful propagation. To be honest, timing is everything when it comes to growing roses. By working with their seasonal growth rhythms, you set your new plant cuttings up for the greatest success.
Best Seasons for Taking Rose Cuttings
The best seasons to take rose cuttings are spring and fall. From November to February, especially in the winter, hardwood cuttings may be taken from well-ripened stems. This is especially advantageous during the fall, when a more stable environment is provided as the plants are dormant.
Late fall is especially beneficial as many of the everblooming varieties will still be in flower, helping with plant identification. Of the three types of cuttings, softwood are the most successful. Late spring and early summer are the best times to take them, when the stems are still somewhat pliable and beginning to harden up.
Semi-hardwood cuttings are made in late summer and early fall when the stems have begun to mature but are still tender. Planning your propagation activities around these cycles sets you up for the best chance at success.
Ideal Weather Conditions for Propagation
Sunny, mild weather is a game changer when it comes to successful propagation. The key here is to watch what’s happening in your area and select days when it’s not too warm but not too chilly.
As far as timing goes, early morning is the best time to take cuttings when the plant is most hydrated and at its most vitality. Extreme weather, like heavy heat or frost, is not recommended, as these can cause issues with the rooting process.
Knowing what conditions you’re working with will allow you to set up the best days for doing your preparation work, increasing the success rates of your propagation process.
Preparing for Propagation
Successful rose stem propagation starts with the right preparation, especially when using softwood rose cuttings. By following simple steps, you can ensure that your cuttings have the highest likelihood of root growth and developing into healthy plants.
Steps to Take Before Cutting Stems
Choose vigorous stems with good growth from the mother plant, just below spent flowers if possible. This way you’re guaranteed that the cuttings will be vigorous.
Give the parent plant a deep drink the day before. This hydration improves the overall quality of the cuttings.
Cutting preparation involves pulling off any dead or diseased leaves from the stem area you plan to cut. This one easy step not only improves health, but it helps prevent disease.
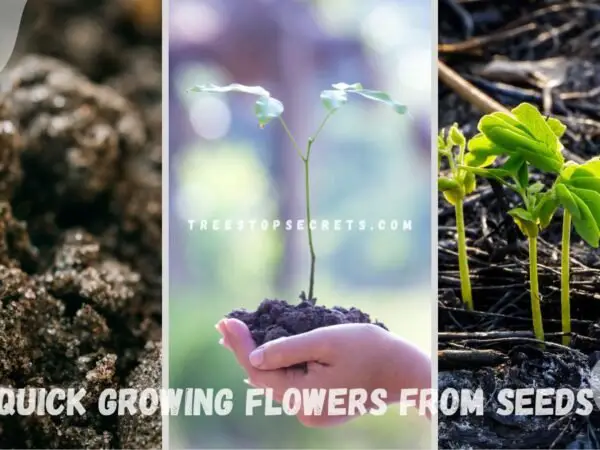
How to Prepare Your Cuttings for Planting
When you are ready to prepare your cuttings, cut them down to 6–8 inches in length. This shortened length is conducive to creating roots.
Snip off all but the top set of leaves to ensure that your cutting has sufficient energy to focus on rooting. This harmony is extremely important for the cutting’s survival.
Dip the cut end in rooting hormone, which stimulates root growth and greatly increases success rates.
Importance of Watering Before Taking Cuttings
Well hydrated cuttings are more vigorous and produce more successful cuttings. Moisture levels have an enormous impact on how successful propagation can be.
Cuttings taken from well-watered plants are less likely to wilt and have a markedly improved chance of success.
Step-by-Step Guide to Taking Cuttings
What’s the secret to propagating rose stem cuttings? It all comes down to taking the right steps in the right order. This gardening task requires exactness at every stage, but it is simple enough for even the newest gardeners to tackle successfully.
1. Take Healthy Cuttings
Choose stems that look healthy, robust, disease and pest free. By taking softwood cuttings during their active growth in late spring or early summer, you increase the odds of success. These intervals maximize your potential for producing vigorous roots.
If possible, go for cuttings that have at least three nodes, as this helps improve your chances of success. A cutting with three nodes gives you a much better shot at producing roots. A cutting that only has one node might not make it.
2. Trim and Prepare Cuttings
If you are using a garden pruner, try to cut from the bottom at a 45° angle. This method ensures more surface area is available for roots to grow. If you are going to plant in soil, pull off the lower leaves so they don’t rot.
This will allow the cutting to direct its energy towards developing robust roots. A smooth cut encourages new growth and lessens shock on the parent plant.
3. Use Rooting Hormone Effectively
Using rooting hormone on the cut end of the stem cuttings can greatly stimulate the process of root growth. Be sure to follow the product instructions for how much to apply. Adding a root stimulator helps speed the rooting process, resulting in quicker, stronger rose plants with a better head start.
4. Planting in Potting Soil
Fill pots with a mixture of 50 percent potting soil and 50 percent perlite for good drainage. Make a hole in the soil for the cutting to prevent disturbing the cutting edge with the hormone application.
Make sure to tightly pack the soil around the cutting to avoid air gaps that can prevent the cutting from growing roots.
Creating the Right Environment
Creating the right environment is key to successful rose cutting propagation. This practice promotes the development of new stems and gives them the greatest opportunity to form a deep root system, ensuring the rose plant can prosper.
Ideal Soil and Potting Mix for Roses
Choosing a high-quality, well-draining potting mix is very important to stop root rot before it starts. Mixing potting soil with perlite improves aeration and drainage, allowing water to drain freely.
The first step is to test the soil pH. Roses prefer a slightly acidic pH range of 6.0 to 6.8 for best growth. A basic at-home test kit will go a long way toward determining if your soil mix is up to snuff.
Managing Temperature and Humidity Levels
Keeping a warm environment for your cuttings helps them develop roots. A temperature around 70°F to 75°F works best.
Wrapping cuttings in plastic wraps or glass jars helps to trap humidity, which is key for rooting. By monitoring temperature and humidity regularly, you can keep these conditions in check to promote stable and healthy growth.
Providing Adequate Sunlight
Providing ample sunlight is essential for successful propagation. Proper placement of cuttings in bright, indirect sunlight is crucial.
Bright, direct sunlight will burn the new cuttings, preventing them from growing. Rotate pots every so often, if necessary, so all cuttings get equal exposure to light, encouraging uniform growth among all cuttings.
Caring for New Rose Cuttings
Setting up new rose cuttings proper care home routine is important for the new plants to thrive. This means keeping an eye on things like light, temperature and humidity.
Roses prefer bright, indirect light, so putting them close to a window works well. Too much direct sunlight will burn the newly rooting leaves. Repositioning the flat as the season changes will help make sure the cuttings get enough light without burning them.
Watering Techniques for New Cuttings
Watering new rose cuttings is an art and a science. You want to make sure that new cuttings always have soil that is moist, but never soggy.
Water them in with a soft watering technique, letting water slowly soak into the soil without forming cloud-like water puddles. Using a spray bottle to mist the cuttings might be useful, particularly if you’re in hot or dry conditions.
Monitoring moisture is key because if the cuttings dry out, they will not root.
Monitoring Growth and Health of Cuttings
Keeping an eye on the cuttings will be a very important part of measuring their health and success. Monitor for signs of new growth, like budding leaves, which means rooting is a success.
Robust, green leaf growth is an indication that the cuttings are rooting and adjusting nicely. If you notice any signs of disease or pests, treating them right away will help avoid bigger problems later on.
Pest Management Strategies
Preventing bugs from taking hold is essential for keeping your cuttings in top condition. By using preventive measures, like diatomaceous earth, you can stop pests without needing toxic chemicals.
With regular inspections of the cuttings, you can notice any early signs of infestation and take swift action before they become an issue.
Transitioning to Outdoor Conditions
Transitioning rooted cuttings, such as softwood rose cuttings, to outdoor conditions is an important step in rose stem propagation. This crucial gardening task helps young plants acclimate to their new conditions, minimizing transplant shock and maximizing new leaf growth.
When to Remove Humidity Covers
To decide when humidity covers can be removed, inspect root development. When you can see roots through the drainage holes, or the potting medium is hard, it’s time to think about introducing them to outdoor conditions.
Once you have them all potted up, begin acclimating the cuttings to outdoor air by taking the humidity covers off for a few hours each day. Monitor the plants very closely for any indication of stress.
Look for signs of wilting, yellowing or die back before finally removing the humidity covers.
Steps for Transplanting Rooted Cuttings Outdoors
Choosing the right spot in your garden is key. Find a spot that gives them enough light – at least 6 to 8 hours per day.
Second, dig holes that will allow the root systems of your cuttings to fit comfortably, giving them room to develop. Once you have moved the cuttings into their new homes, water them in well.
This will prevent the soil from settling and leaving air pockets underneath.
Acclimating New Plants to Garden Conditions
Take your new plants outside for progressively longer intervals over a course of a few days. This stage is critical to their acclimatization.
Be aware of conditions such as wind and high temperature or drying winds in this time. First, shade will shield the new plants from a possible sunburn, letting them acclimate without too much added stress.
Common Mistakes to Avoid
If you want to propagate your own rose stem cuttings, being aware of common mistakes will help you achieve successful growth. Many novice gardeners overlook essential instructions, which can lead to disappointing results in their rose rooting medium. Knowing these mistakes will significantly enhance your gardening task.
Pitfalls in the Propagation Process
The first common blunder is cutting from unhealthy or diseased stock. This slows growth and may even add pests and diseases to your garden.
Mistake #5 Not using the right propagation material. Always choose the healthiest, most vigorous stems for propagation.
Overlooking rooting hormone application is another mistake. Not using rooting hormone can hinder your success at forming roots. This product will improve your success and is a great addition to your propagation toolkit.
Finally, extreme temperature fluctuations or direct sun can cause cuttings to desiccate and die. Stake your cuttings to minimize uncontrolled movement and maintain ideal growing conditions.
Tips for Ensuring Success
Most importantly, though, is to get into a regular pattern of caring for the plant. Consistent watering and gauging the moisture in the medium will help root establishment and new growth of the cuttings.
Taking good notes on each propagation project will help you remember what worked and what didn’t. This hard-earned wisdom will serve you well on your next try!
Networking with other gardeners is an invaluable resource. When we share our experiences—successful and not so successful—everyone comes away with valuable tips and advice, plus a great community of fellow gardeners.
Conclusion
Rose stem propagation can be a very fulfilling method for increasing the size of your garden. If you take the right steps, the propagation process can be simple and very rewarding! Select vigorous stems, process them correctly, and provide a conducive environment for root development. Be mindful of your environment and provide the right conditions to ensure your cuttings root. Avoid these common mistakes, and you’ll be well on your way to seeing your hard work pay off.
Looking to propagate your own rose stems? Snag some healthy rose stems and get started on your propagation adventure today. Have fun with the process, it’s all about seeing new life spring forth and the beauty that is found in growing your own roses. With just a bit of time and attention, you’ll find yourself surrounded by a bountiful array of blossoms in no time.
Frequently Asked Questions
What is rose stem propagation?
Rose stem propagation is the technique of starting new rose plants from softwood rose cuttings taken from another rose plant. It’s an easy and inexpensive gardening task to increase your favorite rose inventory.
When is the best time to take rose cuttings?
The best time to take rose cuttings is when the stems are strong, healthy, and leafy, ideally as softwood rose cuttings, which helps ensure a higher success rate for root growth.
How do I prepare cuttings for propagation?
To prepare rose stem cuttings for propagation, remove the lower leaves, then dip the cut end in rooting hormone to promote root growth and prevent rot.
What kind of environment do rose cuttings need?
Rose cuttings thrive in an environment with indirect sunlight, a temperature near 70°F, and a plastic cover to maintain moisture for optimal root growth.
How often should I water my new rose cuttings?
How often should I water my new rose cuttings? Just don’t overwater, or the stem cuttings will rot.
When can I move my new roses outdoors?
When can I move my new rose cuttings outdoors? This is usually after 4-6 weeks when you’ll notice new roots and new leaf growth. Slowly get them used to being outside.
What are common mistakes in rose stem propagation?
Common mistakes in taking rose cuttings include inserting bad cuttings, overwatering, or placing them in direct sunlight. Avoid these errors to enhance your chances of successful propagation.
Image Source: Paid image from CANVA