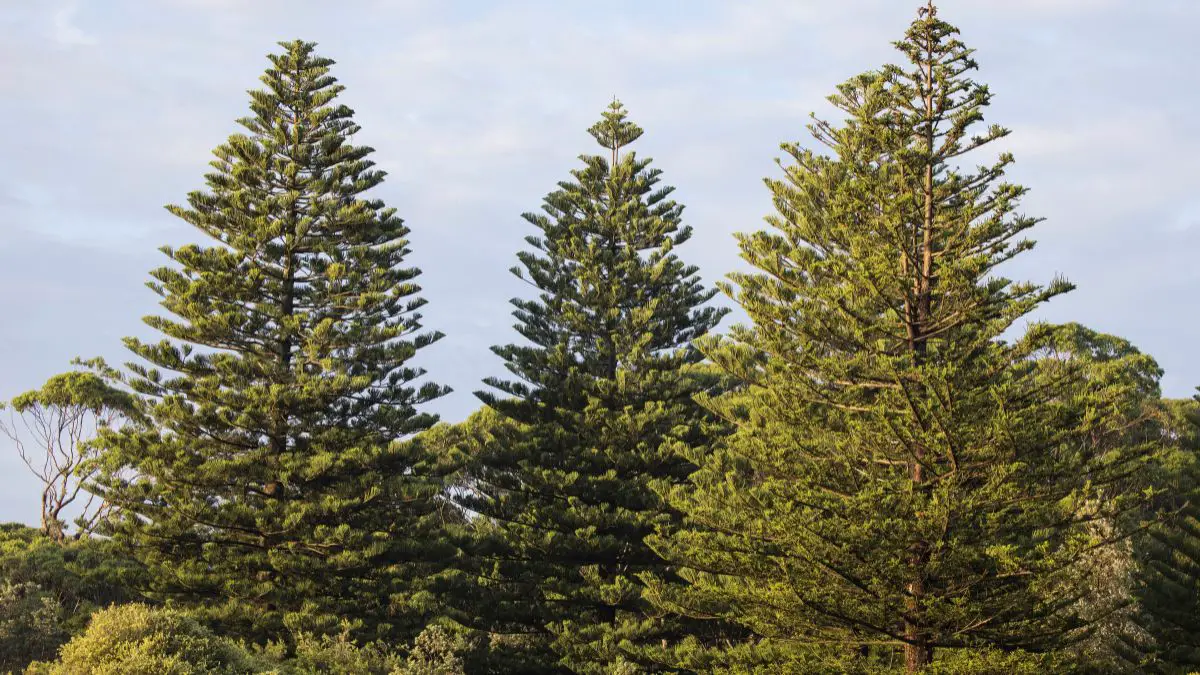
Providing proper culture and care for this attractive houseplant. The species is a native of Norfolk Island.
Light and temperature requirements Norfolk pine does best in bright, indirect light and temperatures of 60°F-75°F. Keep watering your plant on a consistent basis.
Provide a plant care tip by letting the top inch of soil dry out between watering episodes. Humidity is key, so misting the leaves or keeping a humidifier nearby will keep moisture in the air.
By understanding these simple care guidelines, you’ll set your Norfolk pine up for success. This gorgeous plant will add a stunning new burst of life to your indoor environment.
We’ll explain step-by-step below how to help your Norfolk pine thrive indoors.
Key Takeaways
- Place your Norfolk pine near a window that receives plenty of bright, indirect light to help it thrive. Keep out of direct sunlight to avoid burning leaves.
- Watering & Feeding Water your plant only when the top 25% of the soil dries out, watering deeply to avoid root rot.
- Keep indoor temperatures in the range of 65-85°F and raise humidity in winter, with pebble trays or humidifiers.
- Always use a well-draining soil mix with your Norfolk pine, and make sure your pot has proper drainage holes to encourage healthy root growth.
- Fertilize your plants once a month in the spring and summer with a balanced fertilizer. From fall to winter, omit feedings to help promote their natural dormancy period.
- Make sure to check your plants often for any pest or disease issues. Follow your usual care routine and prune as necessary to promote bushier growth and better air circulation.
Understanding Norfolk Pine Care Indoors
To successfully care for a Norfolk Island pine indoors, you need to know what makes this remarkable evergreen plant tick. This tree thrives best when provided with ideal conditions, including the right light, temperature, humidity, soil composition, and fertilization.
1. What Light Conditions Are Best for Norfolk Pines?
Norfolk pines do best with abundant indirect light. Placing them very close to the window, with a north or east exposure, is perfect. If the plant starts to grow leggy, it is likely a sign telling you that your plant is not receiving enough light.
Too much direct sun can burn the leaves, so don’t go that far. In homes where natural light is unavailable, grow lights will help you produce just the right intensity needed.
2. How to Water Your Indoor Norfolk Pine Effectively
Checking soil moisture is the best way to gauge when to water. Wait until the top 1-2 inches of soil are dry to the touch before watering the plant. Water the plant until you see water pouring out the bottom of the pot.
It’s really important to make sure you remove all standing water, or you risk root rot. Monitor the humidity in your home and adjust watering accordingly as humidity levels change throughout the year.
3. Ideal Temperature and Humidity for Norfolk Pines
Keeping indoor temperatures within that range is best. Don’t put your Norfolk Pine in a draft or heat source, as these will make your plant stressed and unhappy. Norfolk pines prefer humidity over 50%.
In dry winter months, consider humidifiers or pebble trays to keep humidity in check.
4. Choosing the Right Soil and Pot for Norfolk Pines
A quality, fast-draining soil mix that contains organic matter will help promote healthy root development. Adding peat moss or coconut coir will help improve moisture retention. Select a pot with drainage holes to allow excess water to escape.
Ensure the pot size accommodates growth without being excessively large.
5. Adjusting Fertilization for Indoor Norfolk Pines
From spring through summer, fertilize every month with a balanced, water-soluble fertilizer. Fertilizing should stop in fall and winter to match the plant’s natural dormancy period.
Monitoring plant growth will help inform when to make changes in indoor Norfolk pine fertilization practices.
Managing Common Issues with Norfolk Pines
Taking care of Norfolk Island pines means knowing how to deal with a few common problems that can occur, ensuring these charming plants remain healthy and happy in your home. In this section, we’ll discuss how to properly identify pests and diseases, introduce basic preventive measures, learn to identify signs of overwatering, and improve air circulation.
1. Identifying Pests and Diseases in Norfolk Pines
Inspecting foliage frequently is key to recognizing pests such as spider mites or aphids at first sight. Monitor your Norfolk pine closely for signs of disease, like yellowing leaves, wilting, or sticky honeydew substance on the plant.
Common issues are root rot due to overwatering and needle blight. Using organic pest control tactics like insecticidal soap is a great way to safeguard your greenery without resorting to toxic substances.
2. How to Prevent Common Problems in Indoor Norfolk Pines
Generally yes, but consistency is the most important aspect of watering to avoid creating stress for your Norfolk pine. They prefer bright, indirect light and need to be regularly misted, particularly in the winter when indoor air can be extra dry to help maintain humidity.
Conducting routine pest inspections and immediately treating emerging infestations with appropriate treatments will keep your plant vibrant and healthy. Cleaning off dust from the foliage helps with photosynthesis, helping the plant gain color and grow strong.
3. Signs of Overwatering or Underwatering in Norfolk Pines
Brown tips on your Norfolk pine branches usually means they’re getting dried out (underwatered) and yellow leaves can mean too much water (overwatered). To check soil moisture, feel it with your finger.
If it feels dry below the surface, increase your watering, keeping in mind the change in seasons.
4. Improving Air Circulation for Healthier Norfolk Pines
Place your Norfolk pine in a place with plenty of air flow, without cluttering it with other plants. Fans are helpful to improve air movement in rooms without much air circulation.
Consistent pruning of broken or dead branches will promote an open canopy and increase air movement within the tree.
Pruning and Repotting Techniques
Pruning and repotting are important practices for keeping indoor Norfolk Island pines healthy and attractive. Consistent pruning will promote a fuller, bushier plant, and provide an easy way to eliminate dead or diseased limbs. Cut back branchy and lanky foliage to encourage healthier and bushier growth, especially for those who want a classic evergreen look during the holiday season.
Cut to a lateral branch or leaf, usually just above a node, to promote outward growth when the plant is young. Pruning becomes critical when lower branches begin to die back from lack of water or light. Frequent pruning helps keep the plants looking their best with a natural shape while promoting new leafy growth and overall vigor, making them ideal as indoor plants.
Timing is everything when repotting Norfolk Island pine trees. The ideal time for undertaking this process is during the spring months, when the stress on the plant can be kept to a minimum. When it’s time to repot, choose a container only one size bigger, no more than 2 inches across, to ensure the health of your tropical evergreen.
Don’t forget to use a well-draining potting mix! Young Norfolk pines are very slow growers, so repotting is generally only required every 2-3 years. Care must be taken during this process, as they are highly prone to transplant shock, having naturally weak root systems that are brittle when young.
Carefully remove the plant from its original pot to avoid tearing any roots in the process. Next, put it in the new pot, ensuring it is at the same level as it was previously.
If you want to try propagating Norfolk Island pines indoors, choose cuttings from healthy specimens and plant them in a well-draining soil mix. Keep humidity high around your cuttings and monitor moisture levels, giving them filtered light for the best results in your indoor landscape.
Seasonal Care Adjustments for Norfolk Pines
Understanding how to tailor Norfolk Island pine care to seasonal changes can make all the difference in the world to their overall health and growth. Knowing how to adjust care routines seasonally is key to keeping Norfolk Island pines healthy and their evergreen appearance enriching your home year-round.
1. Adapting Care Routines Throughout the Year
Creating a seasonal care checklist will make it easier for you to provide your Norfolk pine with the specialized care they need as the world around them shifts. In summer, when your plant is actively growing and needs more moisture, water more often.
During the cooler months, reduce watering as their growth rate is minimal. Monitor light exposure. As days lengthen in spring and summer, ensure your pine receives adequate sunlight and adjust its position if necessary.
Monitoring growth trends will help identify areas where adjustments in care are required. Keep an eye out for seasonal pests like spider mites, which can appear in the hotter months.
2. Preparing Your Norfolk Pine for Winter Conditions
As winter gets closer, start moving your Norfolk pine to a spot further from windows and entry doors. This will shield it from any cold drafts and ensure its overall wellbeing.
Indoor humidity tends to fall during the winter months. To ensure humidity is maintained, use a humidifier or set a tray of water close to the plant.
With shorter daylight hours and cooler temperatures, the plant’s metabolism is slowed during this time period, making it essential to cut back on watering during the winter months. Monitor for any indicators of stress, such as needle browning.
Making some simple seasonal care adjustments can go a long way in keeping your Norfolk pine happy and healthy.
Conclusion
Providing Norfolk pine indoor care is well worth the effort to create a warm and inviting atmosphere with this beautiful tree. Once you meet their lighting and watering needs and occasionally prune them, these trees will flourish. Monitor for pests and care for your plant accordingly depending on the season. If given bright, indirect light and good drainage, regular pruning and repotting will keep them from getting too tall.
Frequently Asked Questions
How much light do Norfolk pines need indoors?
To ensure your Norfolk Island pines thrive indoors, position them near a window with bright, indirect light. Too much direct sunlight can harm their foliage, as these tropical trees prefer a more shaded environment.
What is the ideal temperature for Norfolk pines indoors?
Aim to keep your Norfolk Island pine tree in a space where daytime temperatures are between 65°F and 75°F. These charming plants thrive in environments with stable temperatures, free from cold drafts.
How often should I water my Norfolk pine?
Your Norfolk Island pine will appreciate your attention to this matter! Water your Norfolk Island pine tree when the top inch of soil is dry, which is typically about once a week to every other week. Ensure the container has adequate drainage holes to prevent root rot.
Do Norfolk pines need humidity?
Do Norfolk Island pines need humidity? If you notice that your home is dry, consider getting a humidifier. You can also set a tray of water next to your Norfolk Island pine tree to increase humidity.
When should I prune my Norfolk pine?
When should I prune my Norfolk Island pine tree? Prune Norfolk Island pines in late spring or early summer to encourage healthy growth. By removing dead or damaged branches, you can help maintain the shape and growth direction of this remarkable evergreen plant.
How often should I repot my Norfolk pine?
How often should I repot my Norfolk Island pine tree? Repot every 2-3 years or whenever it becomes rootbound. Select a pot that’s just 1-2 inches larger in diameter, using new potting mix for your indoor plant.
Are Norfolk pines safe for pets?
Are Norfolk Island pines safe for pets? This, along with the fact that these charming plants are safe for pets to be around, makes them an excellent indoor plant option!
Image Source: Paid image from CANVA


