Can you transplant ferns? Absolutely! Transplanting ferns can be a rewarding experience for any gardener. With the right techniques and care, master gardeners can help ferns adapt well to their new environment in beds and continue to thrive.
Ferns are resilient plants that can generally be successfully transplanted. However, it's important to consider the specific type of fern and its individual requirements. Some fern species may have specific needs, such as soil type, sunlight exposure, and moisture levels. Before transplanting, it's advisable to research the particular needs of the fern species you're working with. Additionally, proper timing is crucial for successful transplantation; spring or early fall are usually the best times to transplant ferns. When transplanting, ensure that the new location provides adequate conditions for the fern to establish itself, including appropriate soil moisture and shade levels. With proper care and attention, ferns can be successfully transplanted and continue to beautify your garden for years to come.
If you're interested in learning more about transplanting ferns, there are a variety of resources available to help guide you through the process. From expert gardening books to online forums and communities, you can find plenty of valuable information to ensure the successful transplantation of your ferns. Additionally, consulting with local gardening experts or nurseries can provide personalized advice tailored to your specific fern species and growing conditions. With the right knowledge and resources, you can confidently transplant ferns and enjoy their beauty in your garden.
Key Takeaways
- Prepare Before Transplanting: Gather necessary tools and choose a suitable location for your fern before starting the transplant process.
- Follow Step-by-Step Guidelines: Adhere to a structured approach when transplanting your fern to ensure minimal shock and optimal growth post-transplant.
- Water Wisely: Provide adequate watering post-transplant to support fern health and aid in the establishment of the plant in its new environment.
- Monitor Fern Health: Regularly check on your fern post-transplant to address any issues promptly and ensure its well-being.
- Timing Matters: Choose the best time for transplantation based on the specific needs of your fern species to increase the chances of successful growth.
- Consult Professionals if Needed: If faced with challenges or uncertainties during the transplantation process, seek guidance from gardening experts or professionals.
Understanding Fern Transplantation
Basics First
To transplant ferns successfully, it's essential to know the types suitable for transplantation. Understand the legalities and restrictions involved in moving ferns to new locations. Get familiar with the basic care needs of ferns to ensure their health post-transplant.
Optimal Timing
Identify the best time for dividing and transplanting ferns by considering their growth cycle. Take into account how different seasons can affect the success rate of transplanting. Plan your transplant schedule based on when ferns are most resilient to change.
Signs of Readiness
Recognize when ferns are ready for transplantation by observing visual cues like healthy foliage and root growth. Monitor their overall health and growth patterns before deciding to move them. Look for specific indicators such as strong root development and vibrant foliage.
Preparing for Transplant

Selecting Location
When transplanting ferns, choose a suitable location that offers the right amount of light for their growth. Consider factors like soil drainage and moisture levels to ensure the ferns can thrive. Make sure the new location provides ample space for the ferns to spread out and develop properly.
Soil Preparation
To prepare the soil for transplantation, ensure it is well-drained and nutrient-rich. Check the pH levels of the soil to create an optimal environment for fern growth. Adding organic matter such as compost can significantly improve the quality of the soil, providing essential nutrients for the transplanted ferns.
Gathering Tools
Before starting the transplant process, gather essential tools like a shovel, gardening gloves, and a watering can. It's crucial to have appropriate containers or pots ready for transporting and planting the ferns. Keep mulch on hand to cover the soil after transplanting, helping retain moisture and protect newly transplanted ferns.
Step-by-Step Transplanting
Digging Up
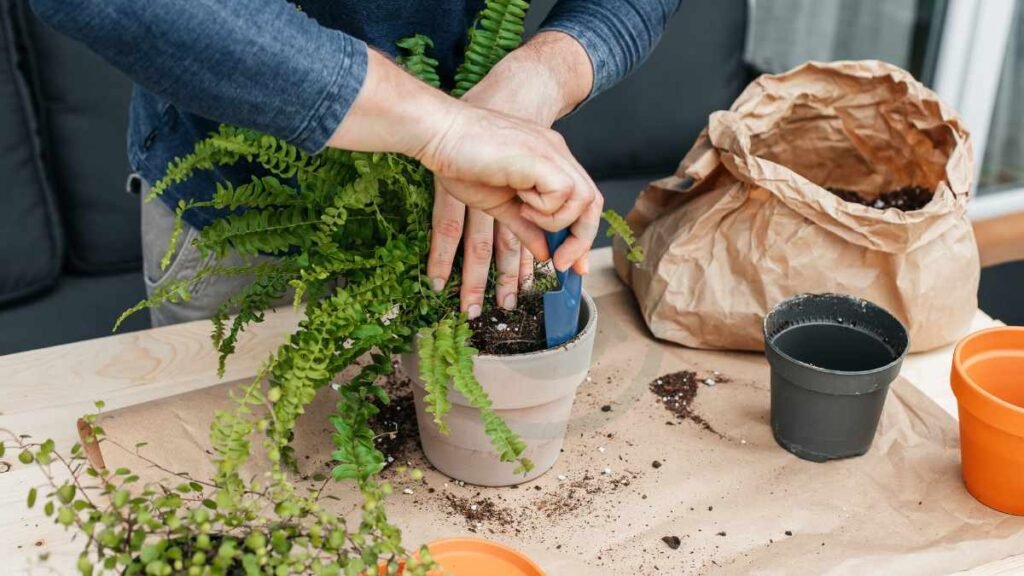
Using a sharp shovel, carefully dig up the ferns to keep the root system intact. Start by loosening the soil around the plant before gently lifting it out. Avoid causing any harm to the delicate roots while digging.
Handle the roots with gentleness to prevent damage during transplantation. Trim any excessively long or damaged roots before replanting. It is essential to ensure that the roots are well-covered with soil to support healthy growth.
Root Handling
When replanting, create holes in the soil that are large enough to accommodate the ferns' root systems. Position each fern at an appropriate depth in the soil for optimal growth. Finally, pack the soil firmly around the roots to secure them in place.
Watering Essentials Post-Transplant

Initial Watering
Water your transplanted ferns right after planting to aid in their establishment. Ensure thorough watering to reach all parts of the root system for optimal growth. Keep a close eye on soil moisture levels during the first few days post-transplantation.
Frequency Adjustments
Signs of Adequate Hydration
Ensuring Fern Health
Sunlight Requirements
Ferns thrive in indirect sunlight, making them perfect for areas with filtered light or shade. They prefer low to medium light levels.
In low-light conditions, ferns may exhibit slower growth but can still survive due to their ability to adapt. Direct sunlight should be avoided as it can scorch the delicate fronds.
Soil Moisture
For optimal growth, ensure that the soil remains consistently moist but not waterlogged. Well-draining soil is crucial for preventing root rot in ferns.
Avoid letting the soil dry out completely between watering sessions. A good practice is to water thoroughly when the top inch of soil feels dry to the touch.
- Pros:
- Consistent moisture promotes healthy fern growth.
- Prevents issues like wilting and yellowing of fronds.
- Cons:
- Overwatering can lead to root rot.
- Underwatering may cause fern dehydration and stunted growth.
Fertilization Needs
Ferns have moderate fertilization requirements, benefitting from a balanced liquid fertilizer diluted to half strength. Apply this solution every two to four weeks during the growing season.
Avoid over-fertilizing, as this can result in burned roots and damage to the plant. Always follow the recommended dosage on the fertilizer label.
- Key Points:
- Balanced liquid fertilizer at half strength every 2-4 weeks.
- Follow manufacturer instructions for proper application.
Best Time for Transplantation
Seasonal Guide
Transplant ferns during early spring or fall for optimal growth and establishment. These seasons provide moderate temperatures and ample moisture, promoting successful transplantation.
Consider avoiding the hot summer months, as high temperatures can stress the ferns and hinder their ability to adapt to a new environment.
Weather Conditions
Choose transplanting days with overcast skies or in the late afternoon to minimize stress on the ferns. Avoid transplanting during windy conditions, as it can lead to dehydration and damage to the delicate fronds.
Ensure the soil is moist but not waterlogged, providing ideal conditions for the ferns to settle into their new location without excessive shock.
Growth Cycle Considerations
Observe the growth cycle of your specific fern species before transplanting. Some ferns prefer being moved while they are dormant, while others thrive when transplanted during active growth periods.
Taking into account the growth cycle ensures that you disrupt the plant minimally, allowing for a smoother transition and quicker establishment in its new environment.
Troubleshooting Common Issues
Yellowing Leaves
Yellowing leaves on ferns can indicate various issues. Check for overexposure to sunlight, as ferns prefer indirect light. Ensure proper humidity levels to prevent leaf yellowing.
Ferns might also yellow due to nutrient deficiencies. Consider fertilizing with a balanced formula to address this issue. Inspect the roots for root rot, which can cause yellowing leaves.
Stunted Growth
Stunted growth in ferns could result from inadequate light levels. Place the fern in a brighter location to encourage healthy growth. Regularly dust the leaves to allow optimal light absorption.
Another reason for stunted growth is pot-bound roots. Repot the fern into a larger container to provide more space for root expansion and promote growth.
Over/Under Watering
Overwatering ferns can lead to root rot and wilting leaves. Allow the topsoil to dry out between waterings, ensuring proper drainage in the pot.
Conversely, underwatering causes dehydration, resulting in crispy, brown fronds. Maintain consistent moisture levels, watering when the top inch of soil feels dry.
Advanced Care Tips
Mulching Benefits
Mulching is essential for ferns as it helps retain moisture, suppress weeds, and regulate soil temperature. Organic mulches, such as compost or shredded leaves, enrich the soil as they decompose.
Using mulch also protects fern roots from extreme temperatures and minimizes water evaporation. By adding a layer of mulch around your ferns, you can create a conducive environment for their growth.
Pruning Techniques
When pruning ferns, focus on removing dead or damaged fronds to promote new growth. Use sharp scissors or pruning shears to make clean cuts close to the base of the plant.
Avoid cutting off too many healthy fronds at once, as this can stress the plant. Regularly pruning your ferns will keep them looking tidy and encourage healthy development.
Pest Management
To manage pests on ferns, regularly inspect the leaves for signs of infestation such as holes or discoloration. Natural remedies like neem oil or insecticidal soap can help control common pests like aphids or mealybugs.
Introducing beneficial insects like ladybugs can also aid in pest control without harming your ferns. By staying vigilant and addressing pest issues promptly, you can ensure your ferns remain healthy and thriving.
Seeking Professional Help
When to Call Experts
If you find yourself struggling to revive your ferns despite following all the care tips, it might be time to seek professional help. Experts can provide tailored advice based on the specific needs of your plants.
Calling in professionals is recommended when dealing with severe issues like pest infestations, diseases, or persistent wilting that don't improve with standard care. Their expertise can save your ferns from irreversible damage.
Consider reaching out to local plant nurseries, botanical gardens, or horticulture extension services for specialized assistance. These professionals have the knowledge and experience to diagnose problems accurately and recommend effective solutions.
Finding Resources
When looking for professional help with your ferns, consider visiting reputable nurseries like Mohonk, known for their expertise in plant care. Nurseries often offer consultations, diagnosis services, and personalized treatment plans for ailing plants.
Online forums and social media groups dedicated to gardening can also be valuable resources for connecting with experienced enthusiasts and professionals. Seek recommendations from fellow plant lovers who have successfully revived their ferns through expert guidance.
Exploring gardening websites and publications can provide additional insights into finding reputable experts in fern care. Look for certifications, reviews, and success stories to ensure you're entrusting your plants to knowledgeable hands.
Final Remarks
Congratulations on mastering the art of fern transplantation! By now, you're equipped with the knowledge and skills needed to ensure your ferns thrive in their new homes. Remember to keep a close eye on their health post-transplant, and don't hesitate to seek professional help if needed. Your lush, vibrant ferns will be a testament to your dedication and care.
Now it's time to get your hands dirty (literally!) and start transplanting those ferns. Follow the steps diligently, and watch as your indoor or outdoor space transforms into a green oasis. Share your newfound expertise with fellow plant enthusiasts, and let's spread the joy of successful fern transplantation together!
Frequently Asked Questions
Can ferns be transplanted during any season?
Ferns are best transplanted in the spring or fall when temperatures are moderate. Avoid transplanting during extreme heat or cold to ensure the plant's successful adaptation.
Should I water ferns immediately after transplanting?
Yes, it is crucial to water ferns thoroughly after transplanting to help them establish their roots in the new environment. Keep the soil consistently moist but not waterlogged to support healthy growth.
How deep should I plant a fern when transplanting?
When transplanting a fern, make sure to plant it at the same depth as it was previously growing. Avoid planting too deep or too shallow, as this can affect the plant's ability to thrive in its new location.
What are common signs of stress in transplanted ferns?
Wilting, yellowing leaves, and stunted growth are common signs of stress in transplanted ferns. Monitor your fern closely after transplantation and provide proper care to help it recover from the shock of being moved.
Is it necessary to fertilize ferns after transplanting?
It is recommended to avoid fertilizing ferns immediately after transplanting. Allow the plant some time to adjust to its new location before introducing fertilizer. Once the fern shows signs of new growth, you can consider using a balanced fertilizer sparingly.
Image Source: Paid image from CANVA


