Key Takeaways
- Prevent your hibiscus from getting leggy and unhappy by making sure they get a minimum of 8 hours of direct sun a day to create thriving, beautiful blooms. Change indoor lighting conditions as needed to provide adequate light and heat.
- Water regularly 3 to 4 times a week with warm water to avoid shock. Pay attention to soil moisture so you don’t end up with the problems caused by overwatering or under-watering.
- Plant hibiscus in a loam, peat moss, and sand mixture for best drainage and growth. Watch your soil drainage closely to avoid root rot.
- Holmes recommends fertilizing your hibiscus every week during its period of active growth, which lasts from spring through fall. Fertilize a balanced formula to promote abundant blooms. Modify your fertilizer routine depending on your plant’s reaction to the diet.
- Apply pruning hibiscus in spring to stimulate new growth and cut back any dead or weak branches. This ensures a compact and tidy habit, while ensuring improved airflow through the plant.
- Stay alert for typical pests and disease that can plague your hibiscus. Make a habit of regularly inspecting your plants, applying treatments accordingly, and maintaining their health, so they can result in thriving beauty.
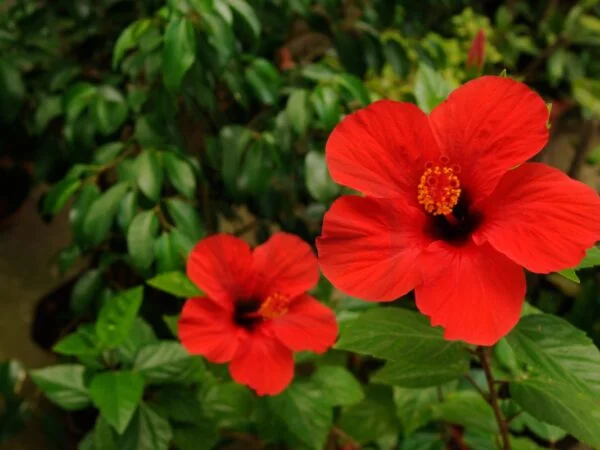
Providing care for a hibiscus plant is simple yet rewarding as they add stunning, tropical color to your landscape or indoors. These stunningly gorgeous blooms will reward you in kind if the sun, water, and soil are just right.
Place your hibiscus in a location where it will receive at least 6 hours of bright, direct sunlight a day to keep it happy and thriving. Water deeply, allowing soil to slightly dry out before your next watering to avoid root rot. A nutrient-rich, well-draining potting mix should do the trick.
By routinely monitoring for pests and pruning spent flowers, you will ensure that your hibiscus will remain healthy and blooming. In this post, I’ll provide some expert advice to help you properly care for your hibiscus. You’ll be rewarded with lovely blooms in every season!
Understanding Hibiscus Care
Caring for a hibiscus plant, particularly the hardy hibiscus varieties, means understanding your specific plant’s needs. By providing ample sunlight, temperature, humidity, and soil, your hibiscus will flourish and reward you with abundant blooms.
1. What Light and Temperature Do Hibiscus Need?
Hibiscus plants love sunny locations that receive 8 or more hours of direct sun each day. Setting them in full sun conditions will result in abundant blossoms.
Maintaining warm temperatures, ideally within the range of 60°F and 90°F will help encourage blooms to develop from spring through fall. If your room situation is light deficient, you may want to ensure they’re getting enough light with grow lights.
Look for symptoms such as stretched growth or leaf yellowing, both of which are signs of too little light or temperature shock.
2. How to Maintain Humidity for Healthy Growth
Humidity is another important factor in determining the well-being of your hibiscus. You can add humidity with a humidifier or by placing pebble trays filled with water under the pot.
Consolidating plants increases the humidity because the group of plants creates a microenvironment. Mist leaves frequently to keep them moist, and use a hygrometer for precise adjustments to humidity levels.
3. Essential Soil Composition and Drainage Tips
Planting in a loamy peat moss and sand mix encourages vigorous plant growth.
Drainage is crucial for hibiscus health. Please test drainage first, either by checking how long water pools in a hole you dig or preferred make a test planting.
Improve drainage and nutrient content by amending your soil with plenty of organic matter. To make comparison easy, try making a chart of various soil mixes that explains the advantages of each.
Watering Techniques for Hibiscus
Keeping these beauties happy starts with getting their watering right, whether they’re growing indoors or living outside. It’s important to set up a routine watering schedule of 3-4 times a week. This routine allows you to keep them hydrated without drowning the plant.
Warm water is best, as it will help avoid shock and aid in absorption. Water the soil thoroughly to penetrate deeply and hydrate the roots. This technique makes it easier to avoid overwatering and root rot. Make it a habit to check soil moisture by touching it—this easy measure will help you avoid mushy roots.
1. Adjusting Watering Routines by Season
Temperature fluctuations from season to season will decide how often your hibiscus needs to be watered. In summer, especially during hotter spells, water more frequently to maintain consistently moist soil.
In the fall and winter, cut back on watering to avoid waterlogging your plant. Keeping an eye on rainfall is a big part of knowing when to change up your routine, too.
2. Signs of Overwatering and Underwatering
Watch for yellowing leaves, a sign that your hibiscus may be getting too much water. Dry, hard soil means you are not watering enough.
Wilting or drooping leaves is another indicator to gauge hydration. Having a mental checklist of these symptoms will allow you to more readily recognize watering problems.
3. Best Practices for Container vs. Outdoor Plants
Container hibiscus plants should be watered every day, while in-ground ones should be watered every two days. Fertilization practices for container-grown plants should be adapted to the environment.
Temperature changes should be carefully tracked for container plants.
Nutritional Needs of Hibiscus
Caring for a hibiscus plant begins with knowing its nutritional needs. Consistent fertilization throughout the growing season is key to producing vibrant blooms and maintaining plant health. Selecting the correct fertilizer, especially ones with trace elements, can produce notable results.
Providing these essential nutrients allows the plant to flourish with uplifting flowers, healthy growth, and all-around vigor.
1. Choosing the Right Fertilizer for Optimal Growth
Choose slow-release types of fertilizer specifically made for hibiscus. A general-purpose fertilizer with a nitrogen-phosphorus-potassium (N-P-K) ratio of either 10-10-10 or 20-20-20 will do the trick.
Never use fertilizer high in phosphorus, which is harmful to hibiscus. Instead, find something more balanced, like a 10-10-10 with equal parts nitrogen, phosphorus, potassium. Here’s a quick comparison of some effective fertilizers:
| Fertilizer | N-P-K Ratio | Benefits |
|---|---|---|
| Plantura Flower Food | 10-4-12 | High potassium for winter strength |
| Generic Hibiscus | 20-20-20 | Balanced nutrients for healthy growth |
2. Recommended Feeding Schedule for Hibiscus
Feed your hibiscus every week from March through October, when it’s actively growing. Just keep in mind to always adjust based on the response of your plant.
During winter months feeding should be lessened if not eliminated. A suggested feeding schedule might look like this:
- Spring: Weekly
- Summer: Weekly
- Fall: Weekly
- Winter: No fertilizer
3. Application Techniques for Effective Nutrient Delivery
Fertilizers should be applied in a circle around the plant’s base. Give it a thorough watering afterward to ensure these nutrients make their way deep into the soil.
Don’t apply fertilizer directly on the leaves or they will burn. Here’s a quick checklist:
- Apply evenly around the base
- Water after application
- Avoid leaf contact
Pruning Strategies for Healthy Growth
Pruning is an important step in caring for hibiscus. This is important not just to keep the plant looking tidy, but can boost flowering on the plant. All annual pruning should occur at springtime in advance of bird nesting season.
This timing corresponds with the plant's natural growth cycle, giving the plant the opportunity to thrive. By eliminating these unhealthy branches, you increase the overall health and vigor of the plant. This approach allows the full potential of the program to take root and flourish.
Pruning your hibiscus improves aeration and light exposure, both of which are key factors in promoting healthy growth.
1. When to Prune for Maximum Blooming
Pruning very late winter or early spring, right before the plants start to leaf out, is critical for the best flowers. Deadheading, or removing spent flowers, promotes more blooms all season long.
Watch for growth trends. If you start to see very little growth, it’s time to prune. Signs like leggy branches or washed-out blooms tell you it's time to step in and make a move.
2. Techniques for Encouraging Bushier Growth
To encourage a denser plant with lateral branching, pinch the tips of the stems. Pinching off fat, fleshy new growth tips encourages wider, bushier foliage.
Thin branches evenly throughout the tree to let in the most light. Pruning methods, including topping and thinning, can produce a bushier hibiscus plant and make it more decorative.
3. Post-Blooming Care and Renewal Pruning
After flowering, determine the overall health of the plant and any pruning required to restore or rejuvenate it. Cut away dead or damaged branches in order to make way for new healthy growth.
Fertilizing at the time of pruning helps plants recover and promotes vigorous new growth. This checklist of post-blooming care tasks will help keep your hibiscus healthy and colorful all season long.
Common Problems and Solutions
Caring for a hibiscus plant, especially the perennial hibiscus varieties, can be one of the most rewarding experiences for gardeners, but it can also be intimidating. Familiarizing yourself with common hibiscus pests and how to remedy them will help your new plant flourish.
1. Identifying and Treating Pest Infestations
Frequent and thorough inspections of your hibiscus leaves should be routine. Keep an eye out for insect invaders such as aphids or spider mites that can quickly wreak havoc. Signs include abnormal growth or syrupy film on the leaf surfaces.
To get rid of these plant pests, turn to insecticidal soap or neem oil, effective and safe solutions that get the job done. Other harmful pest hawks that can be attracted naturally include beneficial insects like ladybugs.
Here’s a quick checklist for pest management: inspect leaves weekly, apply insecticidal soap as needed, and encourage beneficial insects.
2. Managing Fungal Infections in Hibiscus
Fungal diseases, like these leaf spots and powdery mildew, often become more pronounced due to stress. To combat this, increase air circulation around your plant to dry the air, which prevents fungal spores the humidity to thrive and spread.
Finally, if infections continue despite these steps, preventative and/or curative fungicides can be effective in controlling severe infections. Preventative measures include making sure there is enough space between plants and watering at the base and not overhead.
Here are some preventive tips: maintain good airflow, avoid overhead watering, and apply fungicides during wet seasons.
3. Recognizing Symptoms of Distress and Adjusting Care
Watching your hibiscus for signs of stress is key. Changes in leaf color, shape or texture are often a clear sign that something is wrong. Watering and fertilization should be tailored based on these observations.
Signs such as wilting or stunted growth indicate that it may be time to reconsider your plant care. Use this checklist to diagnose care issues: check leaf color, monitor growth patterns, and adjust watering frequency.
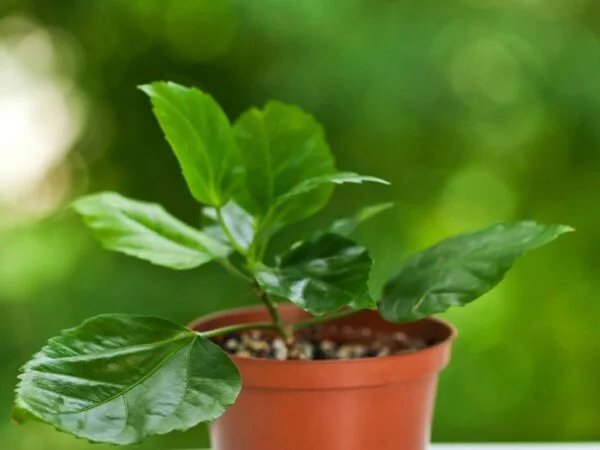
Container vs. Outdoor Hibiscus Care
Whether you grow hardy hibiscus plants in containers or in your yard, knowing how to care for these hibiscus varieties is the key to having beautiful blooms. Each specific hibiscus variety has unique environmental and cultural needs that must be catered to.
1. Differences in Environmental Needs
How much sun your indoor hibiscus gets greatly affects his health. Outdoor hibiscus love the sun and should get no less than six hours of direct sunlight each day. Container plants love sunshine too, but they need perfect placement to prevent burning.
High and low temperatures can really take a toll on plants in containers. They are highly sensitive to cold nights and hot days, so smart placement is especially important.
Humidity is the next big consideration. Outdoor hibiscus benefit from the natural humidity outdoors, while containerized plants will require added moisture, particularly if you live in a drier climate.
Here are some key factors to consider:
- Sunlight: 6+ hours for outdoor, adjust for containers
- Temperature: More stable for outdoor, variable for containers
- Humidity: Natural for outdoor, may need supplementary for containers
2. Container-Specific Watering and Fertilization Tips
Since container plants dry out much faster, more often watering should occur. As a general rule of thumb, you should be checking the soil every couple of days.
To prevent overfeeding, use smaller amounts of fertilizer formulated for use with potted plants. Always make sure drainage holes are clear so the plant doesn’t become waterlogged, which can cause root rot.
Here’s a quick checklist:
- Water every few days
- Apply fertilizer once a month
- Check drainage holes regularly
3. Seasonal Considerations for Outdoor Plants
Outdoor hibiscus require seasonal preparation. Insulate them from seasonal extremes by placing a 6-8” layer of mulch around the base.
Change your care routine with the season. Changing seasons means different things for your hibiscus plants, and in summer look out for pests.
Here are some seasonal tasks:
- Mulch for winter protection
- Adjust watering in summer heat
- Inspect for pests in spring
Propagation Techniques for Hibiscus
Hibiscus plants of all kinds are an absolute joy to grow and propagating them can be a fun and fulfilling endeavor. Once you know how to propagate these stunning beauties, the exciting possibilities await in your garden. Here’s the best way to propagate hibiscus.
We’ll cover when to propagate and Prep & tools 101, the key tools that will set you up for success.
1. How to Propagate from Cuttings
Begin with healthy cuttings of 4-6 inches in length removed from the parent plant. Strip the bottom leaves and dip the cut end in rooting hormone to promote root development. Provide a warm, humid environment for your cuttings, which encourages root density and quality.
Steps for propagating from cuttings:
- Choose a healthy cutting.
- Apply rooting hormone.
- Place cuttings in a pot with soil.
- Water lightly and cover with a plastic zip-top bag to maintain humidity.
- Wait for roots to develop.
2. Seed Propagation Methods Explained
Gather seeds from ripe matured hibiscus flowers. The seeds will need a fine, light, well-draining soil mix to germinate in. Keep them evenly moist without being soggy. Too much water and the cuttings will rot.
Checklist for seed propagation:
- Gather mature seeds.
- Prepare a seed-starting mix.
- Plant seeds at the right depth.
- Keep the soil consistently moist.
3. Best Practices for Successful Rooting
After your cuttings have rooted, keep them evenly moist and give them indirect light until they’re ready for more direct sun. This allows the tender young plants to settle in without the added stress of transplanting.
Once they’re rooted well, transplant them into larger pots.
Best practices for rooting:
- Keep soil consistently moist.
- Offer indirect sunlight.
- Transplant to bigger pots as they grow.
Mitigating Environmental Stressors
Providing proper care for a hibiscus plant starts with educating yourself on the environmental stressors that may compromise your hibiscus plant’s health. Frequent stressors are high winds, heat, and humidity variation. Each of these factors not only can stop the plant from growing, but could kill the plant entirely.
By understanding and developing effective strategies, you can best protect your hibiscus and promote a thriving and diverse environment.
1. Protecting Hibiscus from Wind Damage
To protect your hibiscus from wind, position it in protected locations, like against a wall or fence. For the larger varieties, staking or otherwise supporting your plants keeps them erect and safe from impulse winds. During extreme weather, draping your plants with frost cloth can help give them extra protection.
Consider these strategies:
- Choose sheltered locations for planting.
- Use stakes for taller plants.
- Cover with cloth during storms.
2. Strategies for Coping with Extreme Temperatures
On blistering hot summer days, access to shade can help eliminate the risk of heat stress. For container plants, surrounding them with mulch or insulating pots with bubble wrap will help shield roots during unexpected cold weather.
Pay attention to temperature extremes and adjust your watering habits accordingly. Hot spells might require more frequent watering to keep plants healthy. Here’s a checklist for managing temperature:
- Provide shade on hot days.
- Insulate containers in cold weather.
- Adjust watering as temperatures change.
3. Creating a Microclimate for Optimal Growth
Planting closely together will increase humidity and warmth, conditions that hibiscus loves. Implementing barriers, such as trellises or other garden structures, can protect them from damaging winds and sun exposure.
There are ways to regularly monitor and adjust conditions that aren’t onerous that will keep this highly beneficial microclimate precisely on point. Tips include:
- Group plants for humidity.
- Use barriers for protection.
- Adjust conditions to suit plant needs.
Conclusion
Learning how to care for a hibiscus plant is a rewarding experience that can enliven your home or garden. Be rewarded with gorgeous flowers and leafy, green foliage for just a bit of extra work. When in doubt, just concentrate on providing the proper water, nutrition, and light to your plant and you should find success! Healthy plants require pruning to keep them in top shape and promote new growth. Keep an eye out for pests and diseases, and address them immediately. Regardless if your hibiscus is potted or planted, giving them the care they crave will ensure their longevity and beauty.
So go ahead, take the plunge and get started with your new hibiscus friend today. Get caught up in the creative process, learn from experiences along the way and reward yourself with beautiful floral displays. With a little consistent care and attention, you’ll be rewarded with a vibrant garden full of colorful blossoms and natural beauty. Dive in, and get hibiscus care right!
Frequently Asked Questions
How often should I water my hibiscus plant?
Water your hibiscus plants indoors when the first inch of soil is dry, typically every 2 to 3 days during the growing season and less frequently in winter.
What type of fertilizer is best for hibiscus?
During the spring and summer months, apply a balanced fertilizer, such as a 10-10-10 or 20-20-20 NPK formula, to support the prolific flowering of your hibiscus plants. This practice encourages vertical growth and enhances the beautiful blooms, so feed every 4 to 6 weeks with a time release or water soluble fertilizer throughout the growing season.
How do I prune my hibiscus plant?
For this reason, the best time to prune your hibiscus plants is late winter or early spring. Prune any dead or weak branches of your hardy hibiscus to promote strong, healthy hibiscus varieties. Try to train the plant to complement its natural structure.
What are common pests that affect hibiscus?
Common pests to watch for on hibiscus plants include aphids, spider mites, and whiteflies. Regularly check your hibiscus flowers, and at the first sign of infestation, spray all parts of your hardy hibiscus with insecticidal soap or neem oil.
Can hibiscus be grown in containers?
Ensure your pot has drainage holes and fill it with well-draining soil for your hibiscus plants indoors. Container hibiscus will dry out faster than those planted in garden beds, so regularly check the moisture level for healthy hibiscus growth.
How can I protect my hibiscus from extreme weather?
To protect your hibiscus plants indoors from extreme wind and freeze, bring potted hibiscus inside during cold spells and drape outdoor plants in burlap or frost cloth if freezing threatens.
When is the best time to propagate hibiscus?
The ideal time for growing hibiscus is spring or early summer. Take stem cuttings from healthy hibiscus plants, ensuring they receive ample sunlight, warmth, light, and moisture.
Image Source: Paid image from CANVA