Orchids, those exotic beauties of the plant world with their green leaves and flowers, have a reputation for being notoriously hard to revive once their bloom stem seems dead, even when surrounded by moss. But here's the professional tip: with proper care and an understanding inch by inch, you can coax them back to cool life in the media! These resilient plants, like moss and orchids, are often mistakenly written off as lost causes when their lush green leaves wilt, orchid roots weaken, or flowers fall off the bloom stem of a dead orchid.
Yet, beneath that seemingly lifeless exterior, a well-cared-for indoor plant like an orchid holds potential for a lifespan that could rival any other garden favorite. However, it's important to prevent moss, mold, and ensure flowers bloom properly. Don't rush to cut your 'dead' orchid stem and toss it in the compost just yet. You might be surprised at what a little TLC in the right room can do for your leafy friend. This professional tip is further elaborated in our article.
Diagnosis: Why Orchids Seem Dead
Orchids are a bit of a drama queen. They might look like a poorly cut stem, but these orchids are probably just throwing a fit over the wrong mix, as this article suggests.
Signs of an Unhealthy Orchid
If your orchid stem is looking like it's on its last legs, don't panic just yet. This article may help. There are some signs in this article to keep an eye out for on the stem of your dead orchid that can help you figure out what the issue is.
- Leaves turning yellow or brown.
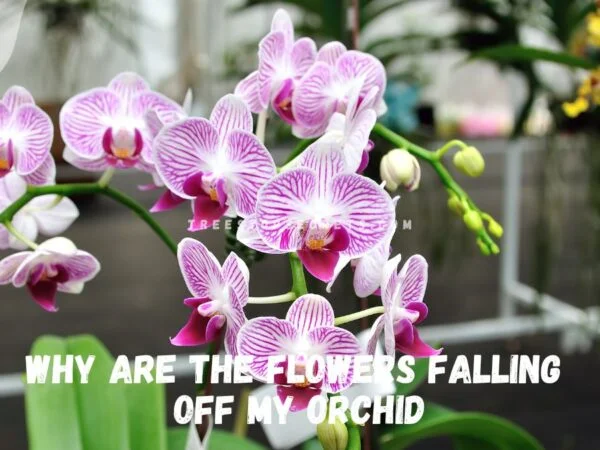
- Flowers wilting or dropping off.
- Roots appearing dry and shriveled.
These symptoms might make you think your orchid stem is headed for the big greenhouse in the sky, as this article suggests. But hold up! It might not be as bad as it seems.
Common Causes for Wilting
Now let's get down to brass tacks and talk about why the stem of your orchid might be wilting.
- Overwatering: This is a common mistake made by many well-meaning plant parents, often leading to stem damage. Too much water can cause root rot in the stem, which leads to wilting.
- Lack of light: Orchids, including their stems, need plenty of indirect light to thrive.
- Incorrect stem temperature: These divas like their stem environment just right - not too hot, not too cold!
Understanding these stem-related causes can help you avoid repeating the same mistakes, enabling you to bring your orchid back from the brink.
Dormancy Misinterpretation
Alrighty then! Let's clear up this dormancy thing once and for all.
Orchids have a dormant period where they stop blooming and take some time off to chillax (just like us after a hard week!). During this time, they might look lifeless, but they're actually just conserving energy for their next bloom cycle. So don't toss out your 'dead' orchid before checking if it's simply taking a nap!
Role of Root Health
Last but definitely not least, we gotta talk about roots because healthy roots = happy orchid.
Orchid roots should be plump and green. If they're brown, shriveled, or mushy, it's a clear sign that something's up. Overwatering is often the culprit here too. So remember, folks -Less is more!
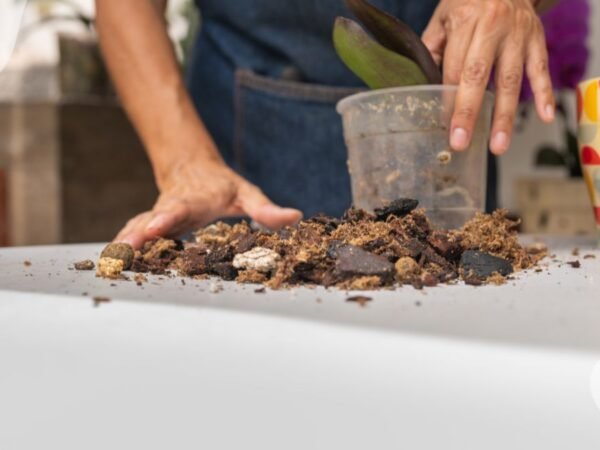
Practical Steps: Removing Dead Roots
Timing Is Everything
Root pruning isn't just a random snip-snip game. It's like surgery for your orchid, and timing is crucial. If your orchid's roots are looking more like last week's spaghetti than healthy roots, it's time to act.
Tools of the Trade
You don't need a bunch of fancy tools to prune dead roots. A pair of sharp scissors will do the trick. Just make sure they're clean to avoid infecting the root system with any nasties.
- A pair of sharp scissors
- Rubbing alcohol (for sterilizing)
Spotting Dead Roots
Identifying dead roots from living ones can be tricky. Healthy roots are firm and green or white, while dead roots are brown, mushy and smell funky – kinda like root rot.
Here are some signs:
- Color: Healthy = Green/White; Unhealthy = Brown/Yellow
- Texture: Healthy = Firm; Unhealthy = Mushy
- Smell: Healthy = Fresh; Unhealthy = Funky (like rot)
The Pruning Process
Now comes the real deal - cutting away those sickly roots. Here’s how you do it:
- Remove the orchid from its pot.
- Identify the dead roots using our tips above.
- Use your scissors to cut away at the base of each unhealthy root.
- Be careful not to damage healthy roots or stems in the process.
- Once done, discard all removed parts properly.
Post Pruning Care
Aftercare is as important as the pruning itself! You don’t want your precious plant catching stem rot or any other infection after going under the scissors.
Here’s what you need to do:
- Cleanse your pruned orchid with a gentle fungicide solution.
- Let it air-dry completely before repotting.
- Use fresh, sterile potting mix – preferably bark-based.
- Monitor your orchid closely for new growth or any signs of distress.
Remember, patience is key when reviving an orchid. It might take a while before you see new leaves or air roots sprouting, but hang in there. With these steps, you’re setting the stage for your orchid to bounce back from the brink and bloom beautifully again.
Repotting Guide: Timing and Essentials
Orchids can be a bit tricky, but with the right tips and timing, you can bring them back to life. Let's dive into the nitty-gritty of repotting these beauties.
Ideal Time Frames for Repotting Revived Orchids
Timing is everything. The best time? Right after they finish blooming. This gives your plant plenty of time to settle in before its next growth spurt.
Some signs that it's time to repot include:
- The plant is top-heavy and keeps tipping over.
- The roots are climbing out of the pot.
- The potting mix has broken down and no longer drains well.
Choosing the Right Pot and Soil Mix
Choosing the right pot is crucial. Go for a slightly larger one than its current home, but not too large. Orchids like being snug!
The soil mix should be specific to your type of orchid. Most thrive in a blend of bark, moss, and perlite which provides excellent drainage while retaining enough moisture.
Proper Technique to Repot Without Damaging Roots
Gentle does it! Here's how:
- Carefully remove the orchid from its old pot.
- Trim any dead or rotten roots.
- Place some new soil mix at the bottom of the new pot.
- Position your orchid in the center, spreading out its roots.
- Fill in around the roots with more soil mix until just below the rim.
Remember this professional tip: Never pack down your soil mix – orchid roots need air!
Post-Repotting Care Tips
After repotting, give your orchid some TLC:
- Water thoroughly but make sure there’s no water sitting at the bottom of the pot.
- Keep it in indirect light until new growth appears.
- Feed it with an orchid-specific fertilizer to provide the necessary nutrients.
In no time, you'll see your once wilted orchid bursting back to life. It's a sight to behold and totally worth the effort!
Watering Regime: Regularity and Soaking Method
Orchids can be a bit tricky to water correctly. The frequency, method, and quality of water all play crucial roles in their health.
Orchid Watering Frequency is Key
How often should you water your orchids? It's not a one-size-fits-all answer. Different species require different amounts of water. Size matters too - larger orchids need more hydration than smaller ones. And don't forget about environmental conditions! If it's hot and dry, your orchid will need watering more frequently.
- Tip: Keep an eye on the soil. If it feels dry to touch, it's time to give your plant some H2O!
The Soaking Method for Healthy Orchids
So what's the deal with the soaking method? Simply put, it involves letting your orchid sit in fresh water for a good while before draining it out completely.
- Fill up a basin with enough fresh water to cover the pot.
- Place your orchid in the basin.
- Let it soak for about 15 minutes.
- Drain thoroughly.
Why bother? Well, this method ensures that every part of the root system gets ample moisture - something surface watering can miss out on.
Watch Out for Overwatering and Underwatering
Just like Goldilocks' porridge, you want the amount of water for your orchid to be just right - not too much or too little!
Overwatered orchids often show signs like yellow leaves or black roots, while underwatered ones may have wrinkled leaves or dry roots.
- Remember: Balance is key when watering orchids!
Water Quality Matters Too
Last but definitely not least is water quality. Tap water might seem convenient but could contain chemicals harmful to your plant baby.
Consider using rainwater or distilled water instead – they're free from those pesky chemicals and can help your orchid thrive.
Light Requirements: Orchid Health Key
Different orchids need different light levels. Too much or too little can affect their health and blooming cycle.
Different Orchids, Different Light Needs
Orchid care isn't one-size-fits-all, especially. Some orchids, like the popular Phalaenopsis (moth orchid), thrive in low light conditions. On the other hand, Cattleyas and Dendrobiums are sun-lovers that need a lot of bright but indirect light.
- Phalaenopsis: Low light
- Cattleya & Dendrobium: Bright, indirect light
Impact of Light on Orchid Health
Getting the lighting right is crucial for your orchid's health. Too little light, and your plant might struggle to photosynthesize properly. It'll look dark green and won't bloom.
Too much light can cause sunburnt leaves - yes, plants get sunburn too! Sunburnt leaves will have yellow or white patches and might even turn black if left untreated.
Indoor vs Outdoor Lighting for Orchids
Whether you're growing your orchids indoors or outdoors affects how you manage their lighting needs.
Indoor growers have more control over the lighting conditions. You can move your orchids around to find their sweet spot or use artificial lights if needed.
Outdoor growers should consider placing their orchids in a shady spot that still gets plenty of bright but indirect sunlight throughout the day.
Seasonal Changes Affect Lighting Needs
As the seasons change, so do your orchids' lighting needs. During winter months when daylight hours are fewer, indoor growers might need to supplement with grow lights.
For outdoor growers, moving your plants around to avoid harsh midday summer sun could prevent leaf burn.
Encouraging Blooming: Maintenance and Humidity
Orchids are a sight to behold when they bloom. But getting them to that stage requires some work.
The Role of Humidity
Humidity plays a crucial role in an orchid's life. These tropical indoor plants thrive in conditions where the air is moist. However, too much humidity can lead to mold growth and attract pests.
To maintain the right balance:
- Place your orchid in an area with good air circulation.
- Use materials like moss around your plant to increase moisture levels.
- Monitor humidity levels regularly.
Remember, each type of orchid has its ideal humidity range, so it's essential to know what works best for your specific plant.
Temperature Ranges for Flowering
Temperature is another factor that significantly influences orchid blooms. Orchids need a fluctuation between day and night temperatures for optimal growth.
- Cool-growing orchids thrive at 50-60 degrees Fahrenheit
- Intermediate growers prefer 65-75 degrees Fahrenheit
- Warm-growing orchids love anything above 80 degrees Fahrenheit
Keeping these ranges in mind will help create the perfect environment for your orchid.
Regular Fertilization During Bloom Phase
Fertilizer is like food for your orchid – it needs regular meals during the bloom phase! A balanced fertilizer can provide all the nutrients necessary for growth.
Here's how you do it:
- Choose a fertilizer designed specifically for orchids.
- Follow the instructions on the package closely.
- Avoid over-fertilizing as it can damage roots and inhibit growth.
Regular feeding will keep your plant healthy and encourage more vibrant blooms!
Common Mistakes That Inhibit Blooming
Despite our best efforts, sometimes our beloved plants still refuse to bloom! Here are some common mistakes that might be holding back your flower power:
- Overwatering: Orchids don't like wet feet. Too much water can cause root rot.
- Direct sunlight: While orchids love light, direct sunlight can scorch their leaves.
- Wrong potting material: Some materials may not provide enough air circulation for the roots.
By avoiding these mistakes, you'll be setting your orchid up for a successful blooming season!
Sustain Bloom with Care Tips
Orchids, much like us, need a little TLC to thrive. You've learned the ropes of diagnosing their health, reviving them from root to bloom, and maintaining their vibrant beauty. Now it's time to roll up your sleeves and get your hands dirty. Remember, consistency is key - stick with these routines and you'll soon see your orchid bounce back to life.
Now that we've given you the lowdown on how to bring orchids back to life, why not share your green thumb journey? We'd love for you to join our community of plant enthusiasts where you can ask questions, share tips and tricks or simply show off your beautiful blooms! So go ahead - get started today and let's turn that black thumb into a green one!
FAQs
What are some signs my orchid is unhealthy?
If your orchid has wrinkled leaves, yellowing foliage or its roots are brown and mushy instead of white and firm, it may be unhealthy.
How often should I repot my orchid?
Typically, you should repot an orchid every 1-2 years or whenever the potting medium starts breaking down.
Can overwatering kill my orchid?
Yes. Overwatering can lead to root rot which is detrimental for your plant’s health.
What type of light is best for my orchid?
Indirect sunlight is ideal for most types of orchids as direct sunlight can burn their leaves.
When will my revived orchid start blooming again?
With proper care and maintenance following revival steps mentioned in this guide, most healthy matured orchids bloom at least once a year.
Image Source: Paid image from CANVA