If you're a budding gardener or someone interested in growing your own potatoes, chitting potatoes is a technique you'll want to know about. Chitting is the process of encouraging green shoots to grow on potato cultivars before planting them in pots. Whether you're growing maincrop or early varieties, chitting can help boost yields and ensure healthy potato plants. Chitting is the process of encouraging green shoots to grow on potato cultivars before planting them in pots. Whether you're growing maincrop or early varieties, chitting can help boost yields and ensure healthy potato plants.
Chitting is the process of encouraging green shoots in potato cultivars before planting them in pots, and it offers several benefits for successful maincrop potato cultivation. By chitting your maincrop potatoes in pots, you can help them develop strong shoots and foliage that will lead to better growth and yield of the cultivars. Planting potatoes is a common practice among experienced gardeners who understand the value of using different cultivars and high-quality seed potatoes to grow early potatoes.

Chitting maincrop potatoes and early potatoes also allows you to have more control over the timing of potato growth. Cut the potatoes as advised by the garden specialist expert answer. Whether you're eager to kickstart your maincrop potatoes or want to stagger their growth for a continuous harvest, chitting provides flexibility in managing the development of different potato varieties, including earlies. Chitting involves encouraging the shoot development of table potatoes before planting. So, if you're looking for ways to optimize your early potato-growing journey and ensure a bountiful harvest, chitting early potatoes is an essential technique to master. This article will provide you with tips on how to effectively chit early potatoes and maximize your yields.
Get ready to unlock the secrets of successful potato cultivation with chit potatoes. This simple yet effective practice will help you grow delicious earlies that are perfect for the table.
Benefits of Chitting Potatoes for Growth
Chitting potatoes is a simple yet effective technique that can significantly enhance the growth and development of your potato plants. By allowing the seed potatoes to sprout before planting, chitting offers several benefits for growing different potato varieties and ensuring a successful harvest of healthy potato seeds. Let's explore these advantages in detail:
Increased Chance of Successful Germination
Chitted potatoes have a higher likelihood of successful germination compared to non-chitted ones. This is because chitting encourages the development of strong and healthy sprouts, which are essential for the initial growth stages of different potato varieties on potato day. When you chit your potatoes, you provide them with a head start, giving them the best chance to establish themselves in the soil and thrive.
Early and Uniform Sprouting
One of the key advantages of chitting is that it promotes early and uniform sprouting in potato tubers. By exposing them to light and warmth, you stimulate bud formation, leading to consistent sprouting across all your potatoes. This ensures that every plant starts growing at roughly the same time, creating an even crop that matures together.
Accelerated Growth Process
Chitting accelerates the growth process of potato plants by jumpstarting their development. The pre-sprouted tubers already possess a well-developed root system when they are planted in the ground. As a result, they can quickly absorb nutrients from the soil and channel their energy towards above-ground growth. This accelerated growth allows for earlier harvests, enabling you to enjoy fresh homegrown potatoes sooner.
Healthier and More Vigorous Plants
By chitting your potatoes before planting them, you can ensure healthier and more vigorous plants overall. The process helps identify any weak or diseased tubers during the chitting phase itself. By discarding these problematic ones before planting, you prevent potential issues from spreading to your entire crop later on. Moreover, chitted potatoes tend to produce stronger stems and foliage due to their enhanced root development, leading to robust plants that can better withstand pests and diseases.
Chitting potatoes offers a range of benefits that contribute to the overall growth and success of your potato plants. From increased germination rates to accelerated growth and healthier plants, this simple technique can make a significant difference in your harvest. So, why not give chitting a try and experience the advantages firsthand? Your potato plants will thank you with bountiful yields of delicious spuds!
Steps to Chit Potatoes: Tools and Materials
To successfully chit potatoes, you will need a few essential tools and materials. Follow these steps for a smooth chitting process:
- Gather your tools: Before you begin, ensure you have all the necessary items at hand. You'll need seed potatoes, egg cartons or trays, and a cool, light place for chitting.
- Choose certified disease-free seed potatoes: Opting for certified disease-free seed potatoes is crucial to achieving the best results. These potatoes are carefully inspected and tested to ensure they are free from any harmful diseases that could affect their growth.
- Place the seed potatoes with their "eyes" facing upward: Chitting involves encouraging the development of small sprouts or "chits" on the potato before planting them in soil. To do this, arrange the seed potatoes in trays or egg cartons with their eyes facing upward. The eyes are small indentations where sprouts will emerge.
- Keep the chitting area well-lit but away from direct sunlight: Find a cool spot with ample lighting for your chitting setup. It's important to keep the area well-lit as this stimulates sprout growth. However, avoid placing it in direct sunlight as excessive heat can hinder the process.
Now that you have gathered your tools and materials let's dive into each step of the chitting process:
Step 1: Gather Your Tools Before embarking on your potato-chitting adventure, make sure you have everything ready to go. Collect your seed potatoes – these are specially selected tubers meant for planting – along with some egg cartons or trays to hold them during chitting. Find a suitable location that offers both cool temperatures and adequate lighting.
Step 2: Choose Certified Disease-Free Seed Potatoes While it may be tempting to use any old potato lying around for chitting, it's crucial to select certified disease-free seed potatoes. These potatoes have undergone rigorous testing to ensure they are free from harmful diseases that could potentially ruin your crop. By choosing certified seed potatoes, you're setting yourself up for success and giving your spuds the best chance at thriving.
Step 3: Place the Seed Potatoes with Their "Eyes" Facing Upward Once you've gathered your seed potatoes, it's time to arrange them in the trays or egg cartons. Ensure that each potato is placed with its eyes facing upward – these are small indentations on the surface of the tuber where sprouts will emerge. By positioning them this way, you're providing optimal conditions for chit development.
Step 4: Keep the Chitting Area Well-Lit but Away from Direct Sunlight Now that your seed potatoes are comfortably nestled in their trays or cartons, find a suitable spot for chitting. It should be a well-lit area but not exposed to direct sunlight. Natural light helps stimulate sprout growth while avoiding excessive heat that can hinder progress.
By following these steps and utilizing the right tools and materials, you'll be well on your way to successfully chitting your potatoes. So gather those seed potatoes, find a cool spot with good lighting, and let nature work its magic!
Chitting Potatoes for Planting in Containers
Growing your own potatoes can be a rewarding experience, and planting them in containers is a great option for those with limited space or poor soil conditions. To ensure successful growth, it's important to properly prepare your seed potatoes through a process called chitting.
Select Suitable Containers with Drainage Holes
When choosing containers for growing potatoes, opt for ones that have drainage holes to prevent waterlogging. This allows excess water to escape and prevents root rot. Pots made from materials such as plastic or terracotta work well for container gardening. Ensure that the containers are deep enough to accommodate the growth of potato plants and their developing tubers.
Fill Containers with Well-Draining Soil Mix Enriched with Organic Matter
To provide optimal growing conditions for your potato plants, use a well-draining soil mix enriched with organic matter. A mixture of equal parts garden soil, compost, and perlite or vermiculite works effectively. This combination promotes good drainage while retaining moisture and nutrients necessary for healthy plant development.
Place Chitted Potato Tubers on Top of the Soil Surface in Each Container
Chitting involves allowing potato tubers to sprout before planting them in containers. Start by selecting large potatoes that are free from any signs of disease or damage. Place them in a cool, dry location with plenty of natural light but away from direct sunlight. Allow the tubers to develop small sprouts over several weeks.
Once the tubers have developed sprouts about 1-2 inches long, they are ready for planting. Gently place each chitted potato tuber on top of the soil surface in its designated container. Ensure that the sprouts face upwards as these will grow into foliage and shoots.
Cover Them Lightly with Additional Soil Mix and Water Thoroughly
After placing the chitted potato tubers in their respective containers, lightly cover them with additional soil mix. Aim to cover the tubers by about 2 inches of soil. This provides a protective layer while allowing the sprouts to emerge easily.
Water the containers thoroughly after covering the tubers. Ensure that the soil is evenly moist but not waterlogged. Overwatering can lead to rotting of the tubers, so it's important to strike a balance.
By following these simple steps, you can successfully chit your potatoes and plant them in containers for a bountiful crop. Remember to choose suitable containers with drainage holes, fill them with well-draining soil mix enriched with organic matter, place chitted potato tubers on top of the soil surface, cover them lightly with additional soil mix, and water thoroughly. With proper care and attention, you'll soon be enjoying delicious homegrown potatoes straight from your own pots!
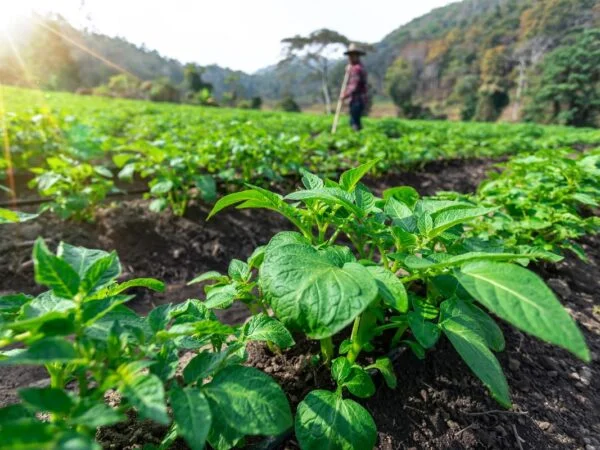
Chitting Potatoes for Outdoor Planting
To ensure a successful potato harvest, it's important to start with the right foundation. One crucial step in growing homegrown potatoes is chitting, which involves encouraging the seed potatoes to sprout before planting them in the ground. In this guide, we'll walk you through the process of chitting potatoes for outdoor planting.
Preparing the Planting Site
Before you begin chitting your potatoes, it's essential to prepare the planting site properly. Start by loosening the soil using a garden fork or tiller. This will create a loose and friable bed that allows for easy root penetration and promotes healthy plant growth. Remove any weeds or debris from the area to prevent competition for nutrients and space.
Digging Trenches or Holes
Once your planting site is ready, it's time to dig trenches or individual holes depending on your preferred planting method. Trenches are ideal for maincrop potatoes as they provide ample space for tuber development and make harvesting easier later on. On the other hand, individual holes work well for early potatoes or when space is limited.
Placing Chitted Potato Tubers
Now that you have prepared your planting area, it's time to place your chitted potato tubers into the trenches or holes you've created. Ensure proper spacing intervals between each tuber to allow room for growth and prevent overcrowding. This will help each plant receive adequate sunlight and nutrients.
Covering with Soil
After placing the chitted potato tubers at their designated spots, cover them gently with soil. Leave some space above the tubers as they grow since hilling will be necessary later on. Hilling involves gradually adding more soil around the plants as their green shoots emerge from the ground, providing additional support and protecting against frost damage.
Remember that soil temperature plays a vital role in successful potato cultivation. Wait until spring, when the ground has warmed up sufficiently, before planting your chitted potatoes. Frost can damage young shoots, so it's crucial to consider the local weather and frost date for your area.
Harvesting Homegrown Potatoes
Once you've completed the chitting process and planted your potatoes outdoors, it's time to care for them throughout the growing season. Regularly monitor soil moisture levels and provide adequate water as needed. Keep an eye out for pests or diseases that may affect potato plants and take appropriate measures to protect your crop.
As the season progresses, you'll notice your chitted potatoes thriving with new shoots emerging from the ground. This is a promising sign of a successful harvest in the making. When the foliage begins to yellow and die back later in the year, it's time to harvest your homegrown potatoes.
Timing and Techniques for Chitting Potatoes
Start chitting 4–6 weeks prior to planting outdoors
To ensure a successful potato crop, the timing of chitting is crucial. Chitting refers to the process of encouraging potatoes to sprout before planting them in the ground. The ideal time to start chitting is around 4–6 weeks before you plan on transplanting them outdoors. This gives the potatoes enough time to develop strong sprouts, which will result in healthier plants and higher yields.
Chitting can be done in a cool, bright room or under fluorescent lights
There are a couple of options available. You can choose a cool and bright room in your house or set up fluorescent lights specifically designed for plant growth. Both options provide sufficient light and temperature control necessary for successful chitting.
Keep the temperature between 50-60°F (10-15°C) for optimal chitting
Maintaining the right temperature during the chitting process is essential. Potatoes thrive when exposed to temperatures between 50-60°F (10-15°C). This range allows them to develop sturdy sprouts without becoming too leggy or weak. If the temperature goes above this range, it may lead to elongated and fragile sprouts that could break easily when planted.
Avoid exposing chitted potatoes to frost or extreme heat
While providing optimal conditions for chitting is important, it's equally crucial to protect your chitted potatoes from frost or extreme heat. Exposing them to these conditions can damage or kill the developing sprouts, rendering all your efforts futile. To prevent this from happening, make sure you choose a location that remains consistently within the recommended temperature range throughout the day and night.
Chitted potatoes are more likely to survive harsh weather conditions once planted outdoors compared to non-chitted ones. The early development of sprouts strengthens the plants, making them more resistant to diseases and pests. Chitting allows you to get a head start on the growing season, resulting in an earlier harvest.
By following the recommended timing and techniques for chitting potatoes, you can significantly increase your chances of a successful potato crop. Remember to start chitting 4–6 weeks prior to planting outdoors, choose a suitable location such as a cool room or under fluorescent lights, maintain a temperature between 50-60°F (10-15°C), and protect your chitted potatoes from frost or extreme heat. With these steps in mind, you'll be well on your way to growing healthy and abundant potatoes in your own backyard.
Preventing Potato Blight: Chitting in Light or Dark?
Chitting potatoes, a process of encouraging sprouts to grow before planting, is an essential step for many gardeners. It not only helps with the early growth of potato plants but also plays a crucial role in preventing diseases like potato blight. However, there is an ongoing debate on whether chitting should be done in light or dark conditions. Let's explore the advantages and considerations of each approach.
Chitting in Light
One significant advantage of chitting potatoes in light conditions is its ability to inhibit fungal diseases such as blight. By exposing the tubers to indirect light, you create an environment that discourages the growth and spread of blight-causing pathogens. The presence of light inhibits the development of spores and reduces the risk of infection. Therefore, if your region is prone to blight outbreaks, chitting your potatoes in a well-lit room can help safeguard their health.
Chitting in Dark
On the other hand, chitting potatoes in dark conditions has its own benefits. Darkness during chitting minimizes exposure to light, resulting in reduced greening of tubers. When potatoes are exposed to excessive light during this stage, they tend to produce chlorophyll and turn green. This greening indicates the presence of solanine, a toxic compound that can harm both humans and animals if consumed in large quantities. By keeping your potatoes away from direct light during chitting, you mitigate the risk of greening and subsequent solanine production.
Considerations for Blight-Resistant Varieties
While both methods have their merits, it's important to note that certain varieties are more resistant to blight than others. In such cases, whether you choose light or dark conditions for chitting becomes less critical as these varieties naturally possess better defenses against blight-causing pathogens. If you're growing blight-resistant potato varieties, you have the flexibility to opt for either light or dark chitting based on your personal preference and convenience.
Local Climate and Disease Pressure
Ultimately, the choice between light and dark chitting depends on your local climate and disease pressure. Consider the following factors before making a decision:
- Climate: If you live in an area with high humidity or frequent rainfall, blight is more likely to be a concern. In such regions, chitting potatoes in light can provide an added layer of protection against this fungal disease.
- Disease Pressure: Assess the prevalence of blight in your vicinity. If blight outbreaks are common and pose a significant threat to potato crops, opting for light chitting may be advisable.
Mastering the Art of Chitting Potatoes
Congratulations! You've now learned everything you need to know about chitting potatoes. By understanding the benefits, tools, techniques, and timing involved in this process, you're well-equipped to maximize your potato harvest. So go ahead and give it a try – chit those potatoes like a pro!
But remember, mastering the art of chitting potatoes is just the first step. To ensure a successful potato-growing journey, make sure to provide them with proper care and attention throughout their growth cycle. Water them regularly, protect them from pests and diseases, and enjoy watching your spuds thrive. Happy potato growing!
FAQs:
Can I chit any type of potato?
Yes, you can chit any type of potato! Whether you have seed potatoes specifically meant for planting or leftover store-bought ones that have sprouted eyes, both can be chitted.
How long should I leave my potatoes to chit?
The duration for chitting potatoes can vary depending on various factors such as the variety of potato and environmental conditions. However, a general guideline is to allow them to chit for around 4-6 weeks before planting.
Do I need special equipment for chitting potatoes?
No special equipment is required for chitting potatoes. All you need are some seed potatoes or sprouted tubers, an egg carton or tray lined with newspaper or tissue paper, and a cool but frost-free location with good light.
What if my potatoes start growing long white shoots during chitting?
If your potatoes start growing long white shoots during the chitting process, don't panic! These are just normal sprouts called "chits." They indicate that your potatoes are ready for planting.
Can I skip the process of chitting altogether?
While it's not mandatory to chit your potatoes before planting them, it does offer several advantages such as faster growth, increased yields, and improved disease resistance. So, if you want to maximize your potato harvest, chitting is definitely worth considering.
Image Source: Paid image from CANVA