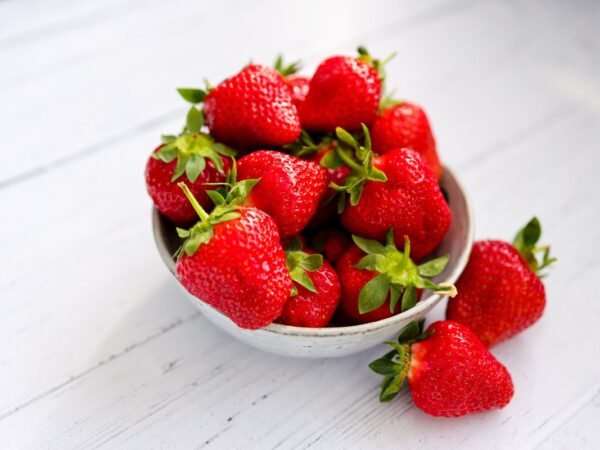
Crocheting is a delightful craft that allows you to create beautiful and intricate designs using just a hook and some yarn. Whether you are sewing or working on a strawberry pattern, crocheting offers endless possibilities. With the use of loops, you can easily bring your creative ideas to life. If you're looking to learn a fun and beginner-friendly sewing project, look no further than crocheting a strawberry hat pattern! This project is perfect for beginners and can be completed in just a few rounds.
Crocheting strawberry patterns has become increasingly popular among crafters due to their adorable appearance and versatility in sewing. Whether you're looking for a round hat pattern or simply want to add some fruity flair to your projects, crocheting strawberries is a fun and trendy way to do it. Whether you want to make keychains, ornaments, or even decorative pieces for your home, sewing strawberries with a free crochet pattern is the perfect choice. By learning the basics of sewing a round hat, you'll be able to create these charming fruit-themed amigurumi in no time.
In this sewing tutorial, we will guide you through the step-by-step process of crocheting a strawberry in the first round of work, including how to create the first stitch, choose vibrant colors for your berries, and add realistic seed details. Get ready to embark on an exciting crochet journey filled with sweetness and creativity! This journey will take you through the wonderful world of crochet, where you will learn to create beautiful pieces by working with different stitches and techniques. From starting with a simple chain stitch to creating intricate patterns, you will explore the endless possibilities of crochet. Whether you are a beginner or an experienced crocheter, this journey will inspire you to unleash your creativity and take your skills to new heights. So grab your hook and yarn, and let's dive into the rnds of crochet!
Step-by-Step Instructions: Crochet a Strawberry Stitch
To master the art of crocheting a strawberry stitch, follow our detailed instructions. This stitch is typically worked in the round, using single crochet (sc) stitches. With simple crochet techniques, you can create a realistic texture and shape in a round. The work involves using rnd and sc stitches. Practice this versatile stitch pattern to enhance your skills.
Follow Detailed Instructions
Start by gathering the necessary materials for crocheting a strawberry stitch in the first round of work. To complete this crochet project, gather the necessary supplies: red and green yarn, an appropriate crochet hook for your yarn weight, scissors, and a tapestry needle.
- To start your work, use the red yarn to make a slipknot on your crochet hook. This will be the first st of your round.
- Create a foundation chain of 4 stitches.
- Insert your hook into the first chain stitch, then make one single crochet (SC) stitch to end the round and complete your work.
- Make two SC stitches in the next chain stitch.
- Repeat step 4 for the second time to have three SC stitches in total.
- Turn your work over and continue working on the opposite side of the foundation chain to start the next round.
- Make two SC stitches in the first chain stitch at the start of this side.
- Repeat step 7 once more to have three SC stitches in total on this side as well. Work the sts for one more round.
- Slipstitch into the first single crochet made at the beginning of this round to join the work together at the end of the rnd.
Create Realistic Texture and Shape
To give your crocheted strawberry stitch its realistic texture and shape, use specific techniques for working in the round. Work the stitches in rounds to create the desired shape and texture.
- Work on increasing rounds: Increase each round by adding extra single crochet stitches (sc) evenly spaced around until you reach the end (end) of the round, reaching your desired width for the strawberry top.
- Decrease rnds: Once you've reached the end of your work, start decreasing each rnd by skipping stitches evenly spaced around until you have closed up the top completely.
Remember to stuff some fiberfill or stuffing material inside as you go along to give it that plump, round strawberry shape!
Enhance Your Skills with Practice
Crocheting is all about practice! The more you work on the strawberry stitch, the better you'll become at it. Practice round after round until you master the technique. Here are some tips to enhance your skills:
- Experiment with different yarn weights and hook sizes to achieve strawberries of various sizes. Vary the rnd and work in sc to create the desired shape and texture.
- Try using variegated or ombre yarns for a unique and colorful effect in your rnd work.
- Embroider tiny seeds onto your crocheted strawberry using black or brown embroidery floss in the rnd. This will give it a more realistic look.
With each rnd, you'll gain more confidence in your crochet work and develop your own personal style. Don't be afraid to make mistakes in your work; they're part of the learning process in R&D!
Free Pattern and Tutorial: Crochet a Strawberry Plush
With our step-by-step instructions, you'll be able to create a cute gift or decoration that is perfect for work, R&D, or any round of Secret Santa. This project is sure to bring a smile to anyone's face, whether it's for a colleague, a friend from the R&D team, or someone in the SC department.
Access our free pattern and tutorial
To get started on crocheting your very own strawberry plush, simply follow the link provided below. This project requires some basic crochet skills, such as working in the round (rnd) and single crochet (sc). It will lead you to our website where you can find the detailed pattern and tutorial for working in the round with single crochet (sc) and chain (ch).
[Link: Free Strawberry Plush Pattern and Tutorial]
Once you have accessed the pattern and tutorial, take some time to familiarize yourself with the instructions before diving into the work. This will help ensure that you are prepared with all the necessary materials for your work round in South Carolina.
Create an adorable gift or decoration
Crocheting a strawberry plush is a fun way to work with yarn and create a cute and customizable toy. You can experiment with different colors and embellishments to make it unique. This project is perfect for those who enjoy round crochet patterns and want to try their hand at making a small soft toy. You can choose a vibrant pink yarn to work on the body of the strawberry in a round shape, giving it a realistic look. Consider adding small round green leaves at the top of your plush for an extra touch of cuteness. This will make your sc work stand out even more.
This crochet project is perfect for creating personalized gifts in the round for friends or loved ones. Whether you prefer working in the round or using the single crochet (sc) stitch, this project is versatile and allows you to showcase your skills. Imagine their delight when they receive a handmade strawberry plush made just for them! This adorable plush is created with love and care using the sc and ch crochet stitches, making it a truly unique work of art. It's also a fantastic way to add charm to your home decor—place the round object on a shelf or use it as part of a centerpiece display while you work on your SC project.
Customize your strawberry plush
One of the best things about crocheting is the creative freedom it offers. You can let your imagination run wild as you work on each round of your crochet project. Feel free to experiment with different color combinations for your strawberry plush. You can try different color combinations when working on the round shape of the strawberry. Use single crochet (sc) and chain (ch) stitches to create the desired look. Try using variegated yarns for a round project or adding unique embellishments like beads or buttons to your sc or ch patterns.
If you're feeling adventurous, why not crochet multiple strawberries in different sizes? Start by creating a round shape and use the sc stitch. You could then arrange the round fruits together in a bowl as decorative fruit or even turn them into a mobile for a nursery. SC
Video Tutorial: Crochet a Strawberry Plush
If you're looking to crochet a delightful strawberry plush toy in the round but need some visual guidance, we've got you covered with this SC tutorial! Our video tutorial will walk you through each step of the round SC process, making it easy for you to replicate at home. Learning from an experienced instructor will boost your confidence in your crochet skills and help you create a cute strawberry plush in the round that you can cherish or gift to someone special. The SC stitch is essential for this project.
Watch our video tutorial for visual guidance on crocheting a delightful strawberry plush toy.
Our video tutorial is the perfect companion for beginners and experienced crocheters alike, as it covers all the techniques needed to create beautiful crochet projects, including how to crochet in the round. By watching the round video, you'll be able to see each step clearly demonstrated, allowing you to follow along effortlessly. Instead of relying solely on written instructions, the visual aspect of the tutorial ensures that nothing gets lost in translation.
Follow along as we demonstrate each step in detail, making it easy to replicate at home.
Crocheting can sometimes feel overwhelming when attempting a new project. Our video tutorial breaks down each step into manageable parts, ensuring that even if you're new to crochet, you'll be able to keep up. From starting with a magic ring to creating stitches like single crochet and increase, every technique is explained thoroughly so that anyone can master them with ease.
Gain confidence in your crochet skills by learning from an experienced instructor.
Learning any new skill can be intimidating, especially if you're worried about making mistakes. But with our video tutorial, there's no need to fret! Our experienced instructor will guide you through the process, providing useful tips and tricks along the way. You'll gain confidence in your ability to crochet as you watch their expertise unfold before your eyes.
So why wait? Grab your yarn and hook and get ready to dive into the world of crocheting strawberries with our engaging and informative video tutorial!
Easy Amigurumi Strawberry in Two Sizes
If you're looking for a fun and beginner-friendly crochet project, look no further! Whether you prefer small or large strawberries, this pattern has got you covered. Let's dive in and get started!
Explore our beginner-friendly amigurumi pattern for crocheting two sizes of strawberries.
Crocheting amigurumi strawberries is a delightful way to showcase your creativity and add a touch of cuteness to your projects. With our beginner-friendly pattern, even those new to crochet can easily follow along and create their own charming strawberry creations.
The pattern includes step-by-step instructions with clear explanations, making it accessible for beginners. You'll learn essential techniques such as single crochet, increasing stitches, decreasing stitches, and attaching eyes to give your strawberries that extra touch of personality.
Choose between small or large strawberries depending on your preference or project needs.
One of the fantastic aspects of this pattern is the flexibility it offers in terms of size. You can choose between crocheting small or large strawberries based on what suits your preferences or project requirements.
For example:
- If you're making keychains or ornaments, the smaller size may be perfect for creating cute and portable accessories.
- On the other hand, if you want to make a larger plush toy or decoration piece, opt for the bigger strawberry size to make a bold statement.
The choice is yours! Feel free to experiment with both sizes and see which one brings out the desired effect in your creations.
Enjoy creating these charming amigurumi fruits that can be used as keychains, ornaments, or toys.
Once you've completed crocheting these adorable amigurumi strawberries using our pattern, the possibilities are endless! These little fruits can serve various purposes depending on your imagination and creativity.
Here are a few ideas to get you started:
- Attach a keychain ring or clip to the top of the strawberry and use it as a cute accessory for your keys or bag.
- Hang them up as ornaments during the holiday season or decorate your space with these charming fruits all year round.
- Create a collection of amigurumi strawberries and gift them to friends, family, or children who will love playing with these delightful toys.
The vibrant red color and cute design of these strawberries make them an instant hit among both kids and adults. So grab your crochet hook, some colorful yarn, and let your creativity run wild!
Giant Strawberry Option: Crochet an Oversized Amigurumi
If you're up for a challenge and want to create something truly eye-catching, why not try your hand at crafting an oversized amigurumi strawberry? This giant option pattern will allow you to make a statement piece that is larger-than-life and sure to impress everyone who sees it!
Take on the challenge of crafting an oversized amigurumi strawberry with our giant option pattern.
Crocheting an oversized amigurumi strawberry requires a bit more time and effort compared to smaller projects. However, the end result is well worth it! With this giant option pattern, you'll have the opportunity to push your crochet skills to the next level and create a unique piece that stands out from the crowd.
Make a statement piece with this larger-than-life crochet project that will impress everyone!
One of the biggest advantages of crocheting an oversized amigurumi strawberry is its visual impact. The sheer size of the finished piece makes it a showstopper. Whether you display it in your home or give it as a gift, this giant strawberry will undoubtedly draw attention and spark conversations. It's a fantastic way to showcase your creativity and craftsmanship.
Showcase your creativity by experimenting with different yarn textures and color combinations.
When crocheting an oversized amigurumi strawberry, don't be afraid to get creative with your yarn choices. Experimenting with different textures can add depth and interest to the final product. Consider using chunky or fuzzy yarns for added dimension. Playing around with color combinations can make your giant strawberry even more visually appealing. You can stick with traditional reds and greens or go bold with vibrant hues—let your imagination run wild!
Wrapping Up the Strawberry Crochet Project
Recap Key Steps and Techniques
Now that you've learned how to crochet a strawberry, let's recap the key steps and techniques involved in this fun and fruity project. First, you'll need to gather your materials, including yarn in your desired strawberry color and a crochet hook.
To start crocheting the strawberry, create a magic ring or magic circle by making a loop with your yarn and inserting your hook through it. This will serve as the center of your strawberry. Then, make a chain stitch to secure the magic ring.
Next, work in rounds to create the body of the strawberry. You can use single crochet stitches or any other stitch pattern you prefer. Remember to increase the number of stitches in each round to give your strawberry its rounded shape. Don't forget to stuff it with fiberfill as you go along!
Once you've reached the desired size for your strawberry, it's time to close up the top. To do this, simply fasten off your yarn by cutting it and pulling it through the last loop on your hook. Use a yarn needle to weave in any loose ends.
Tips and Tricks for Finishing Touches
Adding those final touches can really make your crocheted strawberries pop! Here are some tips and tricks to enhance your creations:
- Leaves: Crochet green leaves using simple stitches like chains and double crochets. Attach them securely at the top of your strawberry for an authentic look.
- Seeds: Embroider small black or dark brown dots onto the surface of your strawberry using a tapestry needle and black embroidery floss.
- Color Variations: Get creative with different shades of red or even experiment with other colors like pink or yellow for unique strawberries.
- Size Options: Adjusting the size of your strawberries can be achieved by using different weights of yarn and varying hook sizes.
Continue Exploring the World of Crochet
Now that you've successfully crocheted a strawberry, it's time to explore even more crochet patterns and projects. The world of crochet is vast and full of endless possibilities!
- Amigurumi: Try your hand at creating other adorable amigurumi creatures like animals, dolls, or even food items.
- Accessories: Crochet hats, scarves, bags, or blankets to add a personal touch to your wardrobe or home decor.
- Home Decor: Explore patterns for coasters, pillow covers, or wall hangings to spruce up your living space.
- Gift Ideas: Crocheted items make wonderful handmade gifts for friends and family. Consider making personalized keychains, bookmarks, or stuffed toys.
Remember, practice makes perfect! Don't be discouraged if your first few attempts don't turn out exactly as planned. With time and patience, you'll become more skilled in the art of crochet.
So grab your yarn and hook and let your creativity run wild! Happy crocheting!
More Free Crochet Patterns and Tutorials
Congratulations on completing the sections on crocheting a strawberry! You've learned how to crochet a strawberry stitch, create a plush strawberry, and even make an oversized amigurumi. But don't stop there! There are so many more free crochet patterns and tutorials waiting for you to explore.
If you're looking for your next fun crochet project, why not try making a fruity watermelon coaster or a cute pineapple keychain? The possibilities are endless. So grab your hook, pick your favorite yarn, and let your creativity blossom!
FAQs
Can I use different colors for my crochet strawberry?
Absolutely! Feel free to experiment with different shades of red and green for your strawberry. You can even add some white or yellow details to make it more realistic. Remember, this is your creation, so let your imagination run wild!
How long does it take to crochet a strawberry plush?
The time it takes to complete a crochet strawberry plush may vary depending on your skill level and the complexity of the pattern. On average, it can take anywhere from a few hours to a couple of days. Take your time and enjoy the process at your own pace.
What size hook should I use for crocheting strawberries?
The size of the hook you use will depend on the thickness of the yarn you choose and the desired size of your finished strawberry. As a general guideline, you can start with a 3.5 mm (US E/4) or 4 mm (US G/6) hook for medium-weight yarn. However, feel free to adjust the hook size if needed to achieve the desired look and texture.
Can I sell my crocheted strawberries?
Absolutely! If you've fallen in love with crocheting strawberries and want to share them with others, go ahead and sell them. Many people appreciate handmade items, and there's a market for crochet creations. Just make sure to set a fair price that reflects your time, effort, and materials.
Are crocheted strawberries safe for babies and toddlers?
Crocheted strawberries can be safe for babies and toddlers as long as they are made with child-friendly materials and securely stitched. However, it's important to remember that small parts like eyes or embellishments can pose a choking hazard. If you're making a strawberry plush for a young child, consider using embroidered features instead of detachable ones.
How do I clean my crocheted strawberry?
To clean your crocheted strawberry, gently hand wash it using mild soap and lukewarm water. Avoid scrubbing or twisting the item too vigorously to prevent damage. After washing, reshape the strawberry while it's still damp and let it air dry completely before using or storing it.
Can I use acrylic yarn for crocheting strawberries?
Yes, acrylic yarn is a popular choice for crocheting strawberries. It comes in a wide range of colors, is affordable, and easy to care for. However, if you want your strawberry to have a more natural look or texture, you may consider using cotton or bamboo yarn instead. Experiment with different yarn types to find the one that suits your preferences best.
Remember to have fun with your crochet projects and don't be afraid to try new patterns and techniques. Happy crocheting!
Image Source: Paid image from CANVA