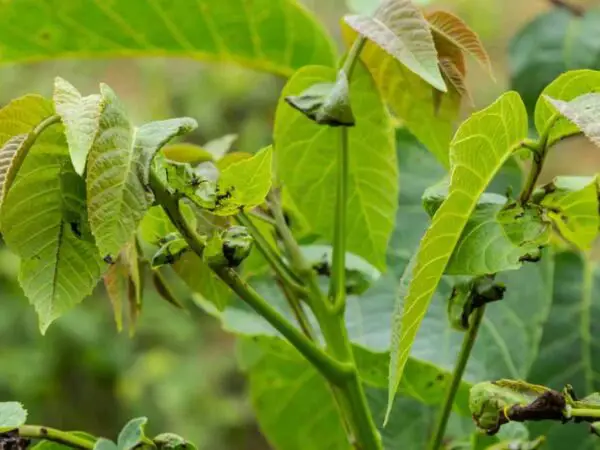
Growing a black walnut tree from seed may seem challenging, but with the right guidance, it can be a rewarding experience. Contrary to popular belief, you don't need advanced gardening skills to nurture this majestic tree from its very beginning stages. By following simple steps and understanding the unique requirements of black walnut seeds, you can successfully cultivate your own thriving tree.
Whether you're a novice gardener or an experienced enthusiast looking to expand your botanical repertoire, learning how to grow a black walnut tree from seed opens up a world of possibilities. From providing shade in your backyard to enjoying the beauty of its foliage, embarking on this journey will not only enhance your green space but also give you a sense of accomplishment.
Key Takeaways
- Choose a suitable location: Select a sunny spot with well-draining soil for optimal growth.
- Check seed viability: Conduct a float test to determine viable seeds for planting.
- Prepare seeds: Remove husks and soak seeds before stratification.
- Follow the stratification process: Mimic natural conditions by cold treating seeds to break dormancy.
- Plant seeds correctly: Plant seeds at the right depth and maintain consistent moisture levels.
- Provide ideal germination conditions: Ensure warmth, moisture, and light for successful germination.
Choosing Location
Ideal Spot
When planting a black walnut tree, choose deep, moist, well-drained soil to support its growth. Consider a soil pH of 6.0 to 6.5, as black walnut trees thrive in slightly acidic conditions. The roots of black walnut trees produce juglone, a chemical that can be harmful to certain plants nearby.
Soil Type
- Opt for well-drained soil for optimal growth.
- Maintain a soil pH of 6.0 to 6.5 for ideal conditions.
- Be cautious of juglone production from black walnut tree roots impacting neighboring plants.
Sunlight Exposure
- Ensure the black walnut tree receives full sunlight exposure for healthy development.
- Avoid planting in shaded areas as sunlight is crucial for photosynthesis.
- Adequate sunlight is essential for the tree's overall growth and productivity.
Growing Zones
When selecting a location, consider the specific North American zones where black walnut trees thrive. Different zones offer varying climates and conditions suitable for walnut tree cultivation. Ensure your zone is compatible with the requirements of growing a black walnut tree.
North American Zones
- Black walnut trees can flourish in various North American zones.
- Check the compatibility of your zone with the requirements for successful walnut tree growth.
- Each zone offers unique conditions that may affect the cultivation of black walnut trees.
Space Requirements
Provide ample space when planting a black walnut tree to accommodate its growth and root expansion. Consider the mature size of the tree when spacing it out to prevent overcrowding and competition for resources among neighboring plants.
Seed Viability
Testing Germination
Water Test
- Conduct a water test to evaluate soil drainage.
- Ensure proper water drainage to avoid waterlogging issues.
- Walnut trees require adequate water supply for healthy growth.
Visual Inspection
- Examine seeds visually to assess viability.
- Look for white, solid meats in viable seeds.
- Discard seeds with beige, shriveled kernels as they are non-viable.
Selecting Seeds
Size and Weight
- When selecting black walnut seeds, consider their size and weight.
- Opt for seeds that are heavier and larger for better germination chances.
- Larger seeds typically indicate healthier and more viable options for planting.
Seed Preparation
Husking Walnuts
Remove husks from black walnuts before planting. Husking aids in seed preparation for germination, ensuring optimal conditions for growth.
Separating Husk
Manual Methods
- Implement manual methods for husking black walnuts.
- Use gloves and tools for efficient husking.
- Manual husking helps in seed selection and preparation.
Tools Required
Gather necessary tools like gloves and nutcrackers for seed preparation. Tools aid in efficient husking and seed selection; ensure you have all required tools before starting the planting process.
Stratification Process
Cold Stratification
Black walnut seeds require cold stratification to break dormancy and promote germination. This process mimics natural conditions, enhancing seed viability.
To cold stratify black walnut seeds, place them in a moist medium like peat moss or sand. Keep the temperature consistently low to simulate winter conditions.
Duration
The stratification period for black walnut seeds typically lasts 90-120 days. This extended chilling period is crucial for successful germination.
During this time, regularly check the moisture levels to ensure the medium remains damp but not waterlogged. Proper moisture control is essential for seed viability.
Temperature Conditions
Maintain a constant temperature of around 33-41°F (1-5°C) during cold stratification. Fluctuations in temperature can impact the effectiveness of the process.
Consistent cold temperatures help initiate biochemical changes within the seed, preparing it for germination once planted.
Moisture Control
Ensure that the stratification medium remains consistently moist throughout the process. Avoid overwatering, as excess moisture can lead to fungal growth and damage the seeds.
Regularly monitor the moisture levels by gently pressing the medium to check for dampness. Proper moisture control is vital for successful stratification.
Planting Seeds
Correct Planting Depth
Plant the seed at a depth of around 1 inch in well-draining soil to ensure optimal growth. Adequate depth promotes root development.
For successful germination, the plant needs to be covered with soil at an appropriate depth. This protects it from external factors.
Ensure the plants are not buried too deep as this can hinder their ability to sprout and grow effectively.
Spacing Seedlings
Space seedlings at least 20-30 feet apart to allow ample room for growth and development. Proper spacing prevents competition for resources.
Adequate spacing between plants ensures that each seedling receives sufficient sunlight, water, and nutrients for healthy growth.
Properly spaced plants have better access to essential resources, reducing the risk of stunted growth or nutrient deficiencies.
Single vs. Group Planting
Consider planting black walnut seeds individually for better control over each plant's growth conditions. This allows personalized care for optimal development.
Group planting may lead to overcrowding, limiting each plant's access to sunlight and nutrients essential for robust growth.
Individual planting enables focused attention on each fruit-bearing tree, ensuring they receive tailored care as they mature.
Germination Conditions
Watering Techniques
Black walnut seeds require consistent moisture for successful germination. Ensure the soil is damp but not waterlogged to prevent rotting of the seeds. Avoid letting the soil dry out completely, as this can hinder the germination process.
To maintain optimal moisture levels, water the seeds regularly, especially during dry spells or hot weather. Use a gentle watering method to avoid displacing the seeds or causing damage to the delicate roots as they begin to grow.
Temperature Management
Black walnut seeds prefer a warm and consistent temperature for germination, ideally around 70-85 degrees Fahrenheit. Ensure that the seeds are kept in a warm location with access to indirect sunlight for best results.
During colder months or in regions with fluctuating temperatures, consider using a heat mat to maintain a stable warmth around the seeds. Avoid exposing the seeds to extreme temperature changes, as this can negatively impact their ability to sprout.
Seedling Care
Pruning Techniques
Black walnut trees require pruning to develop a strong structure and remove damaged branches. Start by cutting off any dead or diseased branches using sharp, clean tools. Trim branches that cross or rub against each other to prevent damage. Avoid heavy pruning in the first few years to allow the tree to establish itself.
To promote healthy growth, prune your black walnut tree during the dormant season in late winter or early spring. Focus on removing weak or crowded branches to improve air circulation and sunlight exposure. Regularly inspect the tree for signs of disease or pest infestations, and promptly prune affected areas to prevent spreading.
Pest Management
Pest control is crucial for maintaining the health of your black walnut tree. Common pests include caterpillars, aphids, and borers that can damage the leaves, bark, and wood. Implement integrated pest management strategies such as introducing natural predators, using insecticidal soaps, or applying organic pesticides when necessary.
Regularly monitor your black walnut tree for signs of pest infestation, such as chewed leaves or unusual markings on the bark. Preventive measures, like keeping the area around the tree clean and free of debris, can help reduce pest populations. Consider consulting with a local arborist for specialized advice on managing pests effectively.
Growth Monitoring
Milestones Tracking
Track the growth of your black walnut tree seedlings by monitoring key milestones. Look for initial root development, emergence of cotyledons, and first true leaves. Measure growth in height and leaf count.
Keep a record of each milestone to assess the overall progress of your seedlings. Note the date of each stage reached to track growth rates accurately. Regularly measure and compare against expected growth timelines.
Adjustments and Interventions
Make necessary adjustments based on milestone tracking. Ensure proper watering, sunlight exposure, and soil conditions for healthy growth. Address any issues like yellowing leaves or stunted growth promptly.
Consider providing additional support such as stakes for taller seedlings to prevent bending or breaking. Implement interventions like adjusting watering frequency or adding organic fertilizer if needed. Monitor closely for any signs of pests or diseases.
Harvesting and Uses
Wood Uses
Black walnut wood is highly valued for its durability and rich color, making it a popular choice for furniture, flooring, and cabinetry. It is also sought after for its use in gunstocks due to its strength and attractive appearance.
The wood from black walnut trees is prized for its distinctive grain patterns and dark hues, which add a touch of elegance to any woodworking project. Its natural resistance to decay makes it ideal for outdoor furniture as well.
Lumber Varieties
Black walnut lumber comes in various grades, including FAS (Firsts and Seconds), Selects, and Common grades. FAS grade offers the highest quality with minimal defects, making it perfect for fine furniture. Selects grade has fewer imperfections than Common grade.
When selecting black walnut lumber, consider the color consistency and grain patterns to ensure the best match for your project. Each grade offers unique characteristics that can enhance the overall look of your woodworking creations.
Establishing Plantation
To establish a black walnut tree plantation, start by selecting a suitable site with well-drained soil and adequate sunlight. Plant seeds in the fall or early spring, ensuring they are spaced at least 30 feet apart to allow ample room for growth.
Regularly monitor the young trees for signs of pests or diseases, providing necessary care such as watering and fertilizing as needed. Prune the trees to promote healthy growth and shape them according to your desired aesthetic or functional purposes.
Summary
In growing a black walnut tree from seed, you've learned crucial steps from choosing the right location to monitoring its growth. Ensuring seed viability, proper preparation, and following the stratification process are essential for successful germination and healthy seedling care. By planting your seeds with care and monitoring their growth diligently, you're on your way to harvesting and utilizing the benefits of a thriving black walnut tree.
Take charge of your black walnut tree project by implementing the strategies outlined. Keep a close eye on your seedlings, providing them with optimal conditions for growth. Your dedication will soon yield rewarding results as you witness the growth of your black walnut tree from a tiny seed to a majestic plant. Now, it's time to put your knowledge into action and nurture your black walnut tree to maturity.
Frequently Asked Questions
How important is choosing the right location for growing a black walnut tree from seed?
Choosing the right location is crucial for the successful growth of a black walnut tree. Ensure the site has well-drained soil, receives full sun, and has enough space for the tree to grow tall and wide.
What is seed viability, and why is it essential when growing a black walnut tree from seed?
Seed viability refers to the likelihood of a seed to germinate and grow into a healthy plant. It is vital when growing a black walnut tree from seed as viable seeds have a higher chance of successful germination and growth.
Why is stratification necessary in the process of growing a black walnut tree from seed?
Stratification mimics the natural conditions needed to break dormancy in black walnut seeds. By exposing seeds to cold and moist conditions, stratification helps prepare them for germination, increasing their chances of sprouting successfully.
How should I care for black walnut seedlings during their early stages of growth?
Provide consistent watering, protect seedlings from harsh sunlight or extreme weather conditions, and ensure they are free from pests and diseases. Mulching around the base can help retain moisture and suppress weeds.
When is the appropriate time to harvest black walnuts, and what are some common uses for them?
Harvest black walnuts when the outer husk turns brown or begins to crack open. Common uses include culinary purposes like baking or making preserves, crafting projects using the wood, or extracting oil from the nuts for various applications.
Image Source: Paid image from CANVA

