Looking to add a touch of nature to your holiday decor? Try making DIY pine cone Christmas trees! These festive and easy-to-make Christmas crafts are perfect for adding a rustic charm to your home. Simply gather some pine cones and decorate them with red ornaments for a festive touch. In this post, we'll show you how to make a stunning Christmas tree using large pine cones and red ornaments. This easy DIY project is perfect for the holidays.
Pine cones are not only beautiful but also versatile. With just a few simple steps, you can transform these natural wonders into a unique and eye-catching centerpiece for your home. Whether you're looking for a fun Christmas craft or creative ways to repurpose furniture legs, this DIY project is a must-try. The end result will surely impress anyone who lays eyes on it.
Curious about the process? We'll guide you through each step, from gathering the supplies like styrofoam and pine cones to assembling your pine cone Christmas tree. Make sure to attach the furniture leg scales securely to create a sturdy tree. You'll learn handy tips along the way, such as creating a hole in the middle of each pine cone and placing them in a row for an aesthetically pleasing look. This DIY project is perfect for decorating your home with natural elements like trees. You can find all the materials you need at your local dollar tree, including pine cones and styrofoam.
Ready to get started on this fun and festive project involving trees, pine nuts, and styrofoam? Let's begin by arranging the materials in a row. Grab your scissors and let's dive right in!
Essential Supplies for Pine Cone Trees
Crafting a large pine cone Christmas tree requires some essential supplies, including styrofoam and scales, to ensure a successful and beautiful project. Let's explore the necessary materials, tools, and types of pine cones with scales you'll need to create your own festive masterpiece.
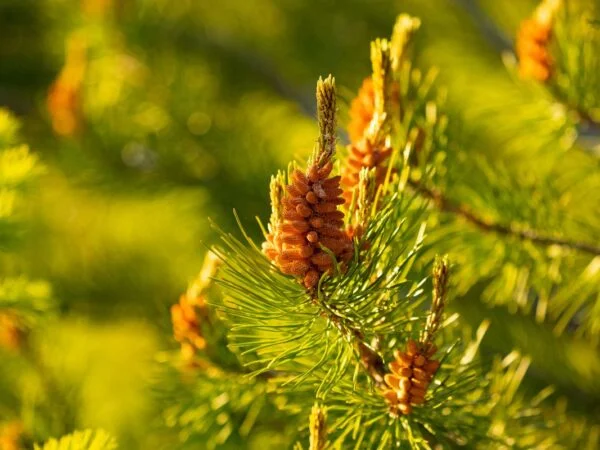
Types of Pine Cones
There are various types of pine cones with different scales you can choose from. Consider exploring different varieties of cones, such as fir, spruce, and pine cones. These cones have unique scales that contribute to their distinct appearance and characteristics. Each type of Christmas tree has its unique characteristics and sizes, allowing you to add diversity to your project. You can even incorporate pine nuts and cone scales for added natural elements. Take the time to learn about the specific features of each type of scales and select the one that best suits your vision. Additionally, consider incorporating pine nuts into your recipe for added flavor and texture.
Materials Required
Before diving into your pine cone tree project, gather all the necessary materials, including scales. It's crucial to have scales everything on hand so that you can work smoothly without any interruptions. Make sure you have glue or adhesive suitable for bonding wood surfaces like hot glue or craft glue. These are essential for joining and securing the scales of the wooden surface. Gather wire or floral stem wire for securely attaching the pine cones' scales. Don't forget about floral foam or another sturdy base material to provide stability for your tree. This is especially important when using scales, as they can add weight and potentially tip the tree over.
Creating a checklist will help ensure that you don't miss any critical items during preparation. Tick off each supply as you gather them together so that when it's time to assemble your tree, everything is within reach.
Tools for Crafting
To bring your large pine cone Christmas tree to life, familiarize yourself with the tools needed for this crafty endeavor. Having the right tools handy will make the process much easier and more enjoyable. Some essential tools include scissors for trimming any excess branches or wires, pliers for bending wires if needed, and wire cutters for cutting stems or wires cleanly.
Other handy tools may include a hot glue gun if using hot glue adhesive or a craft knife if precision cuts are required. These tools will assist in attaching and arranging the pine cones effectively.
By preparing your toolkit in advance, you'll save time and frustration during the crafting process. Keep all your tools organized and easily accessible so that you can focus on creating a stunning pine cone Christmas tree.
Designing Your Pine Cone Christmas Tree
Designing your own pine cone Christmas tree can be a fun and creative project that adds a festive touch to your holiday decor. To ensure your tree turns out just the way you envision it, there are a few key steps to consider.
Choosing a Theme
Choosing a theme is an essential first step. Think about what style resonates with you and complements your existing decor. You could go for a traditional rustic theme, creating a cozy and nostalgic feel. Or perhaps you prefer a winter wonderland theme, with silver and blue accents evoking the magic of snow-covered landscapes. If you're feeling adventurous, why not create a modern chic design using unconventional colors or materials? The choice is yours! Let your creativity shine by selecting a unique theme that reflects your personality.
Planning the Structure
Once you've settled on a theme, it's time to plan the structure of your pine cone Christmas tree. Consider the size and shape you want for your tree made from pine cones. Sketching out an outline or referring to images can help guide you in creating the desired structure. Determine how many layers or tiers you want for your tree design - this will depend on the size of pine cones available and how tall you want your finished tree to be. By planning ahead, you'll have a clear vision of how to bring your pine cone Christmas tree to life.
Preparing Pine Cones
Before diving into crafting, it's important to properly clean and prepare the pine cones. Start by removing any debris or insects from the surface of the pine cones safely. You can do this by gently brushing them or rinsing them under water if necessary. Once cleaned, allow the pine cones to dry thoroughly before proceeding with crafting. This step ensures that your finished tree will look its best and helps prevent any unwanted surprises later on.
Now that you have a good understanding of the key steps involved in designing your pine cone Christmas tree, you're ready to embark on this festive DIY project. Remember to choose a theme that speaks to you, plan the structure of your tree, and prepare your pine cones properly for crafting. With a little creativity and some holiday spirit, you'll have a unique and beautiful pine cone Christmas tree that will be the envy of all your friends and family.
Constructing the Base of Your Tree
Creating Texture on the Cone
To make your large pine cone Christmas tree visually appealing, it's essential to add texture to the plain-looking pine cones. There are various techniques you can use to achieve this, such as painting or glittering. By experimenting with different colors and finishes, you can create a unique and eye-catching effect. For example, you could paint the pine cones in festive colors like red, green, or gold for a traditional Christmas look. Alternatively, you could opt for a more modern approach by using metallic paints or adding glitter for extra sparkle.
Enhancing the natural beauty of the pine cones is another way to create texture on your tree. You can achieve this by using texture-enhancing methods such as applying a thin layer of Mod Podge and then rolling them in fine-grain sand or crushed leaves. This will give them a rustic and natural appearance that adds depth and interest to your tree.
Attaching Large Pine Cones
It's crucial to ensure they are securely attached. There are several effective methods you can use for this purpose.
One option is to use wire. Start by wrapping floral wire around the base of each large pine cone, leaving enough excess wire for attaching it to the tree branches. Then, twist the ends of the wire together tightly so that they form a secure loop around the branch. Repeat this process for each large pine cone, making sure they are evenly distributed throughout the tree.
Another option is hot glue. Apply a generous amount of hot glue onto the base of each large pine cone and press firmly against the desired spot on your tree structure until it sets and holds securely in place.
If neither wire nor hot glue is suitable for your needs, there may be other attachment methods available depending on your specific circumstances. It's important to choose a method that ensures sturdy attachment and prevents the pine cones from falling off.
By following these steps, you'll be able to construct the base of your large pine cone Christmas tree with textured pine cones securely attached. This will give your tree a visually appealing and festive look that is sure to impress your friends and family.
Building Up Your Pine Cone Tree
To create a stunning and eye-catching pine cone Christmas tree, it's essential to strategically add medium and small-sized pine cones. This will give your tree depth, balance, and a cohesive look that will impress your friends and family.
Adding Medium Pine Cones
Placement is key. You want to ensure that they are evenly distributed throughout the branches for an aesthetically pleasing result. Start by selecting medium-sized pine cones with varying shapes and sizes to add visual interest.
To create balance, alternate the placement of the medium pine cones with the larger ones on your tree. This will prevent one area from looking too crowded or sparse. Securely attach the medium-sized pine cones between the larger ones using hot glue or floral wire. This will help them stay in place and maintain their position on the tree.
By strategically placing medium-sized pine cones, you can achieve a harmonious blend of different sizes and shapes, creating a visually appealing Christmas tree that stands out from the rest.
Filling in with Small Pine Cones
Once you've added the medium-sized pine cones, it's time to fill in any gaps or empty spaces on your tree structure with small-sized pine cones. These smaller ones act as fillers and accents, enhancing the fullness and density of your Christmas tree design.
Arrange the small pine cones in areas where you see gaps or spaces between branches. Focus on creating an even distribution while ensuring they complement the overall shape of your tree. You can use hot glue or floral wire to secure them if needed.
Small pine cones also serve as decorative elements that add texture and detail to your tree. By incorporating them strategically, you can achieve a more polished appearance that showcases attention to detail.
Remember that when working with smaller elements like these tiny pine cones, less is often more. Avoid overcrowding your tree by using them sparingly and intentionally. This will help maintain a clean and balanced look.
Incorporating medium and small-sized pine cones into your Christmas tree design is an excellent way to elevate its overall aesthetic. By following these tips and techniques, you can create a visually stunning tree that captures the essence of the holiday season.
Decorating Your Pine Cone Tree
Now that you've successfully built up your pine cone tree, it's time to make it truly shine with some beautiful decorations.
Adding Picks and Decorations
To bring your pine cone tree to life, consider incorporating various picks and decorations. Explore options like ornaments, ribbons, berries, or any other festive elements that catch your eye. These additions will not only add color and texture but also give your tree a personalized touch.
When choosing ornaments, opt for ones that complement the natural aesthetic of the pine cones. You can go for traditional red and green baubles or experiment with different colors to match your desired theme. Hang them delicately on the branches of the tree to create a visually appealing display.
Ribbons are another fantastic addition to consider. You can wrap them around the branches or tie bows at various intervals for a whimsical touch. Choose ribbons in different widths and patterns to add depth and visual interest to your tree.
If you want to incorporate a more natural look into your design, consider using artificial berries or leaves as picks. These can be nestled among the branches of the pine cone tree for an organic feel. They will add pops of color while maintaining a rustic charm.
Don't be afraid to get creative and think outside the box when selecting decorations for your pine cone Christmas tree! Look for unique picks that resonate with your chosen theme or personal style. Whether it's miniature snowflakes, tiny presents, or even little woodland creatures, these special touches will make your tree stand out from the rest.
Creating a Tree Top
No Christmas tree is complete without an eye-catching top!There are plenty of options to explore.
One classic choice is a beautiful bow. You can create a large and dramatic bow using ribbon that matches your overall color scheme. Attach it securely to the top of the tree, allowing the loops and tails to cascade down the sides.
Another popular option is a star or angel tree topper. These iconic symbols instantly add a touch of elegance and tradition to your tree. Choose one that suits your personal taste and complements the overall design of your pine cone masterpiece.
If you want to get even more creative, consider using other decorative items as your tree top. This could be anything from a sparkling snowflake ornament to a mini Santa Claus figurine. The key is to find something that brings joy and captures the essence of the holiday season.
Finishing Touches and Display Ideas
Adding Festive Touches
Elevate the holiday spirit of your large pine cone Christmas tree by adding some extra festive touches. Get creative and incorporate elements that will make your creation stand out and bring even more joy to your space. Consider these ideas:
-
Lights: Add a magical glow to your tree by weaving string lights through the branches. Opt for warm white or colorful lights, depending on the ambiance you want to create.
-
Garlands: Wrap miniature garlands around the pine cones for an added touch of elegance. You can use traditional green garlands or experiment with different colors, such as silver or gold, to match your overall decor.
-
Faux Snow: Create a winter wonderland effect by dusting your pine cone tree with faux snow. Spray it lightly over the branches to give them a frosty appearance.
-
Seasonal Ornaments: Hang small ornaments from the branches of your tree to add pops of color and personality. Choose ornaments that complement your theme or represent special memories.
Remember, these additional touches are meant to enhance the beauty of your pine cone Christmas tree, so don't go overboard! Keep it balanced and let the natural charm of the pine cones shine through.
Displaying Your Tree
Once you've put in all the effort to create a stunning large pine cone Christmas tree, it's time to find the perfect spot to showcase it in all its glory. Here are some display ideas:
-
Tabletop: Place your pine cone tree on a tabletop for a charming centerpiece at holiday gatherings or as an eye-catching decoration in any room. Ensure that you choose an appropriately sized table that allows enough space for other items if needed.
-
Mantel: If you have a fireplace mantel, it can serve as an ideal location for displaying your pine cone Christmas tree. The height and prominence of the mantel provide a great platform to showcase your creation.
-
Centerpiece: Make your pine cone tree the focal point of your dining table by using it as a centerpiece. Surround it with candles, fresh greenery, or other festive decor items to create a cohesive look.
When choosing the display area for your tree, consider factors such as visibility and accessibility. You want people to be able to appreciate the beauty of your creation from different angles. Avoid placing it in an area that is too crowded or where it might get knocked over easily.
Remember, finding the right spot for your pine cone Christmas tree is all about creating impact and spreading holiday cheer throughout your home. Let your creativity guide you in selecting the perfect location that will make your tree shine.
Care and Storage Post-Holiday Season
Storing the Pine Cone Tree
After the holiday season, it's important to know how to properly store your pine cone Christmas tree so that it remains in good condition for future use. To protect it from dust and damage, consider using storage containers or bags specifically designed for Christmas trees. These containers will help keep your pine cone tree safe and secure until the next holiday season rolls around.
When storing your pine cone tree, make sure to remove any delicate decorations or ornaments that could get damaged during storage. Gently pack them away separately to ensure they stay intact for future use. Place your tree in a cool, dry place where it won't be exposed to extreme temperatures or moisture.
Reusing Materials for Other Crafts
Don't let those leftover materials from your pine cone project go to waste! Get creative and find ways to repurpose them in other DIY crafts or home decor projects. Extra pine cones can be used as natural accents in floral arrangements, wreaths, or even as table centerpieces. You can also spray paint them in different colors to match your desired aesthetic.
If you have leftover wire from assembling your pine cone tree, consider using it for other crafting projects such as making jewelry or creating wire sculptures. The possibilities are endless when it comes to repurposing materials!
Any extra decorations like ribbons, beads, or glitter can be used in various craft projects throughout the year. They can add a touch of sparkle and charm to homemade cards, gift wrapping, or even as embellishments on picture frames.
By reusing these materials instead of throwing them away, you not only reduce waste but also maximize the potential of your crafting supplies. It's a win-win situation!
Share and Inspire on Social Media
Platforms for Showcasing
If you've created a large pine cone Christmas tree and want to share your masterpiece with the world, there are several platforms where you can showcase your creation. One popular option is social media platforms like Instagram, Pinterest, or craft-focused websites. These platforms provide an excellent opportunity to connect with fellow crafters and inspire others with your unique designs.
On Instagram, you can create a dedicated account solely for showcasing your pine cone creations. Use relevant hashtags such as #pineconeart or #diychristmasdecor to reach a wider audience interested in crafts and holiday decorations. Post high-quality photos of your large pine cone Christmas tree from different angles to highlight its beauty and intricacy. Engage with other users by commenting on their posts and following accounts that share similar interests.
Pinterest is another fantastic platform for sharing your creativity. Create boards specifically for pine cone crafts and pin images of your large pine cone Christmas tree along with other related ideas or inspirations. By organizing your pins into different categories, you make it easier for others to find specific types of crafts they're interested in. Don't forget to include detailed descriptions and links back to any blog posts or tutorials you have created.
Craft-focused websites are also great places to showcase your work. Look for websites that accept submissions from DIY enthusiasts like yourself. Share step-by-step tutorials on how to make a large pine cone Christmas tree or write articles discussing the inspiration behind your creation. These sites often have active communities of crafters who appreciate unique projects made from natural materials.
Encouraging Community Engagement
Sharing your love for pine cone crafts goes beyond just posting pictures online; it's about engaging with the crafting community as well. Joining online forums or groups dedicated to DIY projects involving natural materials can provide valuable connections and opportunities to learn from others' experiences.
Participate actively in discussions by sharing tips and ideas related to pine cone crafts. Offer advice to fellow crafters who may be struggling with their own projects or seeking inspiration. By fostering a sense of collaboration and support within the crafting community, you contribute to an environment where everyone can grow and learn together.
In addition to online communities, consider organizing local workshops or meetups where you can share your knowledge and passion for pine cone crafts with others in person. Connect with local craft stores, community centers, or schools that may be interested in hosting such events. These gatherings provide a unique opportunity to interact directly with fellow crafters, exchange ideas, and inspire one another.
Remember, the key is not only to showcase your own creations but also to encourage others in their creative pursuits.
Additional DIY Christmas Tree Crafts
Creative Craft Ideas
Expand your creativity by exploring other innovative craft ideas using pine cones. With their unique shape and texture, pine cones can be transformed into various decorative items that add a touch of nature to your holiday decor.
Experiment with wreaths, garlands, ornaments, or other decorative items made from pine cones. Create a stunning pine cone wreath by attaching them to a wire frame and embellishing it with ribbons and ornaments. Hang it on your front door or use it as a centerpiece for your holiday table.
If you're feeling adventurous, try making pine cone garlands to adorn your fireplace mantel or staircase railing. Simply string the pine cones onto twine or ribbon, alternating with colorful beads or small ornaments for an extra festive touch.
Pine cone ornaments are another fun project that can involve the whole family. Paint the pine cones in different colors and patterns, then attach strings or hooks to hang them on your Christmas tree. You can even add glitter or faux snow for some extra sparkle.
Let nature be your inspiration as you explore endless possibilities with this versatile material. Use smaller pine cones to create place card holders for your holiday dinner party or incorporate them into a centerpiece arrangement along with candles and greenery.
Using Leftover Materials
Don't let any leftover materials from your large pine cone Christmas tree project go to waste! Instead, get creative and find new ways to utilize them in future crafts.
Consider incorporating those leftover materials into smaller versions of the original design. Create mini pine cone trees that can be used as table centerpieces or placed on shelves around your home. These pint-sized versions will still bring the charm of nature indoors while using up any excess supplies.
Embrace sustainability by minimizing waste through resourceful reuse. Take those extra pine cones and turn them into natural potpourri by adding essential oils in scents like cinnamon, vanilla, or evergreen. Place them in a decorative bowl or sachet and enjoy the delightful aroma throughout your home.
If you have any leftover paint or glitter, use it to enhance other holiday decorations. Give plain ornaments a festive makeover by adding a touch of color or sparkle. You can also use the leftover materials to create unique gift tags or personalized holiday cards.
By repurposing and reimagining your leftover materials, you not only reduce waste but also get more mileage out of your crafting supplies. Plus, you'll have even more handmade creations to showcase during the holiday season.
Conclusion
Congratulations! You've now learned how to create a stunning pine cone Christmas tree. By following the step-by-step instructions in this article, you'll be able to design and build your own unique tree that will be the centerpiece of your holiday decorations. From gathering the essential supplies to adding the finishing touches, we've covered everything you need to know.
Now it's time to let your creativity shine! Experiment with different color schemes, ornaments, and embellishments to make your pine cone tree truly one-of-a-kind. Don't forget to share your masterpiece on social media and inspire others with your DIY skills. And remember, creating a pine cone Christmas tree isn't just about the end result—it's about the joy and satisfaction you'll experience throughout the process.
So go ahead, gather your supplies, put on some festive music, and enjoy the magical journey of crafting your very own pine cone Christmas tree. Happy decorating!
FAQs
How do I make a large pine cone Christmas tree?
To make a large pine cone Christmas tree, start by collecting several big pine cones. Then, attach them to a foam cone using hot glue. Next, spray paint the entire tree in your desired color and let it dry. Finally, decorate the tree with ornaments and lights for a festive touch.
Where can I find large pine cones for my Christmas tree?
You can find large pine cones for your Christmas tree in various places. Look for them in local parks or forests where there are pine trees. You can also check craft stores or online retailers that specialize in natural decor items.
What materials do I need to make a large pine cone Christmas tree?
To make a large pine cone Christmas tree, you will need the following materials:
-
Large pine cones
-
Foam cone
-
Hot glue gun and glue sticks
-
Spray paint
-
Ornaments and lights for decoration
Can I use small pine cones instead of large ones?
While using small pine cones is possible, it may not achieve the same visual impact as using larger ones. Large pine cones provide a more substantial base for creating an impressive Christmas tree. However, if you prefer smaller decorations or have limited resources, feel free to experiment with different sizes.
How long does it take to make a large pine cone Christmas tree?
The time required to make a large pine cone Christmas tree depends on various factors such as the size of the project and your crafting skills. On average, it may take around 1-2 hours to complete the entire process from gathering materials to decorating the finished tree.
Image Source: Paid image from CANVA