Looking to bring the beauty of pine trees to life on your canvas? Wondering how to capture their essence in your artwork? Look no further! In this tutorial, we'll delve into the essential techniques for painting realistic pine trees using theartsherpa's watercolor paper. Whether you're a seasoned artist or just starting out, these tips will help enhance your pine tree paintings and take them to the next level. Use a small brush and vibrant colours to create stunning pine tree art.
Painting pine trees with watercolors requires a keen eye for detail and an understanding of their unique characteristics. Using theartsherpa's techniques, you can capture the texture of their needles and the graceful curve of their branches. Experiment with different colours and styles, using a small brush to add intricate details. This will allow you to infuse your own artistic flair while staying true to nature's design on high-quality watercolor paper.
So grab your theartsherpa brushes and let's dive into this tutorial, where we'll demystify the art of painting pine trees on watercolor paper with technique-driven guidance. Get ready to unleash your creativity and master the artistry of capturing these majestic evergreens on canvas, using bristles to create beautiful hills.
Realistic Pine Tree Painting: Step-by-Step Guide
Creating lifelike pine tree paintings with silhouette trees requires attention to detail and a step-by-step approach. In this guide, we will explore the techniques to depict texture, shading, highlights, depth, and perspective in your artwork. Let's dive in and learn how to use theartsherpa colours and adjust the thickness of your brushstrokes to create stunning pine tree paintings.
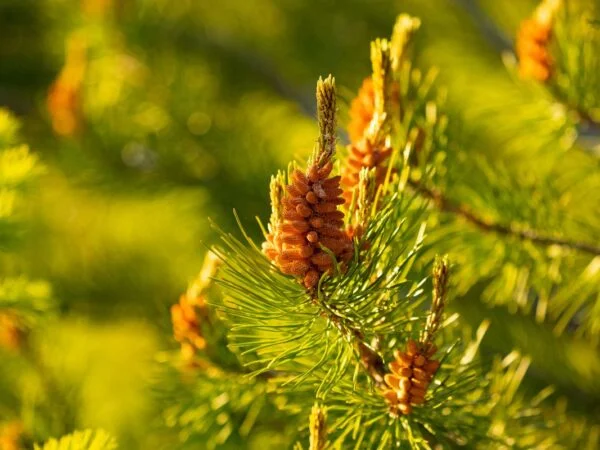
Depicting the Texture and Details of Pine Needles
To capture the essence of a pine tree's silhouette trees and intricate details, it is crucial to master the art of depicting its unique texture and colours. Here's how you can achieve that with the help of theartsherpa and by focusing on composition.
- Observation: Start by studying real-life pine trees or reference images to understand the patterns and arrangement of pine needles.
- Brush Selection: Use a fine-tipped brush or a liner brush for precision while painting individual needles.
- Layering Technique: Begin with a light base layer using green paint mixed with a touch of yellow to represent fresh needles. Gradually add darker shades of green for depth and dimension.
- Short Strokes: Apply short strokes with your brush to mimic the appearance of clustered needles. Vary the length and angle of these strokes to create a realistic effect.
- Highlighting: Add highlights sparingly using a lighter shade of green or white paint on the tips of some needles to simulate sunlight hitting them.
- Variation: Remember that not all pine needles are perfectly aligned or uniform in color. Introduce subtle variations in length, color intensity, and direction for an authentic look.
Proper Use of Shading and Highlights
Shading and highlighting, with the help of theartsherpa techniques, play vital roles in bringing your pine tree painting to life. Using art sherpa's methods, you can create depth and dimension in your artwork. One key tool for achieving this is titanium white, which can be used to add highlights and bring out the details of the tree.
- Understanding Light Source: Determine the direction from which light is hitting your subject (e.g., top-left corner). This will guide your shading and highlighting choices.
- Shading Techniques: Use cross-hatching or stippling techniques with darker shades of green or brown paint to create shadows and depth within the tree's branches and trunk.
- Highlights: Apply lighter shades of green or white paint to areas where light would naturally hit, such as the tops of branches or the tips of needles.
- Blending: Smoothly blend your shading and highlighting with the surrounding colors to avoid harsh lines and create a seamless transition between light and shadow.
Creating Depth and Perspective
To make your pine tree painting appear three-dimensional, mastering depth and perspective is crucial:
- Foreground, Middleground, Background: Divide your canvas mentally into these three sections. Paint larger, more detailed trees in the foreground, smaller ones in the middleground, and fainter ones in the background to convey distance.
- Size Variation: As objects recede into the distance, they appear smaller. Adjust the size of your pine trees accordingly to create an illusion of depth.
- Overlapping: Overlap some trees with others to indicate their relative position in space. This technique enhances depth perception by showing objects partially hidden behind others.
- **
Easy Acrylic Methods for Painting Pine Trees
Painting pine trees can be a delightful and rewarding experience, allowing you to bring the beauty of nature onto your canvas. With simple acrylic techniques, you can create stunning pine tree paintings that capture the essence of these majestic trees.
Creating Vibrant Colors and Textures
Acrylic paints offer a wide range of possibilities. One technique is to layer different shades of green to add depth and dimension. Start with a base layer of light green and gradually build up darker shades on top. This creates a realistic effect by mimicking the way light interacts with the foliage.
To add texture to your painting, experiment with different brush strokes. Use short, quick strokes for the needles or branches to create a sense of detail and movement. For added texture, you can also use a palette knife to apply thick paint directly onto the canvas, giving your pine trees a three-dimensional appearance.
Time-Saving Methods for Impressive Results
If you're looking for time-saving methods without compromising on quality, there are several techniques you can try. One approach is using masking tape or stencils to create clean edges for your pine tree shapes. Simply tape off the areas where you want the trees to be and then paint around them. Once dry, remove the tape or stencil to reveal crisp tree shapes against the background.
Another time-saving method is using pre-mixed greens instead of trying to mix different shades yourself. Many art supply stores offer a variety of ready-made green hues that are specifically designed for painting landscapes. These premixed greens save both time and effort while still providing beautiful color variations for your pine trees.
Experimenting with Brush Strokes
Brush strokes play an important role in adding variety and interest to your pine tree paintings. By varying the pressure, direction, and size of your brush strokes, you can create different effects. For example, using long, sweeping strokes can convey the height and grandeur of a tall pine tree. On the other hand, short, dabbing strokes can simulate the texture of dense foliage.
Don't be afraid to experiment with different brushes as well. Fan brushes are great for creating soft textures while flat brushes are ideal for defining edges and branches. Round brushes can be used for adding details such as individual needles or highlighting certain areas.
Watercolor Tutorial: Simple Steps to Paint Pine Trees
Watercolor painting is a beautiful and expressive art form that allows you to create stunning works of art. If you're looking to capture the beauty of nature in your artwork, learning how to paint pine trees can be a great starting point. In this watercolor tutorial, we will explore simple steps to paint pine trees that will help you achieve a natural and realistic look in your paintings.
Follow an easy-to-follow watercolor tutorial for painting stunning pine trees.
To begin, gather all the necessary materials for your watercolor painting. You will need watercolor paints, brushes of various sizes, watercolor paper, and a palette for mixing colors. Once you have everything ready, follow these steps:
- Start by sketching the outline of the pine tree lightly on your watercolor paper using a pencil or light-colored pen.
- Mix different shades of green on your palette by combining different ratios of yellow and blue paints. This will give your pine tree depth and dimension.
- Using a medium-sized brush, apply a light wash of the lighter green shade over the entire area within the outline of the tree.
- While the first layer is still wet, add darker shades of green using short strokes with a smaller brush to create texture and definition in the foliage.
- To add even more depth to your pine tree, use a dark green or brown color to indicate shadows and areas where branches overlap.
- Allow each layer to dry before adding subsequent layers or details.
Learn how to create soft, delicate washes for a natural look in your artwork.
Creating soft washes is key. Here's how you can do it:
- Wet your brush with clean water and load it with diluted paint from your palette.
- Apply gentle strokes on dampened areas of the paper using broad, sweeping motions.
- Gradually build up the colors by adding more layers of washes, allowing each layer to dry before adding the next one.
- To create a sense of depth and distance, use lighter washes in the background and gradually intensify the colors as you move towards the foreground.
Discover techniques for blending colors seamlessly in watercolor paintings.
Blending colors seamlessly is essential to achieve smooth transitions and gradients in your artwork. Here are some techniques you can try:
- Wet-on-wet technique: Wet the area of the paper where you want to blend colors, then apply different shades while it is still wet. The wet surface allows the colors to mix and blend naturally.
- Wet-on-dry technique: Apply a layer of paint on dry paper, then add another color next to it while it is still wet. Use a clean brush or a damp brush to gently blend the two colors together.
Experiment with wet-on-wet and wet-on-dry techniques to achieve desired effects.
Watercolor painting offers endless possibilities for experimentation.
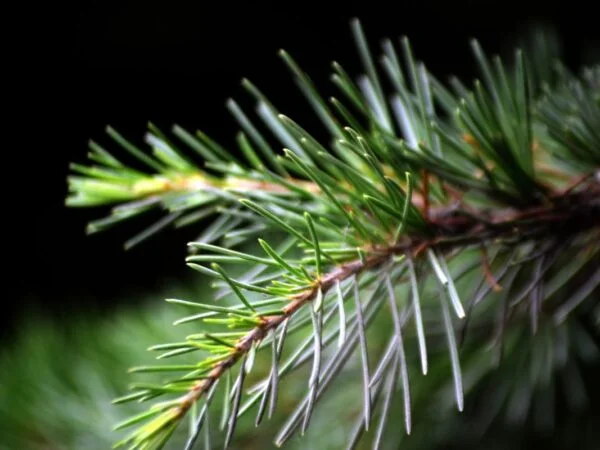
Mastering Branches and Needles in Pine Tree Art
Painting a pine tree can be a challenging task, especially. In this guide, we will explore techniques that will help you gain expertise in depicting these elements realistically, adding depth and dimensionality to your pine tree art.
Realistic Needles: Adding Depth and Dimensionality
One of the key aspects of painting a pine tree is mastering the art of depicting individual needles realistically. To achieve this, it is essential to observe reference photos or real-life examples closely. Pay attention to the way light interacts with the needles, creating highlights and shadows.
To paint realistic needles:
- Start by loading a round brush with green paint mixed with a touch of white for highlights.
- Using quick and controlled strokes, apply the paint to create thin lines representing individual needles.
- Vary the pressure on your brush to create different thicknesses for added realism.
- For shadows, mix a darker shade of green using black or brown paint and repeat the process.
Remember that not all needles are perfectly aligned or evenly spaced. Introduce some randomness into their positioning for a more natural look.
Observing Branches Accurately: Reference Photos as Your Guide
When painting branches on your pine tree artwork, accuracy is crucial for achieving a realistic result. Referencing actual trees or high-quality photographs can provide valuable insights into how branches grow and intersect.
Tips for observing branches accurately:
- Study reference photos or real-life trees carefully before starting your artwork.
- Pay attention to how branches emerge from the trunk at varying angles.
- Note where they split off into smaller stems and how they connect with other branches.
- Observe how branch thickness changes as they extend away from the trunk.
By understanding these nuances, you'll be able to recreate complex branch structures effectively.
Simplifying Complex Branch Structures: Breaking Down into Basic Shapes
Complex branch structures can be overwhelming to paint, but breaking them down into basic shapes can simplify the process. By focusing on the underlying forms, you can gradually build up the intricate details.
Here's a step-by-step approach to simplifying complex branches:
- Start by sketching the main trunk and major branches using a light pencil.
- Identify the primary shapes that make up each branch (e.g., cylinders, cones).
- Begin painting by blocking in these basic shapes with a round brush or angle brush.
- Gradually refine the details, adding smaller branches and twigs as you go.
- Use different brush sizes and strokes to create variations in thickness and texture.
Remember to observe reference photos or real-life examples throughout this process to ensure accuracy.
Mastering branches and needles in pine tree art requires practice and patience. By following these techniques and dedicating time to honing your skills, you'll be able to create realistic pine tree paintings that capture the beauty of nature.
Enhancing Landscapes with Beautifully Rendered Pine Trees
Incorporating beautifully rendered pine trees into landscape paintings can greatly enhance the visual impact of your artwork. By mastering the art of positioning, scaling, and composing these majestic trees within a landscape, you can create stunning scenes that captivate viewers. Understanding techniques for creating depth and atmosphere in your artwork will further elevate the overall aesthetic appeal. Let's delve into some key points to help you achieve this artistic feat.
Positioning, Scaling, and Composition
When painting pine trees in a landscape, it is crucial to consider their placement and size relative to other elements such as hills, clouds, grassy areas, and the sky. Pine trees are often depicted as taller than surrounding vegetation or structures. To convey their grandeur effectively, position them strategically in the background or middle ground of your composition. This allows for a sense of scale while maintaining focus on other foreground elements.
To create depth in your artwork, vary the size of pine trees as they recede into the distance. Larger trees placed closer to the viewer will provide a sense of proximity and serve as focal points. As they fade into the background, gradually decrease their size to simulate distance accurately.
Techniques for Depth and Atmosphere
To evoke depth within your landscape paintings featuring pine trees, employ various techniques that add dimensionality to your artwork:
- Use highlights: Apply lighter shades on select branches or edges of pine tree foliage to mimic sunlight hitting specific areas.
- Employ shadows: Darken certain sections beneath tree canopies or cast shadowy figures on nearby surfaces.
- Utilize silhouette trees: Depicting silhouettes against vibrant skies or sunsets adds drama and striking contrast.
- Introduce atmospheric perspective: Gradually lighten hues as objects recede into the distance; this simulates air particles affecting color perception.
Experimenting with Lighting Conditions
Lighting plays a crucial role in setting the mood of your landscape paintings. Pine trees can evoke various emotions depending on the lighting conditions you choose. Consider these scenarios:
- Bright sunlight: Paint pine trees basking in direct sunlight, casting crisp shadows and vibrant hues.
- Soft, diffused light: Depict a tranquil scene with gentle light filtering through clouds, creating a serene ambiance.
- Golden hour: Capture the warm, golden tones of sunset or sunrise as they bathe the landscape in a soft glow.
By experimenting with different lighting conditions, you can add depth and atmosphere to your artwork while eliciting specific emotional responses from viewers.
Enhancing landscapes with beautifully rendered pine trees requires careful consideration of positioning, scaling, composition, techniques for depth and atmosphere, and experimentation with lighting conditions. By incorporating these elements effectively into your artwork, you will create captivating scenes that transport viewers to picturesque locations where nature's beauty takes center stage. So update your palette, grab your brushes, and let your imagination add life to every stroke as you embark on this artistic journey!
Capturing the Essence: Vibrant Pine Tree Artwork
Capturing their essence is key. By infusing vibrancy and energy into your paintings, you can bring these majestic trees to life on canvas. Let's explore some techniques and tips to help you create vibrant pine tree artwork that truly stands out.
Using Bold Colors and Expressive Brushwork
To make your pine tree art pop with vibrancy, harness the power of bold colors and expressive brushwork. Experiment with a palette of vibrant hues that reflect the natural beauty of these evergreen giants. Consider using colors like little alizarin crimson, yellow ochre, ultramarine blue, and more to create depth and visual interest in your piece.
When applying paint to the canvas, let loose with your brushstrokes. Embrace a looser style that allows for expressive movements. Use thick strokes to depict the rough texture of pine bark or delicate strokes to capture the softness of pine needles. The combination of bold colors and expressive brushwork will give your artwork a dynamic quality that grabs attention.
Capturing the Unique Character of Different Pine Trees
Pine trees come in various shapes, sizes, and species, each possessing its own distinct character. As an artist, it's essential to understand how to capture this uniqueness in your paintings.
Pay close attention to details such as the arrangement of branches or the specific texture of each type of pine tree. Study their growth patterns and observe how they react under different lighting conditions – whether dappled shade or full sunlight. By incorporating these nuances into your artwork, you can create realistic representations that evoke a sense of authenticity.
Experimenting with Unconventional Compositions and Perspectives
To breathe fresh life into your pine tree art, dare to experiment with unconventional compositions and perspectives. Break away from traditional landscape formats by exploring unique angles or cropping techniques that focus solely on the tree itself. This approach can add an intriguing twist to your artwork and make it stand out from the crowd.
Consider incorporating other elements into your composition, such as a flowing river or a distant mountain range, to provide context and enhance the visual impact. By pushing boundaries and thinking outside the box, you can create pine tree art that captivates viewers with its fresh and innovative approach.
Perfecting Your Pine Tree Paintings
Fine-tune your pine tree paintings by paying attention to details and refining techniques. To create stunning artwork that captures the essence of a pine tree, it's crucial to master various aspects such as proportions, shapes, colors, textures, and even the painting surface or ground you choose.
Evaluating and Adjusting Proportions, Shapes, and Colors
Understanding their unique characteristics is essential. Take time to observe real-life pine trees or reference photographs to familiarize yourself with their distinct shape and structure. By evaluating these elements in your artwork, you can ensure accurate representations.
Start by sketching the outline of your pine tree lightly using a pencil. Pay close attention to the proportions of the trunk and branches. Remember that pine trees often have long trunks with branches extending outward in a somewhat triangular shape.
Once you're satisfied with the basic shape, start adding layers of color using brushes suitable for your preferred painting medium. Begin with lighter shades for the foliage and gradually build up darker tones to create depth. Don't be afraid to experiment with different brush sizes—small brushes are excellent for detailing while larger ones work well for broader strokes.
To achieve a realistic look, consider incorporating subtle variations in color throughout the foliage. Pine needles can range from vibrant green to more muted shades depending on lighting conditions or age. Adding hints of brown or gray can also help create depth and dimension.
Creating Realistic Textures
A key aspect of perfecting your pine tree paintings is capturing realistic textures such as bark or moss. These details add visual interest and make your artwork come alive.
To depict bark texture effectively, use short brush strokes in varying directions along the trunk and larger branches. Experiment with different brush types like fan brushes or stiff bristle brushes to achieve desired effects.
For moss-covered areas on your pine tree, gently dab a small brush loaded with green paint onto the canvas. Use a dabbing motion rather than long brush strokes to mimic the appearance of moss clusters. Layering different shades of green can enhance the realism further.
Experimenting with Painting Surfaces
Incorporating experimentation into your artistic process can yield exciting results. Try using different painting surfaces or grounds to achieve unique effects in your pine tree paintings.
Canvas is a popular choice for many artists due to its versatility and durability. However, don't limit yourself—explore other options such as wood panels or textured papers. Each surface offers distinct characteristics that can influence the final outcome of your artwork.
Consider how the texture of a rough canvas might enhance the appearance of tree bark, while a smoother surface could be ideal for capturing delicate details in foliage. Remember, finding your favorite brush and experimenting with various surfaces will help you discover new techniques and achieve desired effects.
Conclusion: Mastering the Art of Painting a Pine Tree
Congratulations! You've now learned how to paint a pine tree like a pro. With the step-by-step guides, easy acrylic methods, and watercolor tutorials provided, you have all the tools necessary to create stunning pine tree artwork.
By mastering the techniques for capturing realistic branches and needles, you can bring your pine tree paintings to life. Enhancing landscapes with beautifully rendered pine trees will add depth and beauty to your artwork.
Remember to capture the essence of a vibrant pine tree in your artwork. Use bold colors and brush strokes to make your paintings truly stand out. Perfecting your technique through practice will help you refine your skills and create even more impressive works of art.
Now that you are equipped with this knowledge, it's time to put it into action. Grab your brushes, paints, and canvases, and start creating beautiful pine tree paintings today!
FAQs: How to Paint a Pine Tree?
What materials do I need for painting a pine tree?
To paint a pine tree, you'll need basic art supplies such as paintbrushes (different sizes), acrylic or watercolor paints (depending on your preference), canvas or paper, palette or mixing tray, and water containers for cleaning brushes.
Can I use other types of trees instead of pine trees in my landscape paintings?
Absolutely! While we focused on painting pine trees in this guide, you can apply similar techniques to other types of trees as well. Experiment with different species to create diverse landscapes.
How long does it take to master painting a realistic pine tree?
Mastering any art form takes time and practice. The duration varies from person to person depending on their dedication and commitment. It may take several weeks or even months before you feel confident in your ability to paint realistic pine trees.
Are there any shortcuts or hacks for painting pine trees?
While there are no shortcuts to becoming a master artist, there are techniques and tips that can make the process easier. For example, using masking tape to create clean edges or starting with a light sketch before painting can help you achieve better results.
Can I sell my pine tree paintings?
Absolutely! Once you have honed your skills and created beautiful pine tree artwork, you can consider selling your paintings. Online platforms, local art galleries, and art fairs are great places to showcase and sell your artwork.
Remember, practice makes perfect. Keep experimenting, exploring different styles, and pushing yourself creatively. With time and dedication, you'll continue to improve your pine tree painting skills. Happy painting!
Image Source: Paid image from CANVA