Ready to dive into the art of painting olive trees? Let's explore the rich history and timeless beauty these majestic trees bring to canvas. From ancient symbolism in Mediterranean cultures to modern interpretations in contemporary art, olive trees have captivated artists for centuries. Discover how to capture their essence with brushstrokes that breathe life onto your masterpiece. Unleash your creativity as we delve into techniques, color palettes, and tips that will elevate your olive tree paintings from ordinary to extraordinary.
Whether you're a seasoned artist or just starting on your creative journey, mastering the art of painting olive trees can add depth and intrigue to your portfolio. Get ready to immerse yourself in a world where nature meets artistry, creating stunning visuals that tell stories beyond words.
Key Takeaways
- Use high-quality materials and pay attention to composition when painting olive trees to enhance the overall look of your artwork.
- Follow a step-by-step guide to ensure a structured approach and achieve a well-executed olive tree painting.
- Incorporate vibrant colors strategically to bring life and energy to your olive tree artwork.
- Explore different techniques and styles when painting an olive grove to capture the essence of this unique landscape.
- Learn specific tips and tricks for painting realistic and detailed olive branches that add authenticity to your artwork.
- Consider digital edits as a tool to refine and enhance your olive tree painting, adding depth and dimension to the final piece.
Composition and Materials
Choosing Materials
When painting olive trees, selecting high-quality green paints, brushes, and canvases is crucial. Different types of paint mediums like oil or acrylic offer unique textures and finishes to your artwork. Exploring various canvas textures can enhance your painting technique by adding depth and dimension to the piece.
Consider investing in professional-grade paints that offer vibrant colors for capturing the essence of olive trees. Quality brushes ensure smooth strokes and precise detailing in your artwork. Canvases with different textures provide variety in creating realistic representations of olive tree landscapes.
Setting the Scene
To create a captivating composition showcasing olive trees, incorporate elements that reflect their natural surroundings. Including hills, fields, or buildings in your painting adds depth and context to the scene, making it more visually appealing. Reference photos or sketches can help you plan out the layout of your artwork before starting to paint.
Step-by-Step Guide
Sketching Outlines
Starting your olive tree painting begins with sketching the basic shape and structure on the canvas. This includes adding details like branches, leaves, and the trunk to create a realistic outline. By using light pencil strokes, you ensure flexibility when applying colors later. This initial step sets the foundation for your entire artwork.
When moving on to applying base colors, it's crucial to select appropriate hues for different parts of the tree. Through broad strokes of color, you establish the overall tone and mood of your painting. Layering multiple base colors adds depth and dimension to your artwork, bringing the olive tree to life with varying shades that mimic nature's complexity.
Applying Base Colors
When focusing on adding details to your painting, concentrate on intricate elements such as individual leaves, bark texture, and branch patterns. Using smaller brushes or fine-tipped pens allows for precision in capturing these finer aspects accurately. Paying close attention to light and shadow further enhances these details by creating contrast that makes them pop off the canvas.
Vibrant Colors Tips
Mixing Colors
Experimenting with color mixing techniques is essential when learning how to paint olive trees. By blending complementary colors like green and red, you can create harmonious tones for the foliage and olives in your artwork. Understanding color theory principles will help you effectively mix colors to achieve realistic results. For instance, mixing blue and yellow can produce various shades of green for the leaves.
When painting olive trees, layering techniques play a crucial role in adding depth and texture to your artwork. Applying multiple layers of paint allows you to create a sense of dimension within the tree branches and leaves. Using transparent glazes over the base layers adds richness and luminosity to the foliage, making it appear more vibrant and lifelike. Gradually building up these layers helps in achieving a realistic three-dimensional effect that brings your olive tree painting to life.
Layering Techniques
Layering techniques are fundamental when aiming for vibrant colors in your olive tree paintings. By applying several coats of paint, you can add complexity and visual interest to different parts of the tree, such as its leaves or trunk. This method allows you to enhance details while creating a sense of depth within the artwork's composition.
Moreover, using transparent glazes on top of existing layers helps intensify certain hues or create subtle transitions between colors, especially within the foliage area of an olive tree painting. Each layer contributes not only to enhancing color vibrancy but also adds dimensionality by creating shadows or highlights where needed.
Olive Grove Painting
Capturing Light
When painting olive trees, understanding how light interacts with them is crucial. Highlighting and shading techniques help depict the play of light and shadow on the leaves. By manipulating light, you can create depth in your painting, giving it a realistic atmosphere.
To capture light effectively, consider how sunlight filters through the branches, casting shadows on the ground. Use lighter tones to represent areas hit directly by sunlight and darker shades for shadowed areas under foliage. This contrast adds dimension to your painting, making it more visually appealing.
- Pros:
- Enhances realism
- Adds visual interest
- Cons:
- Requires practice to master
Creating Depth
Incorporating perspective techniques into your olive tree painting is essential for creating depth. By using overlapping branches and leaves, you can achieve a layered effect that mimics the natural growth pattern of olive trees. Adjusting the size and placement of elements helps create a realistic spatial arrangement in your artwork.
When adding depth to your painting, start by sketching out the basic structure of the olive grove with varying sizes of trees at different distances. Remember that objects appear smaller as they recede into the background; replicate this effect by scaling down elements further away from the viewer.
- Begin by outlining key elements like tree trunks and major branches.
- Layer leaves in clusters to mimic their natural growth patterns.
- Vary leaf sizes based on proximity to create a sense of distance.
- Use lighter colors for distant trees and darker hues for those up close.
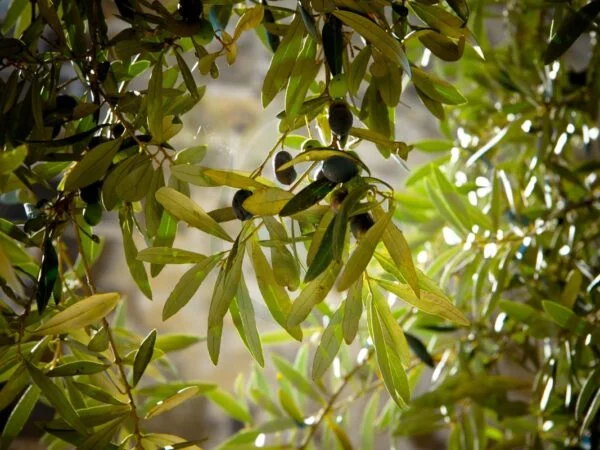
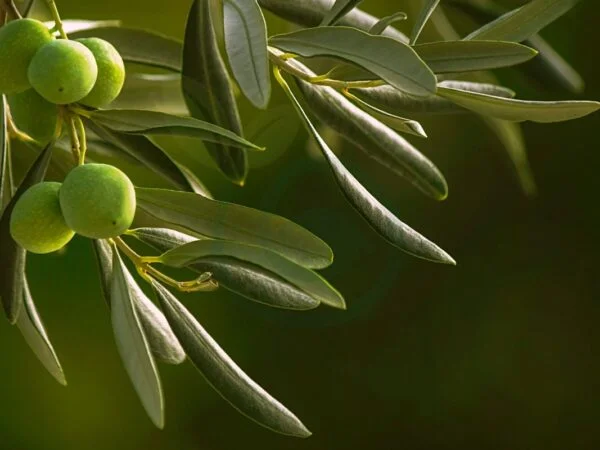
Olive Branch Tutorial
Focusing on Leaves
Painting olive trees involves capturing the essence of their leaves. Pay attention to their unique shape, color, and texture. Experiment with different brush strokes to mimic the organic nature of these leaves. Try adding variations in tone and hue to showcase the natural diversity of foliage.
When painting olive tree leaves, think about how each leaf is distinct yet part of a larger whole. Use your brush to create irregular shapes that resemble real olive leaves. Consider mixing shades of green or adding hints of gray for a more realistic effect.
Highlighting Olives
To make olives stand out in your painting, focus on emphasizing their roundness and shine. Employ careful highlighting techniques to bring attention to these fruits. Using lighter shades or metallic paints can enhance the visual appeal of olives against the backdrop of foliage.
Imagine sunlight hitting ripe olives, creating a subtle glow on their surface. To replicate this effect in your painting, strategically place highlights that mimic light reflections on the smooth skin of olives.
Digital Edits Overview
Enhancing Colors
When painting olive trees digitally, enhancing colors is crucial. By intensifying the vibrancy of greens and browns in your artwork, you can create a visually striking piece. Consider adding warm tones to evoke a sunny day or cool tones for a more serene atmosphere. Balancing color saturation ensures that your composition looks cohesive and pleasing to the eye.
To bring out the details in your olive tree painting, adjusting contrast is essential. Manipulate contrast levels between light and dark areas to add drama to your artwork. Increasing contrast in specific areas can make textures pop and enhance visual interest. Strive for balanced contrast that adds depth without overshadowing other elements of the painting.
Adjusting Contrast
One technique involves using digital tools like Photoshop or Procreate to adjust color balance sliders selectively on different parts of the image, such as leaves or trunks. Consider experimenting with blending modes like overlay or soft light when enhancing colors digitally. Another approach is using layer masks to control where color adjustments are applied, ensuring precise modifications while maintaining overall harmony in the composition.
Day-by-Day Progress
Initial Sketch
Creating an initial sketch is crucial when learning how to paint olive trees. This step involves outlining the basic composition and structure of your artwork. You need to plan where key elements like the tree, leaves, and olives will be placed on the canvas. Using light pencil strokes during this stage helps establish a flexible foundation for the painting process. By taking your time with the initial sketch, you set yourself up for success in later stages.
When working on the initial sketch, consider referring to reference images or real olive trees for inspiration and guidance. For instance, you can observe how branches extend from the trunk or how olives cluster together on a branch. Paying attention to these details during your sketch can make a significant difference in capturing the essence of an olive tree accurately.
Color Application
The next phase in painting olive trees involves color application. Here, you'll start applying colors using various techniques to different parts of the tree, leaves, and olives. Layering and blending colors are essential techniques that help achieve realistic tones and textures in your artwork. Gradually building up color intensity adds depth and dimension to your painting.
During color application, experiment with mixing different shades of green to capture variations in foliage coloration realistically. Consider incorporating brown tones into the trunk and branches for authenticity as well. Remember that practice makes perfect.
Final Touches
As you near completion of your olive tree painting, focus on adding final touches that elevate your artwork's overall appearance. This step involves incorporating final details such as highlights that bring depth and luminosity to specific areas of the painting. Make any necessary adjustments or refinements at this stage to enhance the composition further.
Incorporating small details like highlighting individual leaves or adding shadows can significantly impact the realism of your olive tree artwork during these final touches stages.
Old Olive Tree Path
Texturing Techniques
When painting olive trees, it's crucial to master various texturing techniques. Experiment with different brush strokes like dry brushing or stippling. These methods can replicate the rough texture of bark or the softness of leaves. By incorporating impasto techniques, you add depth and tactile interest to your painting.
Utilize dry brushing by applying a small amount of paint on a dry brush for a subtle effect. Stippling involves using dots or short dashes to create texture, ideal for mimicking foliage details. Impasto techniques involve applying thick layers of paint to add three-dimensionality and richness to specific areas in your artwork.
Shadowing Effects
Creating realistic shadows is key when painting olive trees as they provide dimension and depth. Consider the direction and intensity of light sources in your composition before adding shadows. Use shading techniques such as hatching (parallel lines) or cross-hatching (intersecting lines) to achieve varying shadow effects.
Hatching can be used for softer shadows, while cross-hatching creates denser shadow areas in your painting. Pay attention to where light falls on the tree; this will guide you in determining where shadows should be darker or lighter for a more realistic portrayal.
Conclusion
You've now mastered the art of painting olive trees, from selecting the right materials to creating vibrant colors that bring your artwork to life. With each brushstroke, you've captured the essence of an olive grove, the beauty of an old olive tree path, and the intricate details of an olive branch. As you reflect on your day-by-day progress and digital edits, remember that every stroke tells a story.
Now it's your turn to pick up that brush and let your creativity flow. Whether you're a seasoned artist or just starting, painting olive trees is a journey worth taking. So, grab your paints, envision that serene olive grove, and start painting your masterpiece. The canvas awaits your touch.
Frequently Asked Questions
How important is the choice of materials in painting olive trees?
Choosing high-quality materials like brushes and paints can significantly impact the final result of your olive tree painting. Opt for brushes with fine tips for detailed work and vibrant colors to capture the essence of an olive grove.
Is it necessary to follow a step-by-step guide when painting olive trees?
While not mandatory, following a step-by-step guide can help beginners understand the process better and achieve desired results. It provides a structured approach, guiding you through composition, color mixing, and techniques specific to painting olive trees.
What are some tips for creating vibrant colors in my olive tree paintings?
To create vibrant colors in your artwork, experiment with layering different shades of green and adding pops of complementary colors like warm yellows or rich browns. This technique adds depth and visual interest to your olive grove masterpiece.
How can I effectively depict an old olive tree's character in my painting?
Capturing the essence of an old olive tree requires attention to detail. Focus on depicting its weathered bark texture, twisted branches, and sparse leaves realistically. Adding subtle highlights and shadows will enhance the sense of age and character in your artwork.
Should I consider digital edits when working on my olive tree painting?
Digital editing tools can be beneficial for refining details, adjusting colors, or experimenting with different compositions without altering your original piece. Consider using these tools as a way to enhance your artwork further before finalizing it.
Image Source: Paid image from CANVA