Did you know that planting iris bulbs can lead to stunning blooms in your garden? Discover the secrets to successfully planting these vibrant flowers and creating a colorful oasis right in your backyard. From choosing the perfect location to nurturing your bulbs for optimal growth, we've got you covered. Whether you're a seasoned gardener or just starting, learning how to plant iris bulbs can add a touch of elegance and charm to your outdoor space. Get ready to witness nature's beauty unfold before your eyes as you follow our expert tips and tricks for a successful iris bulb planting experience.
Key Takeaways
- Choose the Right Iris: Select the iris variety that suits your garden's sunlight and soil conditions for optimal growth.
- Prepare the Soil Thoroughly: Ensure the soil is well-draining and rich in nutrients by amending it with compost or organic matter before planting.
- Follow Proper Planting Steps: Plant iris bulbs at the correct depth and spacing to encourage healthy root development and blooming.
- Provide Post-Planting Care: Water newly planted irises regularly and mulch around them to retain moisture and suppress weeds.
- Divide Irises Regularly: Divide overcrowded iris clumps every few years to rejuvenate them and promote better flowering.
- Monitor Pests and Diseases: Keep an eye out for pests like iris borers and diseases like bacterial soft rot, taking prompt action to prevent damage.
Choosing Your Iris
Selecting Healthy Plants
When choosing new iris plants, always inspect the rhizomes for firmness and overall health. Look for vibrant green leaves indicating a perfect iris. Avoid any plants showing signs of disease or damage.
Understanding Varieties
Explore the wide range of colors and patterns available in iris reticulata types. Consider the height differences between various iris varieties. Familiarize yourself with the blooming seasons to ensure a continuous display of beautiful blooms.
Preparing the Soil
Soil Types
To plant iris bulbs successfully, it's crucial to have well-draining soil for the flower rhizome. This ensures that excess water doesn't accumulate around the roots, preventing rot. Checking the soil pH levels is essential as irises prefer neutral soil for optimal growth. Amending the soil with organic matter like compost or peat moss can improve drainage and nutrient content, promoting healthy bulb development.
Pre-Planting Preparation
Before planting iris bulbs, clear the planting area of any weeds and debris that may hinder growth. This ensures that the bulbs have ample space to grow without competition for resources. Loosen the soil to a depth of 8-10 inches using a garden fork or tiller. This step helps create a loose and aerated environment for the roots to establish themselves firmly for the plant. Adequate sunlight is crucial for iris bulbs, so ensure that the planting site receives ample sunlight throughout the day for at least six hours.
Planting Steps
Cutting Leaves
- Trim iris leaves to a uniform length of 6 inches.
- Remove any damaged or yellowing leaves for healthy growth.
- Cut leaves at an angle to enhance water absorption efficiently.
Making a Mound
- Create a small mound of soil for planting irises effectively.
- Form the mound to ensure proper drainage and prevent waterlogging.
- Ensure the mound is wide enough to accommodate the rhizome comfortably.
Rhizome Placement
- Position the rhizome on top of the prepared mound for optimal growth.
- Spread out the roots around the rhizome evenly to establish a strong foundation.
- Adjust the depth carefully to expose the top half of the rhizome for sunlight absorption.
Group Planting
- Plant irises in clusters of three to create a visually appealing garden display.
- Space each cluster 9-12 inches apart to allow ample room for growth.
- Ensure there is sufficient distance between rows to promote air circulation and prevent overcrowding.
Post-Planting Care
Initial Establishment
After planting the iris bulbs, add Bone Meal around them to provide essential nutrients for healthy growth. Ensure to water the newly planted irises thoroughly to help them establish in their new environment. It is crucial to monitor the soil moisture levels regularly to maintain optimal growing conditions.
Feeding Schedule
For a thriving iris garden, feed the irises with Bone Meal during both Spring and Autumn seasons. Consider using a balanced fertilizer to provide the necessary nutrients for robust growth of plants. Remember to adjust the feeding frequency based on the plant's growth and overall health status.
Winter Preparation
As winter approaches, it is essential to prepare your irises for the cold season. Start by trimming back the iris leaves to about 6 inches above the ground level. This practice helps protect the plant during winter and promotes healthy regrowth in the following seasons. Removing old flower spikes is also crucial to encourage new blooms and maintain plant vitality. To shield your irises from frost damage, mulch around the plants to provide insulation and protection from freezing temperatures.
Dividing Irises
Traditional Method
Divide irises every four to five years to ensure optimal growth and blooming. This practice helps prevent overcrowding and promotes healthier plants. When dividing, select the healthiest rhizomes for replanting to guarantee robust future growth. After division, trim the leaves into a fan shape to support the plant's overall health.
Doddington Method
For a more frequent approach, consider the Doddington method, which involves annual division of your irises. This technique allows for consistent rejuvenation of the plants. During division, remove a portion of the plant mass to create adequate space for new growth. Post-division, it is recommended to cut back the leaves to half their normal height to reduce stress on the plant.
Managing Pests and Diseases
Combatting Slugs and Snails
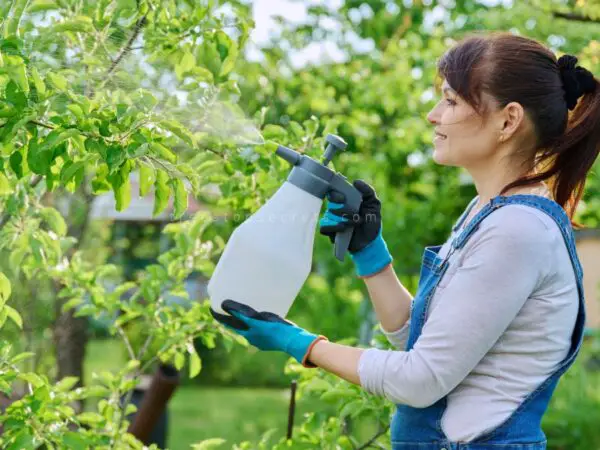
Use organic slug repellents like crushed eggshells or diatomaceous earth to protect iris plants from slugs and snails. These natural remedies create barriers that deter these pests effectively. Setting up physical barriers such as copper tape around the plants can further prevent slug and snail infestations. Regularly inspecting the plants for visible signs of damage caused by these pests is crucial in maintaining a healthy iris garden.
Preventing Leaf Spot
To prevent leaf spot, avoid overhead watering that can lead to moisture accumulation on the leaves, creating an ideal environment for fungal growth. Promptly remove any infected leaves to prevent the spread of the disease to other parts of the plant. Applying fungicides preventively can also help in protecting the iris bulbs from leaf spot infection.
Addressing Rhizome Rot
Improving soil drainage is essential in preventing rhizome rot, as excess moisture can cause this fungal disease. Ensure that the soil has proper drainage to avoid waterlogging, which can lead to the development of rot in the iris rhizomes. If any rhizomes show signs of rot, promptly remove and discard them to prevent the spread of the disease. Treating healthy rhizomes with fungicides serves as a precautionary measure to safeguard them against potential infections.
General Plant Care
Spring and Autumn Feeding
- Feed irises with a balanced fertilizer in Spring and Autumn.
- Adjust feeding amounts based on plant size and age.
- Monitor plant response to feeding for optimal growth.
During Spring and Autumn, it's crucial to nourish your irises with a balanced fertilizer. This will provide them with the essential nutrients needed for healthy growth. Adjust the amount of fertilizer according to the size and age of the plants. By observing how the irises respond to feeding, you can ensure they thrive and bloom beautifully.
Winterizing Irises
- Prepare irises for winter by cutting back leaves.
- Mulch around the base of the plants for insulation.
- Protect irises from extreme cold temperatures.
As winter approaches, it's time to prepare your irises for the cold months ahead. Start by trimming back the leaves to prevent any damage. Apply a layer of mulch around the base of the plants to provide insulation and protect them from freezing temperatures. By taking these steps, you can help your irises survive through the winter and come back strong in the spring.
Companion Planting and Container Gardening
Companion Plants
When planting iris bulbs, it's crucial to choose companion plants thoughtfully. Opt for plants that complement irises, such as daylilies or peonies. These companions not only enhance the overall aesthetic but also provide a harmonious environment for growth. Remember to consider plants with similar sunlight and water requirements to ensure all vegetation thrives together. This compatibility fosters a healthy ecosystem in your garden. avoid overcrowding by selecting non-invasive companions. This prevents competition for resources and allows each plant to flourish independently.
Container Gardening
In container gardening with iris bulbs, the choice of containers plays a vital role in their growth. Select well-draining containers to prevent waterlogging, which can lead to root rot. Terracotta pots are a popular choice due to their porous nature, promoting adequate drainage. When planting irises in containers, opt for a potting mix specifically designed for bulbs. This specialized mix provides the necessary nutrients for healthy growth and blooming. Furthermore, ensure that your containers receive adequate sunlight for growth. Irises require full sun exposure to thrive, so place the containers in a sunny spot to promote robust development.
Frequently Asked Questions
Non-Flowering Issues
Plant iris bulbs in a spot that receives ample sun for at least six hours daily. Insufficient sunlight can hinder flowering.
To address non-flowering irises, ensure they are not shaded by nearby trees or structures. Lack of sun exposure is a common cause.
Check the soil moisture levels to prevent waterlogging, which can lead to root rot and inhibit flower development. Ensure the soil is well-draining.
If your irises still refuse to bloom, consider dividing the rhizomes every three to five years. This process rejuvenates the plant and promotes flowering.
Growing in Clay Soil
When planting irises in clay soil, amend it with organic matter like compost or peat moss. This improves drainage and prevents water accumulation.
Select iris varieties that are known to thrive in clay soil conditions. Some types are more tolerant of heavy soils than others.
Regularly monitor the soil moisture levels to prevent overwatering, which can suffocate the roots and hinder growth. Aim for moist but not waterlogged soil.
- Choose iris varieties suitable for clay soil
- Amend clay soil with organic matter
- Monitor soil moisture levels regularly
Staking Irises
For tall iris varieties prone to bending or breaking, stake them for support. This prevents damage to the stems and flowers.
Use sturdy stakes made of bamboo or metal that can withstand wind and rain without toppling over.
Secure the iris stems loosely to the stakes using soft ties like twine or fabric strips. Avoid tying too tightly to prevent constriction.
- Stake tall iris varieties to prevent damage
- Use bamboo or metal stakes for support
- Secure stems loosely to avoid constriction
Closing Thoughts
By following the steps outlined in this guide, you are now equipped to successfully plant and care for your iris bulbs. Selecting the right type of iris, preparing the soil adequately, and providing proper post-planting care are crucial for vibrant and healthy blooms. Remember to divide your irises when necessary, manage pests and diseases promptly, and consider companion planting or container gardening to enhance your overall garden experience.
Now that you have all the essential information at your fingertips, go ahead and start your iris planting journey with confidence. Don't hesitate to refer back to this guide whenever you need a refresher or encounter any challenges along the way. Happy planting!
Frequently Asked Questions
How deep should I plant iris bulbs?
Iris bulbs should be planted about 2 to 4 inches deep in the soil. Ensure the pointy end of the bulb faces upwards and is just below the soil surface.
When is the best time to plant iris bulbs?
The best time to plant iris bulbs is late summer or early fall. This allows the roots to establish before winter and ensures healthy growth in the spring.
How often should I water newly planted iris bulbs?
Water newly planted iris bulbs thoroughly after planting. After that, water them regularly, ensuring the soil remains moist but not waterlogged. Reduce watering during dormant periods.
Do irises need full sun or shade to thrive?
Irises thrive in full sun, receiving at least 6 hours of direct sunlight per day. However, they can tolerate partial shade, but this may result in fewer blooms.
Should I fertilize my iris bulbs, and if so, how often?
Fertilize iris bulbs once a year in early spring with a balanced fertilizer. Avoid high-nitrogen fertilizers as they can promote lush foliage over flowers. Stop fertilizing after flowering to prevent rot.
Image Source: Paid image from CANVA