Looking to propagate asparagus fern? You've come to the right place! I'll guide you through the process step by step, ensuring success.
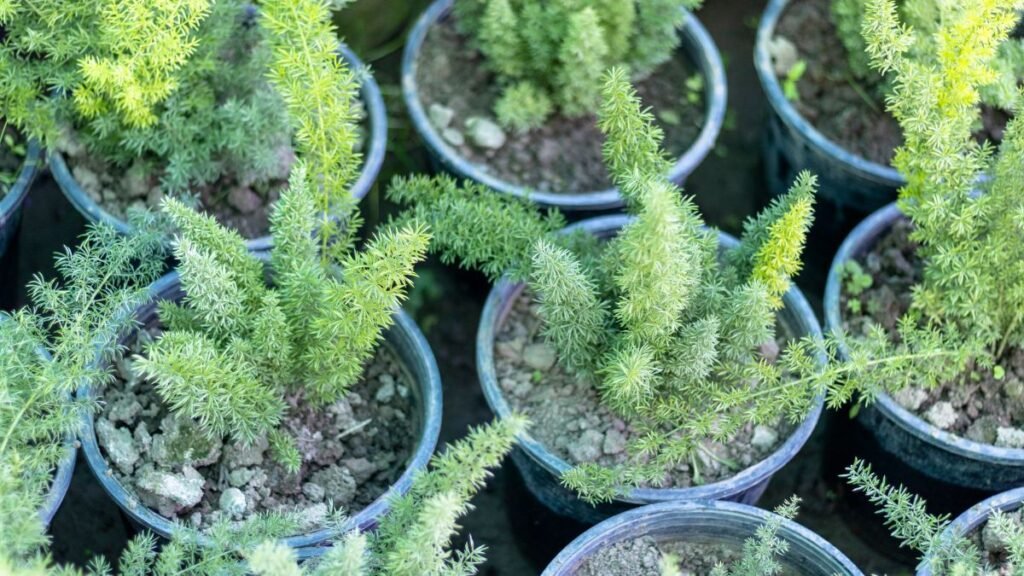
To propagate your asparagus fern, start by dividing the plant's roots during the spring. Gently tease apart the roots and plant them in a well-draining soil mixture. Keep the soil consistently moist but not waterlogged to support healthy roots, and place the newly propagated plants in a location with bright, indirect light to promote leaf growth. Alternatively, you can propagate your fern by collecting and planting the plant's seeds. Keep in mind that propagating through division typically yields faster results compared to growing from seeds.
Ready to expand your knowledge on asparagus ferns? Discover additional tips and tricks to care for these delightful plants and watch them thrive in your home or garden!
Key Takeaways
- Propagate your asparagus fern by division or from seeds for new plants.
- Use sharp, clean tools like pruners or knives for propagation to prevent damage to the plant.
- Provide a humid environment and indirect light for successful propagation.
- Regularly monitor the growth of your propagated asparagus fern to ensure its health.
- Address any issues promptly by adjusting care routines or environmental conditions.
- Consider different varieties of asparagus fern for unique characteristics and preferences.
Propagation Overview
Timing Importance
Start propagating asparagus ferns in spring for optimal results. Avoid winter propagation due to slow growth. Choose timing carefully for successful propagation.
Right Conditions
Light Requirements
- Place asparagus ferns in bright, indirect light for best growth.
- Avoid direct sunlight to prevent leaf burn.
- Provide ample light for healthy foliage development.
Temperature Needs
- Maintain a minimum temperature of 13°C for thriving ferns.
- Keep plants away from draughts and radiators.
- Ensure suitable temperature conditions for robust growth.
Parent Plant Health
Select a parent plant with vibrant foliage for propagation success. Check for disease or pest infestations before propagating. Ensure parent plant is healthy and well-established.
Propagation Techniques

Division Method
Divide the rootball of the parent plant into two or more sections in spring. Pot each divided section separately with a piece of root for successful propagation. Utilize the division method to create new plants from an existing asparagus fern.
Seed Propagation
Plant the berries produced by the fern to grow new plants. Follow the seed propagation method for creating additional ferns. Utilize seeds as a natural way to propagate asparagus ferns.
Clippings Approach
Take clippings from the parent plant to propagate new ferns. Use healthy stem cuttings for successful propagation. Employ the clippings approach to expand your collection of asparagus ferns.
Tubers Propagation
Propagate asparagus ferns using tubers for quick and easy growth. Plant tubers in individual pots for successful propagation. Utilize tubers as an alternative method for expanding your fern collection.
Tools for Propagation
Essential Tools
- Gather the necessary tools like pruning shears and pots before you begin propagating asparagus fern.
- Make sure to have all the essential tools on hand to streamline the propagation process effectively.
- Prepare a complete set of tools to ensure a smooth and successful propagation experience.
Preparing Tools
- Before starting, clean and sterilize your tools to prevent any potential infections during propagation.
- Keep your tools organized in an easily accessible manner for efficiency.
- Sharpen the blades of your tools and check for their overall condition to guarantee optimal performance.
Creating Ideal Environment

Humidity and Airflow
Maintain humidity levels to keep asparagus ferns healthy, ideally around 50-60%. Adequate humidity prevents the plant from drying out. Proper airflow is crucial for preventing diseases like mold and mildew. Ensure good ventilation by placing the ferns in areas with gentle air circulation. Balancing humidity and airflow is key; too much moisture can lead to fungal issues.
Soil and Potting
Select a well-draining soil mix for potting asparagus ferns, such as a combination of peat moss, perlite, and sand. This mixture ensures proper drainage, preventing root rot. Opt for pots with drainage holes to allow excess water to escape easily. The right soil type is essential for the fern's root system to thrive and absorb nutrients efficiently.
Care and Maintenance
Watering Guidelines
Maintaining proper moisture levels is crucial for the asparagus fern's health. Keep the compost moist during spring and summer to support growth. Adjust watering frequency according to seasonal demands to prevent issues like overwatering or underwatering. Remember, consistency in watering is key to a thriving asparagus fern.
Fertilizing Tips
When it comes to fertilizing, apply a balanced liquid fertilizer during the growing season. It's essential to feed your ferns sparingly to avoid nutrient imbalances that can harm their growth. Opt for fertilizers specifically designed for indoor plants to provide them with the necessary nutrients they need.
Monitoring Growth
Growth Expectations
Expect new growth and root development after successful propagation. Monitor the growth progress regularly to ensure healthy foliage. Anticipate potential flowering post-propagation.
Development Progress
Track the development of propagated ferns over time to observe changes in foliage. Document the stages for successful growth. By monitoring closely, you can ensure optimal development and health of your asparagus ferns.
Troubleshooting Issues
Common Problems
Asparagus ferns may encounter various issues, including yellowing leaves and stunted growth. These problems can be indicative of underlying issues that need to be addressed promptly.
e common problems with asparagus ferns include:
- Yellowing leaves: This could be a sign of overwatering or nutrient deficiencies.
- Stunted growth: Improper light conditions or root-bound pots can lead to stunted growth.
Diagnosis and Remedies
To address these issues effectively, it is crucial to diagnose the problem accurately and apply the appropriate remedies promptly. Early detection is key to preventing further damage to your plants.
When faced with yellowing leaves, consider adjusting the watering schedule and ensuring proper drainage. For stunted growth, repotting the plant into a larger container or providing adequate sunlight can help stimulate healthy growth.
Pest Infestations
Pest infestations are another common challenge faced by asparagus fern growers. Keep an eye out for pests such as spider mites or mealybugs, which can quickly damage your plants if left unchecked.
Here are some steps to deal with pest infestations:
- Identify the type of pest affecting your plants.
- Treat the infestation using appropriate methods like neem oil or insecticidal soap.
- Implement preventive measures such as regular inspections and maintaining plant hygiene to avoid future pest problems.
Long-Term Care Essentials
Transplanting Steps
When transplanting propagated ferns into larger pots, ensure proper steps are followed. Adequate drainage in new pots is crucial for healthy growth. Carefully transplant ferns to minimize root disturbance and promote successful establishment.
Ongoing Maintenance
Maintain regular care routines post-propagation to ensure plant health. Monitor watering, light exposure, and humidity levels for continued growth and development. Incorporate ongoing maintenance practices such as pruning and fertilizing for thriving ferns.
Varieties to Consider
Choosing Varieties
As you delve into propagating asparagus fern, consider exploring different varieties to diversify your collection. Look for variations in foliage characteristics and growth habits among different types of asparagus ferns. By selecting a range of asparagus fern types, you can create a visually captivating indoor garden that offers a mix of textures and colors.
When choosing varieties, keep an eye out for unique features that appeal to you. Some varieties may have more delicate fronds, while others exhibit robust and bushy growth patterns. By incorporating a variety of asparagus fern types, you can create a dynamic display that adds depth and visual interest to your space.
Consider the specific requirements of each variety when making your selection. Some types of asparagus fern may thrive in low light conditions, making them ideal for indoor settings with limited sunlight. Others may prefer brighter light or more humidity, so it's essential to match each variety with the right growing conditions to ensure their health and vitality.
Buying Advice
When purchasing asparagus ferns for propagation, it's crucial to source healthy plants from reputable suppliers. Look for well-established asparagus ferns that show no signs of wilting or yellowing leaves, indicating their overall health and vigor. Avoid buying plants that appear stressed or damaged, as they may struggle to adapt to new environments.
Before bringing new plants home, inspect them carefully for any signs of pests or diseases. Common issues such as spider mites or scale insects can quickly spread to other plants in your collection, so it's essential to quarantine any affected specimens and treat them promptly. By conducting a thorough inspection before purchase, you can prevent potential infestations and maintain the health of your indoor garden.
If you're unsure about which varieties to choose or how to care for your asparagus ferns, don't hesitate to seek advice from experts at local nurseries or botanical gardens. These professionals can offer valuable insights into the specific needs of each variety and provide guidance on proper care practices. By consulting with knowledgeable individuals, you can set yourself up for success in propagating and maintaining healthy asparagus ferns in your home.
Final Remarks
You've now mastered the art of propagating asparagus ferns. From understanding the techniques to creating an ideal environment and providing long-term care, you're well-equipped to ensure the healthy growth of your plants. Remember to monitor their progress regularly and address any issues promptly to maintain their vitality. Consider exploring different varieties to add diversity to your indoor garden and enhance its beauty.
As you embark on this propagation journey, don't hesitate to experiment and learn from hands-on experience. Your commitment and care will undoubtedly result in thriving asparagus ferns that will bring a touch of nature into your living space. Keep nurturing your plants with the knowledge you've gained, and enjoy the rewarding process of watching them flourish. Happy propagating!
Frequently Asked Questions
How do I propagate asparagus fern effectively?
To propagate asparagus fern successfully, you can use methods like division, planting seeds, or root division. Choose a healthy parent plant, ensure proper watering and lighting conditions, and be patient during the propagation process to see new growth.
What tools are essential for propagating asparagus fern?
Key tools for propagating asparagus fern include sharp scissors or pruning shears for cutting stems, a suitable potting mix for planting new cuttings or divisions, a spray bottle for misting, and rooting hormone to encourage root development.
What is the ideal environment for propagating asparagus fern?
Create a warm and humid environment with indirect sunlight for propagating asparagus fern. Maintain consistent moisture levels in the soil without overwatering. Providing good air circulation will also help in preventing fungal diseases during the propagation process.
How can I monitor the growth of propagated asparagus fern?
Regularly check the moisture level of the soil by gently inserting your finger into it. Observe the appearance of new shoots or roots on the cuttings to track growth progress. Keep a journal to note any changes in growth patterns over time.
What are some common issues when propagating asparagus fern?
Common issues when propagating asparagus fern include root rot due to overwatering, lack of humidity causing wilting, and inadequate lighting leading to poor growth. Address these problems promptly by adjusting watering frequency, humidity levels, and light exposure accordingly.
Image Source: Paid image from CANVA


