Ever found yourself struggling to keep your orchid's green leaves, healthy roots, and bloom stem alive and thriving? It's frustrating, right? In this post, we're diving into the nitty-gritty of reviving a wilting orchid. Whether you're a seasoned gardener or just starting out with indoor plants, these tips will help you bring your precious orchid back from the brink.
So, if you've noticed droopy leaves or lackluster blooms on your once-vibrant orchid, it's time to roll up your sleeves and give it some much-needed TLC. We'll cover everything from assessing root health and proper watering techniques to ideal lighting conditions and fertilization strategies. Get ready to witness your dying orchid transform into a flourishing beauty once again with a professional tip!
Key Takeaways
-
Regularly inspect your orchid: Keep an eye out for signs of distress such as yellowing leaves or wilting flowers to address any issues promptly.
-
Water your orchid appropriately: Understand the specific water needs of your orchid by checking its roots and adjusting your watering routine accordingly.
-
Rehydrate your orchid effectively: Use appropriate rehydration techniques such as soaking or misting to revive a dehydrated orchid.
-
Manage diseases promptly: Be vigilant for signs of disease and take immediate action to prevent the spread of infections.
-
Create optimal conditions for blooming: Provide the right environment, including proper light, temperature, and humidity, to encourage your orchid to bloom.
-
Utilize revival techniques when necessary: Implement appropriate revival methods such as repotting, trimming, or fertilizing to revive a struggling orchid.
-
Prioritize preventive care: Establish a consistent care routine and maintain optimal conditions to prevent your orchid from reaching a critical state.
-
Know when to seek professional help: Recognize the point of no return and consider seeking expert advice or assistance if your orchid's condition does not improve.
Recognizing Distress
Visible Symptoms
The first step is recognizing signs of distress. Look for yellowing or browning leaves as an indication of stress in your orchid. Wilting or drooping stems may also signal that your plant is struggling. Mold or mildew on the plant can be a clear sign of distress.
Checking the root health is crucial when reviving a dying orchid. Start by inspecting for mushy or discolored roots, which could signify root rot - a common issue with orchids. Healthy, firm roots are what you should look for as they indicate good overall plant health. Ensuring proper drainage in the pot will help prevent waterlogging and subsequent root issues.
Inspecting the condition of your orchid's leaves is another important aspect when trying to revive it. Look closely for any spots or discoloration on the leaves, as this could be indicative of disease or pest infestation. Also, check for wrinkled or shriveled leaves which might suggest dehydration and inadequate watering practices. Keep an eye out for any visible signs of pest infestation such as webs, tiny insects, or eggs.
Assessing Water Needs
Proper watering is crucial to revive a dying orchid plant. Using room temperature water is essential as cold water can shock the plant, while hot water can harm its roots. When watering, ensure that excess water drains out of the pot to prevent root rot. Overwatering should be avoided, so it's important to check the soil moisture levels before watering again.
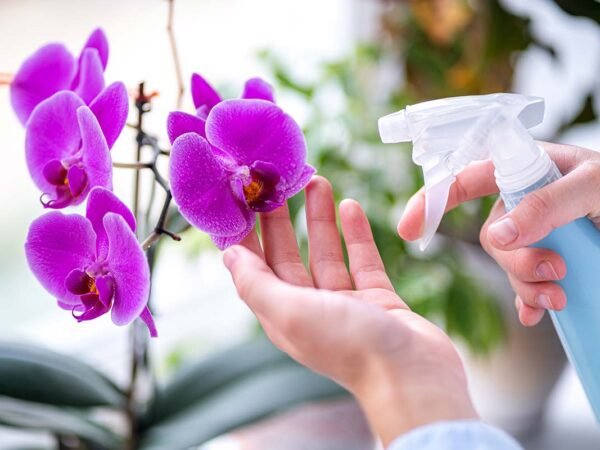
Humidity levels also play a significant role in orchid care. If your home has low humidity, consider using a humidity tray or room humidifier to create an environment that mimics the orchid's natural habitat. Misting the orchid's aerial roots regularly can help maintain adequate moisture levels for the plant. To accurately monitor humidity levels, invest in a hygrometer to ensure that they stay within the optimal range for orchids.
Maintaining proper watering and humidity levels are key factors in nursing a struggling orchid back to health.
Orchid Rehydration
Soaking Method
To revive a dying orchid plant, consider using the soaking method. Simply submerge the entire pot in water for a few minutes to ensure thorough rehydration. After soaking, allow the excess water to drain completely from the pot. This method is effective but should be used sparingly to prevent root rot, which can further harm a struggling orchid.
It's crucial to remember that while this method can help rehydrate an orchid, it's essential not to overdo it. Overwatering can lead to root rot and exacerbate the plant's condition. Therefore, use this technique judiciously and monitor your orchid closely for any signs of improvement or decline.
Frequency
Pay close attention to how often you water it. Water the plant when the potting mix feels dry to the touch, ensuring that you don't let it become bone-dry between watering sessions. Adjust your watering frequency based on environmental conditions such as temperature and air circulation.
For instance, if your home tends to be warmer or more humid, you may need to water your orchid more frequently than if you lived in a cooler or drier climate. By considering these factors and adjusting your care routine accordingly, you can provide optimal conditions for reviving your struggling orchids.
Disease Management
Identifying Diseases
Fungal infections in orchid plants can be identified by the presence of black spots on the leaves. These spots may appear as irregularly shaped lesions and are often accompanied by yellowing or browning of the affected areas. If you notice such symptoms, it's crucial to take immediate action to prevent further spread.
Another common issue is bacterial infection, which can lead to soft rot in orchid plants. This type of infection causes mushy, water-soaked lesions on the plant’s leaves and pseudobulbs. The affected areas may also emit a foul odor, indicating bacterial activity.
viral diseases can cause distorted growth patterns in orchids. Look for stunted or deformed leaves, abnormal flower development, and mottling or streaking on the foliage. It's important to keep an eye out for these signs as viral infections can severely impact the overall health of your orchid plant.
Treatment Options
When dealing with fungal infections, using a suitable fungicide is essential for controlling and preventing further spread of the disease. Apply the fungicide as directed on its label, ensuring thorough coverage of all affected parts of the plant.
For bacterial infections causing soft rot, it's necessary to trim away any infected areas using sterilized tools. Afterward, apply an antibacterial treatment to minimize the risk of recurrence. Proper disposal methods should also be employed when removing infected portions or entire plants from your collection.
In cases where viral diseases are suspected or confirmed, unfortunately there are no specific treatments available for orchids once they have been infected with a virus. Therefore, prevention becomes key; maintaining good cultural practices like proper sanitation and avoiding mechanical transmission through contaminated tools will help reduce the risk of viral outbreaks within your collection.
Encouraging Blooms
Bloom Techniques
To revive a dying orchid plant and encourage new blooms, you can start by pruning the spent flower spikes. This process redirects the plant's energy from producing seeds to growing new flowers. By removing old spikes just above a node, you stimulate the orchid to produce fresh blossoms.
Another crucial technique is providing a balanced fertilizer that supports blooming. Look for a fertilizer specifically formulated for orchids and follow the instructions carefully to avoid overfeeding or nutrient deficiencies. A balanced fertilizer with equal parts nitrogen (N), phosphorus (P), and potassium (K) can aid in promoting healthy blooms.
Adjusting light exposure is essential for promoting flowering in orchid plants. Ensuring adequate but indirect sunlight is key to encouraging blooms. Protecting the plant from harsh midday sun prevents leaf damage while still allowing it to receive beneficial light. If natural light is insufficient, consider using artificial grow lights as an alternative source of illumination.
Light Exposure
Remember that direct sunlight can be too intense and harmful for these delicate plants. It's crucial to strike a balance between providing enough light without exposing them to harsh conditions that could lead to sunburn or dehydration.
If your orchid is situated near a window where it receives direct sunlight during certain times of day, consider moving it slightly away or using sheer curtains as protective barriers during those hours when the sun's rays are most intense.
Optimal Conditions
Maintaining optimal conditions is crucial for its survival. First, ensuring the right temperature is essential. Orchids thrive in consistent temperatures between 65°F to 75°F during the day and slightly cooler temperatures at night. Protecting them from drafts and sudden temperature fluctuations is also vital for their well-being.
Moreover, providing adequate air circulation is equally important for reviving a dying orchid plant. Ensuring good air movement around the plant helps prevent stagnant, humid conditions that can be detrimental to its health. If necessary, using fans to improve air circulation can significantly benefit the orchid's revival process.
Properly controlling the temperature creates an environment where your struggling orchid can recover effectively. Maintaining consistent temperatures within the recommended range of 65°F to 75°F during the day and slightly cooler at night provides stability for your plant's growth and recovery.
Ensuring good air circulation around your orchid allows for proper gas exchange and prevents excess moisture buildup, which could lead to root rot or other issues hindering its revival process.
Revival Techniques
Potting Mix Refresh
One crucial technique is repotting using fresh, well-draining orchid mix. This helps the roots get the right balance of air and moisture. When repotting, ensure that the new pot has enough drainage holes to prevent waterlogging.
The old potting mix may have broken down over time, leading to poor aeration and drainage for the roots. By refreshing the potting mix, you provide better support for root health and growth. For example, you can use a blend of fir bark, sphagnum moss, and perlite as a suitable orchid mix.
Another important aspect is choosing the right-sized pot when repotting your orchid. A too-large pot can retain excess moisture around the roots, while a too-small one can restrict root growth.
Fertilization Strategy
When reviving an orchid plant, it's essential to adopt an effective fertilization strategy. Apply a balanced orchid fertilizer at half strength every two weeks during its active growth phase. This provides essential nutrients without overwhelming the weakened plant.
During dormant periods or when attempting to revive a struggling orchid, reduce fertilization frequency or even pause it altogether if signs of stress persist. It's also beneficial to flush out any excess salts from previous fertilizer applications by occasionally watering with plain water.
Balanced fertilizers designed specifically for orchids usually contain equal proportions of nitrogen (N), phosphorus (P), and potassium (K). These elements are vital for promoting healthy leaf growth, strong roots, and vibrant blooms in your revived orchid plant.
Preventive Care
It's crucial to provide routine monitoring for your orchid plant to keep it healthy. This involves checking the plant regularly for any signs of distress or disease. Look out for yellowing leaves, wilting flowers, or any unusual spots on the foliage. If you notice any of these symptoms, take immediate action to address the issue.
Maintaining a consistent watering schedule is essential for preventing your orchid from deteriorating. Overwatering can lead to root rot and other problems, while underwatering can cause dehydration and stunted growth. By observing the moisture level in the potting medium and adjusting your watering routine accordingly, you can help ensure that your orchid remains vibrant and flourishing.
Providing an optimal growing environment is key to keeping your orchid thriving. Ensure that your plant receives adequate sunlight without being exposed to direct harsh sunlight that could scorch its delicate leaves. Moreover, maintaining appropriate humidity levels by misting the plant or using a humidifier can contribute significantly to its overall well-being.
Creating a suitable temperature range within your home is also important in preventing stress on the orchid plant. Extreme temperatures can negatively impact its health and vitality; therefore, it's essential to keep it within a comfortable temperature range throughout different seasons.
Recognizing the Point of No Return
Reviving a dying orchid plant involves recognizing irreversible damage signs and knowing when to let go. Irreversible damage signs include mushy, brown, or black roots, which indicate root rot. When the leaves turn yellow and drop off despite your best efforts to revive them, it may be time to accept that the orchid is beyond saving.
If you notice a foul smell emanating from the potting medium or see mold growing on it, these are clear indications of irreversible root decay. Another sign of irreversible damage is when the stems become hollow and shriveled due to severe dehydration. These symptoms suggest that the plant has reached a critical stage where revival might not be possible.
Knowing when to let go is crucial for both your peace of mind and resource management. If preventive care measures fail to improve an orchid's condition after several weeks, it's important to consider letting go. This decision frees up resources for healthier plants while sparing you from further frustration.
Closing Thoughts
You've learned how to identify when your orchid is in distress, assess its water needs, rehydrate it, manage diseases, encourage blooms, create optimal conditions, and employ revival techniques. By recognizing the point of no return and taking preventive care measures, you can ensure your orchid stays healthy and vibrant.
Now it's time to put your newfound knowledge into action. Take a good look at your orchid and start implementing the techniques you've learned. Remember, just like nursing a plant back to life, sometimes we need a little care and attention too. So go ahead, show your orchid some love and watch it thrive once again!
Frequently Asked Questions
How can I tell if my orchid plant is distressed?
If your orchid's leaves are turning yellow or drooping, it may be distressed. A lack of new growth or root rot could indicate distress. Observing the plant closely for any unusual changes will help you recognize distress early on.
What are the optimal conditions for reviving a dying orchid plant?
To revive a dying orchid, provide it with bright but indirect light, maintain proper humidity levels, and ensure good air circulation. Maintaining consistent watering and using well-draining potting media can create optimal conditions for revival.
How often should I water my dying orchid during the revival process?
During the revival process, it's crucial to assess your orchid's individual water needs based on its specific environment and condition. Generally, allowing the roots to partially dry out between watering sessions while avoiding prolonged drought periods is advisable.
Are there preventive care measures to keep my revived orchid healthy in the long term?
Yes! After successfully reviving your orchid, continue providing optimal growing conditions including appropriate light exposure and regular fertilization. Monitor for signs of distress or disease regularly to address issues before they escalate.
When should I consider that an orchid has reached the point of no return despite revival efforts?
If after implementing various revival techniques your orchid continues to deteriorate with no signs of improvement over an extended period despite adequate care and attention, it may have reached the point of no return. At this stage, focusing on preventive care becomes essential.
Image Source: Paid image from CANVA


