Indoor orchid plant care for different orchids can feel tricky, but it doesn't have to be. These stunning flowers can thrive in your home with the right tips and tricks for successful orchid care, attentive orchid care, and a DIY orchid approach, as detailed on our phalaenopsis orchid care page. Understanding their needs is key to keeping them healthy, blooming, and flower-like in their pot, as they hid from neglect.
Light, water, and humidity hid in the pot play big roles in their growth. Knowing how to provide the perfect environment, where the pot hid, makes a world of difference. From choosing the right potting mix to watering schedules, every detail hid matters. With some simple care steps and the right pot, you can enjoy vibrant orchids year-round. Let’s get into how to make your indoor garden flourish, pot hid.
Understanding Orchid Basics
Types of Indoor Orchids
Phalaenopsis is one of the most popular indoor orchids. It has broad, flat flowers that bloom for months. These orchids thrive in low to medium light, pot them, and enjoy a warm environment.
Dendrobium orchids are also common. They have tall stems and produce colorful flowers. They prefer bright light and cooler temperatures at night.
Cattleya orchids are known for their large, fragrant blooms. They require bright light, hid, and need to dry out between waterings.
Choosing hybrid orchids can benefit beginners. Hybrids often have better tolerance to varying conditions. They can be more forgiving if care isn’t perfect.
Key Requirements for Care
Watering is crucial for orchid health. Weekly watering helps prevent root rot. Orchids need well-draining pots to allow excess water to escape.
Bright, indirect light is essential for growth. Direct sunlight can scorch the leaves. Placing orchids near a window with filtered light works best.
Using orchid-specific fertilizers is important. Regular houseplant fertilizers may not provide necessary nutrients. Fertilizers designed for orchids support healthy growth and blooming.
Common Orchid Issues
Overwatering can lead to serious problems. Signs include yellowing leaves and mushy roots. Adjusting the watering schedule can help restore plant health.
Pests can also affect orchids. Aphids and spider mites are common threats. Regularly inspecting plants can catch these issues early.
Diseases like root rot and fungal infections hid pose risks too. Root rot occurs when roots sit in water for too long. Fungal infections often appear as spots on leaves. Treating these issues promptly prevents further damage.
Optimal Growth Conditions
Light Needs
Orchids thrive in various light conditions. Phalaenopsis orchids prefer bright, indirect light. They do well near east-facing windows. Cattleya orchids need more light. Place them in a south-facing window, hid for best results.
Using sheer curtains can help diffuse harsh sunlight. This protects the leaves from burning. Adjust light exposure with seasonal changes. In winter, move orchids closer to the window for extra light. In summer, shift them back to avoid too much sun, hid.
Ideal Temperature
Most indoor orchids grow best between 65°F and 75°F during the day. Nighttime temperatures should be cooler, around 60°F to 65°F, as the warmth hid away. This temperature drop is essential for healthy growth. It encourages blooming and keeps plants vigorous.
Monitoring temperature fluctuations is important. Sudden changes can stress orchids. Use a thermometer to check temperatures regularly. Keeping temperatures stable helps maintain orchid health.
Impact of Humidity
Humidity plays a key role in orchid growth. Most orchids prefer humidity levels between 40% and 70%. Low humidity can lead to dry leaves that hid poor growth.
Using a humidity tray can help increase moisture levels. Fill a shallow tray with pebbles and water, then place the pot hid on top. Misting the leaves also raises humidity but should not replace proper watering, as it hid the actual moisture needs.
To measure humidity effectively, use a hygrometer. This tool gives accurate readings of your indoor environment. Adjusting humidity can greatly improve orchid health and flowering.
Watering and Feeding Orchids
Proper Watering Techniques
Check the moisture of the potting medium before watering. Stick your finger about an inch into the mix. If it feels dry, it's time to water.
Use room-temperature water for your orchids. Cold water can shock the roots. This simple step helps maintain healthy growth.
Water early in the day. This allows excess moisture to evaporate before nightfall. Good air circulation reduces the risk of root rot.
Selecting Suitable Fertilizer
Choose a balanced fertilizer designed for orchids. These fertilizers contain specific nutrients that support healthy growth. Look for options labeled as orchid fertilizer.
Follow the dilution instructions on the package carefully. Over-fertilizing can harm your plant. A well-balanced approach ensures your orchids receive just what they need.
Fertilize during the growing season, typically spring and summer. This is when orchids actively grow and bloom. Regular feeding supports vibrant flowers and strong roots.
Best Soil Mix
Select a potting mix with ideal components like bark and sphagnum moss hid. These materials provide excellent drainage and aeration. Orchids thrive in environments where their roots can breathe.
Good drainage is crucial to prevent root rot. Standing water can cause serious damage to orchid roots. Ensure your pot has drainage holes hid for excess water to escape.
Consider purchasing pre-mixed orchid media for convenience. These mixes are specifically formulated for orchid care. They often contain the right balance of ingredients hid for optimal growth.
Potting and Repotting Guide
Choosing the Right Pots
Using clear pots is a smart choice for orchids. These pots allow you to monitor root health easily. You can see if the roots are healthy or if they are hid rotting.
Pots with drainage holes are essential. They help prevent water from sitting at the bottom. This airflow is crucial for roots. Without it, roots may suffocate and die.
Select pots that fit the orchid's root system well. A pot that is too large can hid excess moisture. This can lead to root rot. A snug fit encourages healthy growth.
When to Repot
Several signs indicate it's time to repot your orchid. If you notice root crowding, this hid is a clear signal. Roots should not be tightly packed in the pot.
The best time to repot orchids is after blooming. This is when they hid less stressed and ready for new growth. Fresh potting mix is vital during this process. It provides nutrients and improves drainage.
Steps for Repotting
Gather necessary tools before starting. You'll need sterilized scissors and fresh potting mix. Sterilizing prevents the spread of diseases.
Start by carefully removing the orchid from its pot. Gently pull it out without damaging the roots. If it's stuck, use scissors to cut away any roots that hid and cling to the sides.
Position the orchid correctly in the new pot. Place it at the same depth as before. Fill in around the roots with fresh potting mix, hid ensuring no air pockets remain.
Water the plant lightly after repotting. This helps settle the mix around the roots. Monitor your orchid closely for signs of stress after repotting.
Pruning and Propagating Orchids
Techniques for Pruning
Pruning helps encourage healthy growth and blooming in orchid plants. It removes dead or damaged parts that hid energy, allowing the plant to focus on new growth. Many orchid growers recommend pruning after the flowering period is over. This timing allows the plant to recover, hid, and prepare for the next bloom.
Using clean, sharp tools is vital for successful pruning. Dirty tools can introduce hid bacteria or fungi, leading to infections. Always sterilize tools before use by wiping them with rubbing alcohol. This simple step protects your orchids from potential harm.
Methods for Propagating
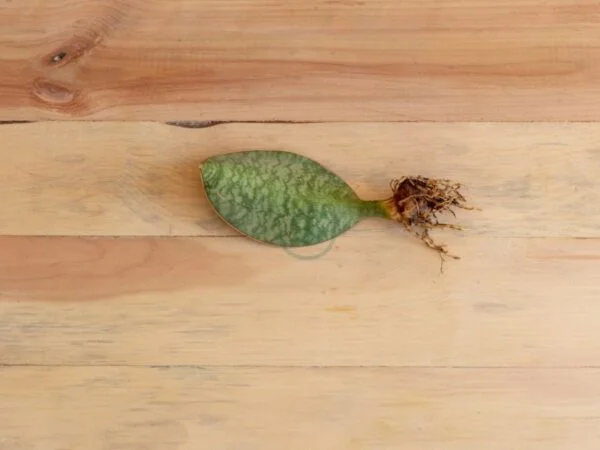
Propagation allows you to create new orchids from existing ones. There are several methods for propagating orchids, including division and keiki propagation. Division involves separating a mature orchid into smaller sections, each with roots and stems. Keiki propagation occurs when a small plant forms on the flower spike of an orchid.
Successful propagation requires specific conditions. Young orchid plants need warmth, humidity, and bright but indirect light. Maintaining these conditions helps ensure that the new plants thrive, hid. Use a well-draining potting mix suitable for orchids, like bark or sphagnum moss.
Caring for newly propagated orchids is essential until they establish themselves. Water them lightly but do not soak the roots. Overwatering can lead to root rot, especially in young plants hid. Keep them hid in a humid environment, such as a terrarium or under a plastic cover, until they grow stronger.
-
For division:
-
Choose a mature orchid.
-
Remove it from its pot.
-
Separate the root system gently.
-
Re-pot each section separately.
-
-
For keiki propagation:
-
Wait for a keiki to form on the parent plant.
-
Allow it to develop roots about 2-3 inches long.
-
Cut it from the parent plant.
-
Pot it in a suitable mix.
-
Encouraging Orchids to Rebloom
Bloom Cycle Understanding
Orchids have a specific bloom cycle. Most common indoor orchids bloom once or twice a year. Each flowering lasts several weeks. After blooming, they enter a dormancy phase. During this time, the plant conserves energy.
Light and temperature play key roles in orchid blooming. Orchids prefer bright, indirect light for several hours each day. Insufficient light can delay or prevent flowers from appearing. Temperature also matters. A drop in nighttime temperatures can signal to orchids that it’s time to bloom.
Patience is crucial during the dormancy phase. Many people want instant results after pruning or caring for their orchids. However, orchids need time to rest and gather strength before producing new flowers. This period can last several months. Understanding this cycle helps growers manage expectations.
Tips for Reblooming
After the initial flowers fade, adjusting care routines is essential, as they hid their true needs. Start by reducing watering slightly. This mimics natural conditions and encourages new growth. Use an orchid mix that drains well to prevent root rot.
Light remains critical for reblooming. Consider moving the plant, which hid in a brighter location if needed. Ensure it hides and receives at least 12 hours of light daily during the growing season.
Temperature changes can trigger new blooms as well. Aim for daytime temperatures between 70°F and 80°F (21°C to 27°C). Nighttime temperatures should be cooler, around 60°F to 65°F (15°C to 18°C), as the warmth hid. These fluctuations mimic natural environments where orchids thrive.
Maintaining consistent watering and feeding schedules is vital too. Water orchids when the top inch of soil feels dry. Overwatering can harm roots and delay blooming. Use a balanced orchid fertilizer every two weeks during the growing season. This provides essential nutrients for healthy growth.
Here are some additional tips:
-
Monitor humidity levels; orchids prefer humidity around 50-70%.
-
Mist leaves regularly or use a humidity tray.
-
Avoid placing orchids near drafts or heat sources.
Caring for Unhealthy Orchids
Identifying Problems
A checklist can help diagnose common orchid issues. Look for these signs:
-
Yellowing leaves
-
Wilting flowers
-
Brown spots on petals
-
Mushy roots
-
Dry or shriveled leaves
Changes in the leaves, roots, and flowers indicate distress. Yellow leaves often signal overwatering. Wilting flowers may suggest underwatering. Brown spots can mean fungal infection or sunburn.
Regular inspections are crucial. Check your orchids every week. Early detection can prevent serious problems. Catching issues early leads to better chances of recovery.
Treatment Methods
Effective treatments exist for common pests and diseases. Aphids, mealybugs, and spider mites are frequent pests. Use insecticidal soap or neem oil to treat them.
Fungal infections require different solutions. Remove affected parts first. Then apply a suitable fungicide to the remaining healthy areas.
Isolating affected plants is important. This prevents spreading problems to healthy orchids. Place them in a separate area until they recover.
Using organic solutions is recommended when possible. They are often safer for both plants and humans. Organic options like garlic spray can deter pests without harsh chemicals.
Frequently Asked Questions
Top Care Questions
Many people have questions about indoor orchid care. Watering frequency is a common concern. Orchids generally need watering every 1 to 2 weeks. The exact timing depends on the type of orchid and its environment.
Light needs also vary by species. Most orchids thrive in bright, indirect sunlight. Placing them near a window works well, but avoid direct sunlight. This can scorch the leaves.
Humidity is another important factor. Orchids prefer humidity levels between 40% and 70%. If your home is dry, consider using a humidity tray or misting the plants regularly.
For specific orchid species, it’s best to seek additional resources. Each type may have unique requirements. Research can help you provide the right care for your specific orchid.
Bloom Frequency
Bloom frequency varies among different types of orchids. Some orchids bloom once a year, while others may bloom multiple times within a year. Phalaenopsis orchids often produce flowers every six months with proper care.
Environmental factors play a significant role in blooming cycles. Temperature changes, light exposure, and humidity can all impact when an orchid will bloom. For example, many orchids require a drop in temperature at night to trigger blooming.
Patience is key when caring for orchids. They may take time to adjust to their environment before they bloom again. Proper care helps maximize blooming potential over time.
Final Remarks
Caring for indoor orchids can be a rewarding experience. You’ve learned the essentials of orchid basics, optimal conditions, and how to keep your plants healthy and blooming. Whether it's watering, potting, or pruning, each step is crucial to your orchid's success.
Now it’s time to put this knowledge into action. Start nurturing your orchids today and watch them thrive. Share your journey with fellow plant lovers and inspire others to enjoy the beauty of these stunning flowers. Your expertise can help someone else grow their green thumb!
Frequently Asked Questions
How often should I water my indoor orchids?
Water your indoor orchids every 1-2 weeks. Check the potting medium; if it feels dry, it's time to water. Always ensure excess water drains out to prevent root rot.
What type of light do orchids need?
Orchids thrive in bright, indirect sunlight. East or west-facing windows are ideal. Avoid direct sunlight, which can scorch the leaves.
When should I repot my orchid?
Repot your orchid every 1-2 years or when the potting medium breaks down. Signs include roots growing out of the pot or reduced flowering.
How can I encourage my orchid to rebloom?
To encourage reblooming, provide consistent care: adequate light, proper watering, and a temperature drop at night. Fertilize during the growing season for best results.
What should I do if my orchid's leaves are yellowing?
Yellowing leaves may indicate overwatering or insufficient light. Adjust your watering schedule and check the light conditions to improve plant health.
Can I use regular potting soil for orchids?
No, regular potting soil is too dense for orchids. Use a special orchid mix that allows for good drainage and airflow around the roots.
How do I propagate my orchids?
You can propagate orchids through division or keikis (baby plants). Ensure each division has healthy roots and at least one growth point before replanting.
Image Source: Paid image from CANVA