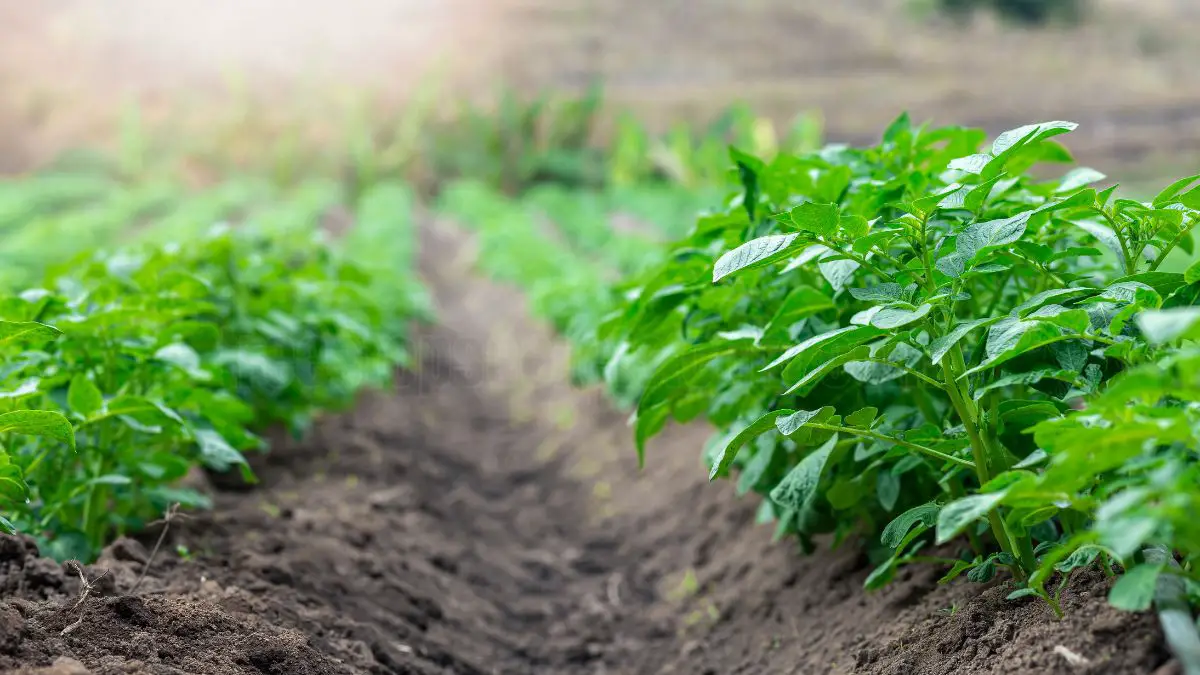
It’s easy and rewarding to grow a potato plant from a potato. Soon you’ll be reaping the rewards of your labors with plenty of nutritious food grown right in your own garden!
First, choose an organic, healthy potato that has “eyes”—the little sprouts that form on the skin. Slice the potato into sections, making sure each section has a minimum of one eye. Let the cut sections dry out for a day or two to avoid any risk of rotting.
Next, plant them in sandy soil, burying the potatoes approximately four inches deep. Keep them watered and make sure they are in full sun. While they are growing, you can continue to mound soil around their stems to encourage stronger plant growth.
Follow along with this guide to learn how to grow potatoes from a potato at home and reap a bountiful harvest.
Key Takeaways
- Select healthy seed potatoes that have easily visible eyes for the best sprouting and growth. Seed potatoes can be cut into pieces, with at least one eye per piece, which gives them more room to develop strong roots.
- Potatoes should be planted in early spring. Try to get soil temperatures in the range of 45 to 55 degrees Fahrenheit to ensure full germination and development.
- Make sure you have loose, nutrient-dense, well-drained soil – ideally, sun-warmed before planting. Monitor soil pH consistently and amend as necessary to ensure your potato plants thrive in ideal conditions.
- Properly water your plants by giving them a good soaking—around two inches of water per week. In addition, apply mulch to help the soil retain moisture, which will help prevent root rot.
- Keep pests and disease away with row covers and disease-resistant varieties. Make sure to practice crop rotation to maintain soil health.
- If you’re container gardening, be certain that your pots have good drainage. Follow up with a nutrient-rich potting mix, ample sunlight, and weekly watering to encourage a luscious plant.
How to Grow a Potato Plant from a Potato
Growing potatoes from seed potatoes is a rewarding endeavor that allows for a connection to the soil and the satisfaction of nurturing plants from start to finish. The next section goes over the most important steps to growing a potato plant from a potato successfully, specifically potato preparation, planting and potato maintenance.
1. Prepare Seed Potatoes for Sprouting
Choosing the healthiest seed potatoes is key to growing a healthy plant. Start by cutting whole seed potatoes into chunks, making sure that each chunk has at least one eye. This withered eye is the most important part, since it’s here that the new plant will begin to grow.
After cutting, allow the pieces to dry for a week or so. This drying period forms a callous over the whittled ends and greatly decreases the chance for rot when you go to plant them. To promote sprouting, store the seed potatoes in a well-lit, cool space.
A warm place with indirect sunlight is an ideal choice because it encourages the sprouting process while avoiding overheating. Watch the seed potatoes carefully, as you want to catch small sprouts as soon as they appear from the eyes. These sprouts are a good sign that they’re ready to be planted.
Be sure to cut with a clean knife to avoid contamination. This way, you avoid spreading disease and you’re more likely to grow healthy plants.
2. Select the Right Potato Varieties
Selecting the right potato varieties is key to matching your planting materials with local climate conditions. Various potato varieties require different lengths of time to grow as well as harvest time.
Early varieties such as ‘Red Bliss’ can be harvested in as little as 60 days. By comparison, late varieties like ‘Russet Burbank’ could take 90 days or longer to reach maturity. This careful variety selection makes for a staggered harvest, helping you get the most yields possible during the growing season.
If possible, use certified seed potatoes purchased from trusted sources. These potatoes are purposefully grown to minimize disease risk. In comparison, the ones you buy in supermarkets are much more likely to be contaminated with dangerous pathogens.
Learn what grows best in the specific conditions of your climate, because some varieties will do better than others. Planting early and late potato varieties together can give you a longer potato harvest season. With this method, you’ll be guaranteed a continuous yield of fresh potatoes.
3. Choose Optimal Soil and Nutrient Mix
Potatoes do best in well-draining soil high in organic matter. Make sure your soil has excellent drainage before planting to avoid water pooling around the tubers and potentially rotting them.
It’s a good idea to test your soil pH as potatoes like it on the slightly acidic side, preferably around 5.5-6.5. If the pH is lower or higher than this range, you may need to amend your soil with lime or sulfur, respectively.
To improve the nutrient content, add compost to the soil. This organic material not only feeds your plants with nutrients, it helps create rich soil structure. Try to achieve soil temperatures of 45 to 55 degrees Fahrenheit for best growth.
Too cold soil temperatures will prevent proper tuber development, and too warm soil temps will cause the tubers to not sprout.
4. Adjust Planting Techniques for Your Climate
Timing is everything when growing potatoes. Wait to plant your seed potatoes until you’ve passed your last frost date to avoid killing them with cold weather. In most areas, this time usually happens sometime between the end of March and beginning of April.
This depends on local conditions. If planting in rows, space the potato pieces 12 inches apart in the row and space each row three feet apart to allow for ample growth and circulation.
Based on your local growing conditions, you can choose between trench or deep mulch planting techniques. Trenching means digging a shallow trench, laying the seed potatoes in the trench, and then covering them with soil.
Another option is to use deep mulching to control soil temperature and moisture. Keeping the soil moist but not waterlogged is key. Water to keep the soil consistently moist but not waterlogged, so be prepared to change your watering style based on rain and heat.
5. Implement Effective Pest Management Strategies
Potato farming is all about pest control. Young plants are especially susceptible to pests like the potato beetle. Using row covers or other protective measures can help create a barrier, keeping young plants safe from these dangers.
Check your plants regularly for indicators of disease, including yellowing leaves or black/brown spots, to nip problems in the bud. Annual crop rotation is an equally great way to reduce pest and disease overload in the soil.
This practice breaks the life cycles of possible pests and diseases, safeguarding future crops. Choosing disease-resistant potato varieties will further decrease the chances of problems occurring, increasing productivity even more.
6. Watering Techniques for Healthy Growth
Even watering is particularly important, especially during the plant’s early growth stages. Water your plants so that they receive two inches of water weekly. This will help them be well watered, particularly during drier periods.
By using mulch to keep soil from getting too dry and preventing moisture from evaporating, you can create an environment that allows your potatoes’ roots to thrive. Pay attention to moisture in the soil, and be prepared to change how often you water depending on the rain and the heat.
Too much water will leave the soil swampy and cause the potato’s roots to rot, so be careful to maintain a happy medium. Test the soil moisture several inches down to judge when it’s time to add water.
7. Hilling Methods for Robust Plants
Hilling is an essential, beneficial and protective practice that helps nurture growing potato plants. When the plants are 6 to 8 inches tall, hill soil around the base of the plants. This is a simple action that would provide important structural support.
Additionally, it protects growing tubers from exposure to sunlight, which will cause greening and bitterness. Plan on doing a second hilling if necessary, especially on varieties that are prone to more hefty yields.
Incorporating loose soil into the hilling process promotes strong stem root growth. This method promotes bigger tuber growth and in turn gives you more to harvest!
8. Avoid Common Gardening Mistakes
Avoiding these common gardening mistakes can make all the difference between a budding potato gardener and a great potato gardener. Planting potatoes too early when the soil is still quite cold will lead to stunted growth, setting back your harvest.
Be sure not to plant too closely and leave enough room between each potato section so they can grow properly. Frequent inspection for invasive pests and diseases is the key to catching an infestation before it gets out of control.
Do not use untreated grocery store potatoes as they can bring diseases into your garden.
9. Container Gardening for Potatoes
This is a great alternative for anyone lacking space, so container gardening provides a great option. Choose large pots or containers that allow for excellent drainage to encourage vigorous potato development.
Use a high quality, nutrient-rich potting mix to fill the containers to give those potatoes plenty of food and goodness to grow. Arrange your containers in a place that gets at least 6 to 8 hours of sun each day.
Regular watering is important for container-grown potatoes because pots can dry out faster than garden beds. Keeping an eye on moisture levels is critical for container gardens so you can be sure your potatoes are getting the water they need.
10. Organic vs. Conventional Cultivation Practices
When deciding between organic and conventional cultivation practices, consider the differences in nutrient delivery, pest management strategies, and environmental impact. Organic fertilizers often take longer to release nutrients, and conventionals can offer quick fixes.
Calculating your individual health and sustainability priorities will help you decide.
Best Practices for Cultivating Potatoes
Cultivating potatoes is no simple task — it’s a balancing act that takes precise knowledge of soil health, nutrient management, and protection of the environment. Practicing crop rotation encourages the use of crop rotation, an important step to keep soils healthy and reduce pest pressures.
By actively checking soil moisture, you can customize how and when you water to reduce waste and better serve your plants’ needs. During the hotter summer months, aim to deliver 1 to 2 inches of water weekly.
1. Understanding Soil Requirements
Potatoes grow best in light, well-draining, slightly acidic soils, with a pH ranging from 5.8 to 6.5. A soil test will help you know what amendments are needed, like adding organic matter to ameliorate soil structure and fertility.
Providing plenty of sunlight, at least six to eight hours a day, is equally important for vigorous potato growth.
2. Nutrient Management for High Yields
While balanced fertilizers should be used to help provide all necessary nutrients, compost can act as a natural amendment to improve soil health. It is essential to regularly monitor nutrient levels throughout the growing season to prevent deficiencies that could negatively impact yield.
3. Natural Techniques to Boost Yield
Not only can companion planting improve plant growth, it can repel pests. Mulching helps retain moisture and control weeds, and sufficient spacing—18 inches between main crop potatoes—provides good air flow.
4. Protecting Plants from Environmental Stresses
Protecting tender plants with row covers can help reduce temperature shocks. Being proactive in monitoring for drought stress is important.
Make sure you have good drainage to avoid waterlogging that can rot roots.
Conclusion
As you can see, growing a potato plant from a potato is a simple process that can be highly rewarding.
Planting potatoesStart with a healthy potato, cut it into several pieces, and allow them to sprout. Select a location with full sun exposure in your garden or patio. Make sure to keep the soil consistently moist and create a weed-free zone around your plants. To harvest, wait until your plants flower. Finally, reap the rewards of your hard work in delicious home cooked meals.
Not only does this process bring you closer to nature, it rewards you with delicious potatoes. Most importantly, have fun and learn through your experiences. With every step, you’re becoming a more confident gardener! So plant that first potato today, and you’ll be reaping the rewards of homegrown spuds in no time. Enjoy the process, and inspire others to get started by sharing your successes! Happy gardening.
Frequently Asked Questions
How do I start growing a potato plant from a potato?
-
Prepare the seed potato Cut a healthy potato into pieces, making sure each piece has at least one eye. Allow them to dry out for at least one day before planting them in deep, well-drained soil.
When is the best time to plant potatoes?
When is the best time to plant potatoes? Getting this timing down is crucial for them to be able to thrive.
How much sunlight do potato plants need?
Potato plants do best in full sun. Provide 6-8 hours of direct sunlight for the best results.
How often should I water my potato plants?
Keep your potato plants evenly moist, watering them once a week. Keep the soil damp, not waterlogged to help avoid rot.
What type of soil is best for growing potatoes?
Choose loose, well-draining soil that is high in organic matter. Potatoes prefer a soil pH of 5.8 to 6.5 for optimal growth.
How long does it take for potatoes to grow?
Generally potatoes require anywhere from 70-120 days to come to maturity, again depending on variety and growing conditions.
How do I know when my potatoes are ready to harvest?
If harvested above ground, harvest as soon as the plant begins to yellow and die back. This is a sign of maturity and often means the potatoes are done growing.
Image Source: Paid image from CANVA


