Caring for a healthy orchids vanilla orchid plant is both an art and a science in the world of orchidaceae tropical orchids as a houseplant. These unique plants, including homegrown vanilla beans and vanilla plantifolia, are native to tropical regions and have been cultivated for centuries, such as water vanilla bean orchids and indoor vanilla bean orchids. They are famous for their fragrant flowers and valuable vanilla beans, in order to brighten each day. Proper care is essential to thriving orchids.
Understanding light, humidity, and watering needs is crucial. Vanilla orchids require specific conditions to flower and produce beans, making them a rewarding challenge for any plant enthusiast in order to cultivate them. With the right approach, you can enjoy beautiful blooms and potentially order your own vanilla bean. This guide will walk you through all the essentials of vanilla orchid plant care, in order to nurture these stunning bean plants with confidence.
Key Takeaways
-
Ensure your vanilla orchid gets bright, indirect light to thrive, as too much direct sunlight can harm the leaves in order to produce quality bean.
-
Use a well-draining potting mix, ideally with bark and perlite, to provide the right environment for root health when you plant vanilla plants or a vanilla bean orchid plant, ensuring proper vanilla orchid care.
-
Water your vanilla orchid regularly but allow the top inch of soil to dry out between waterings to prevent root rot.
-
Maintain a warm temperature between 70°F to 85°F and keep humidity levels high for optimal growth of vanilla bean plants and vanilla bean orchids.
-
Fertilize every month during the growing season with a balanced orchid fertilizer for vanilla bean orchids to support healthy development.
-
Regularly check for pests like mealybugs and aphids on your vanilla bean orchids, and treat infestations promptly to keep your plant healthy.
Understanding Vanilla Orchid Plant
Overview of Vanilla Orchids
Vanilla orchid plants are unique. They have a vine structure, like vanilla bean orchids, that can climb up to 30 feet long. This plant, vanilla bean orchids, is perennial, meaning it lives for several years. Indoor vanilla orchid plants typically grow smaller than those outdoors. Indoor varieties, like the vanilla bean orchid, may reach about 6 to 10 feet, while outdoor ones can grow much larger.
These orchids thrive in tropical regions. They are native to areas like Mexico and parts of Central America, including the vanilla bean orchid. The warm climate helps the mature vanilla orchid vine flourish. Proper conditions include high humidity and bright, indirect sunlight.
Types of Vanilla Orchids
The Vanilla genus includes several species. The most common is Vanilla planifolia. It is known for its rich flavor profile used in food and beverages. Other species include Vanilla tahitensis, which has a sweeter taste and is often used in gourmet products.
Different vanilla orchid types have distinct features. For example, Vanilla pompona offers a lighter flavor compared to the stronger Vanilla planifolia. Environmental conditions significantly affect growth. Temperature, humidity, and light levels influence how each type develops.
Benefits of Growing Vanilla Orchids
Growing vanilla orchids offers many benefits. First, they provide culinary uses through their beans. Freshly harvested vanilla beans enhance desserts, drinks, and savory dishes.
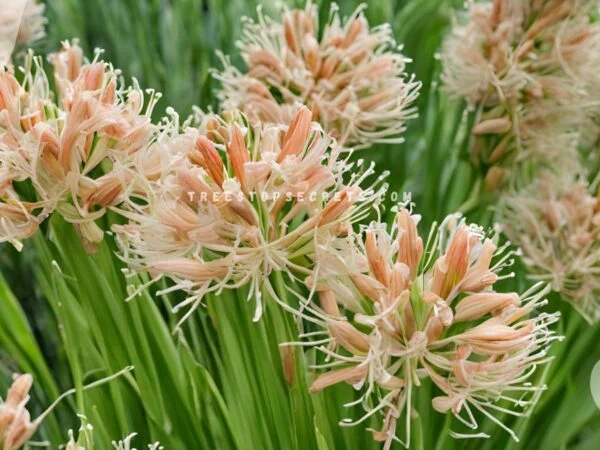
Second, the aesthetic appeal of the orchid flowers is remarkable. Their blooms are beautiful and come in various colors. The fragrance adds a pleasant aroma to any space.
Finally, these plants can improve home humidity and air quality. The moisture released by the vanilla bean plant can create a more comfortable environment. This is especially beneficial in dry climates or during winter months.
Light Requirements
Ideal Light Conditions
Vanilla orchids thrive in partial shade. This means placing them in a location that receives indirect sunlight. Strong, direct sunlight can harm these plants. Sheer curtains can help diffuse harsh light if needed. It's crucial to avoid direct afternoon sun exposure. The afternoon sun tends to be too intense and can scorch the leaves.
Signs of Too Much Light
Watch for signs of excessive light exposure. Leaf discoloration is one major indicator. Leaves may turn yellow or brown due to too much sun. Burning on the leaf edges is another clear sign. Stunted growth or wilting can also occur when the plant struggles with its light conditions. Regular monitoring of the plant's overall health is essential. Catching problems early helps maintain a healthy vanilla orchid.
Adjusting Light Exposure
Adjusting light exposure is vital for plant health. If your vanilla orchid shows signs of stress, consider moving it to a shadier spot. Gradual changes are best to avoid shocking the plant. Rotating the pot periodically also helps ensure even light distribution. This practice allows all sides of the plant to receive adequate light. If natural light is insufficient, consider using grow lights. These lights can provide the necessary light spectrum for growth.
Soil and Potting Needs
Best Soil Mix
A well-draining soil mix is crucial for vanilla orchids. A recommended mix includes equal parts of orchid bark and potting mix. This combination supports optimal drainage while providing essential nutrients. Using a well-draining medium helps prevent root rot, which can be fatal for the plant.
Adding perlite or charcoal enhances aeration in the soil. Perlite creates air pockets that allow roots to breathe. Charcoal can help absorb excess moisture and prevent fungal growth. Both materials contribute to a healthier environment for your vanilla orchid.
Choosing the Right Pot
Selecting the right pot is essential for healthy growth. Use a pot with drainage holes to allow excess water to escape. This feature prevents water from pooling at the bottom, reducing the risk of root rot.
As the vanilla orchid matures, it will need more space. Choose a larger pot to accommodate its growth over time. The material of the pot also matters. Clay pots retain moisture better than plastic ones, but they can dry out faster in hot weather. Consider these factors when choosing your orchid pot.
Repotting Tips
Repotting is necessary for maintaining plant health. The best time to repot is during the growing season in spring. This timing allows the plant to recover quickly from any stress caused by repotting.
Before placing the plant into fresh soil, gently loosen its roots. This step encourages new growth and helps the roots adapt to their new environment. After repotting, water the plant thoroughly. This action reduces transplant shock and helps settle the soil around the roots.
Watering Techniques
Proper Watering Schedule
Maintaining a consistent watering schedule is crucial for vanilla orchids. These plants thrive in moist conditions but can suffer from over-saturation. Check the top inch of the soil for dryness before adding more water. If it feels dry, it's time to water. Misting the plant regularly also helps. This method hydrates the air roots and keeps humidity levels up.
Watering should occur every 1-2 weeks, depending on temperature and humidity. During hot months, increase the frequency. In cooler months, reduce it slightly. Always ensure good drainage in the pot to prevent standing water. Excess moisture can lead to root rot.
Signs of Overwatering
Overwatering can harm your vanilla orchid significantly. Yellowing leaves are often the first sign. They may appear limp and unhealthy. Mushy roots indicate that the plant is drowning. Mold or fungus on the soil surface is another clear indicator of too much water.
If you notice these symptoms, reduce your watering frequency immediately. Allow the soil to dry out before watering again. Consider repotting if the roots are severely damaged. Choose fresh potting mix that drains well.
Signs of Underwatering
Underwatering can be just as harmful as overwatering. Wilting leaves signal that your orchid needs more water urgently. Dry soil indicates that it has not received enough moisture recently. The edges of leaves may become crispy, showing stress from lack of hydration.
Check for dry air conditions in your home that may contribute to underwatering. It's essential to maintain humidity levels around your orchid. Increase misting or use a humidity tray if necessary.
Finding the right balance in watering is key to keeping your vanilla orchid healthy. Make adjustments based on environmental conditions and observe how your plant responds.
Temperature and Humidity
Optimal Temperature Range
Keep temperatures between 60 to 70 degrees Fahrenheit at night. This range is crucial for the vanilla orchid's health. Daytime temperatures should be maintained between 80 to 95 degrees Fahrenheit. These warm conditions mimic the plant's native climate. Protect the plant from frost and extreme temperature fluctuations. Sudden changes can stress the plant, leading to poor growth or damage.
Maintaining Humidity Levels
Use a humidifier or a pebble tray to maintain high humidity around the vanilla orchid. This helps create a moist environment that encourages healthy growth. Regular misting also increases moisture levels in the air. Aim for humidity levels around 50 to 70 percent. Good air circulation is essential to prevent fungal issues. Stagnant air can lead to diseases that harm the plant.
Seasonal Adjustments
Adjust watering and humidity levels based on seasonal changes. During summer, higher temperatures may require more frequent watering. In winter, monitor temperature fluctuations closely. The cooler months can dry out the air, so check humidity levels regularly. Provide additional light during shorter days in winter. This helps the plant continue photosynthesis effectively.
Fertilizing Practices
Best Fertilizers to Use
Using a balanced orchid fertilizer is essential for the health of vanilla orchids. These fertilizers are specifically formulated to meet the unique needs of orchids. They contain the right mix of nutrients that promote healthy growth and blooms.
Organic options can also be beneficial. Fish emulsion provides nitrogen, while seaweed extract offers trace minerals. Both options boost nutrient levels naturally. Always follow the manufacturer's instructions for application rates. This ensures that the plants receive adequate nutrition without overloading them.
Fertilizing Schedule
Fertilizing every two weeks is advisable during the active growing season of spring and summer. This period is crucial as plants focus on growing and producing blooms. As temperatures rise and humidity increases, orchids thrive with regular feeding.
In fall and winter, reduce fertilization frequency. The cooler temperatures slow down growth, making less fertilizer necessary. Diluting fertilizer is important to avoid root burn. A weak solution helps prevent damage while still providing nutrients.
Avoiding Over-Fertilization
Over-fertilization can harm vanilla orchids. Signs include leaf burn or salt buildup in the soil. Yellowing leaves may also indicate too much fertilizer. If these signs appear, flushing the soil with water can help remove excess nutrients.
Maintaining a consistent fertilization schedule is key to preventing issues. Stick to the recommended intervals and dilution rates. Regular monitoring of plant health will guide adjustments in care.
Pruning and Training
When to Prune
Pruning the vanilla orchid is crucial for its health. After the flowering period is the best time to prune. This timing allows the plant to recover and encourages new growth. Removing dead or damaged leaves helps maintain overall plant health. It also prevents disease from spreading. Timing is essential. If you prune at the wrong moment, you may disrupt the plant's growth cycle.
How to Prune Correctly
Using clean, sharp scissors is important for effective pruning. Precision matters when making cuts on the vanilla orchid. Cut just above a node to promote healthy regrowth. This method encourages the plant to produce new shoots. Remove only a small portion of the plant at a time. Over-pruning can stress the plant, leading to poor growth.
Training for Better Growth
Training your vanilla orchid supports better growth. A trellis or support structure can guide the vine as it grows. Tying the plant gently to this support encourages upward growth. Regular adjustments are necessary as the plant matures. This practice ensures that the vine does not become tangled or heavy.
Proper care through pruning and training enhances your vanilla orchid's health and productivity. Following these guidelines will lead to a thriving plant.
Propagation Methods
Propagating from Cuttings
Select healthy stems for propagation during the growing season. This ensures better chances of success. Use a sharp, clean knife to take cuttings, ideally around six inches long.
Apply rooting hormone to the cut ends. This product encourages root development and helps the cuttings thrive. Place the cuttings in a pot filled with a well-draining mix. Keep them in a humid environment until roots form. A plastic bag or humidity dome can help maintain moisture.
Seed Propagation Tips
Collect seeds from mature vanilla pods when they turn brown. This is usually late in the season, around September to October. Open the pods carefully to extract the tiny seeds inside.
Use sterile media for planting seeds. This prevents diseases that could harm young plants. Mix equal parts of peat moss and perlite for a suitable medium. Plant the seeds about one inch apart in small containers.
Germination takes time and patience. Seeds may take several months to sprout. Ensure consistent moisture without overwatering. Maintain warmth and humidity to support germination.
Common Propagation Mistakes
Overwatering is a frequent mistake made by many growers. It can lead to root rot, which damages or kills plants. Monitor soil moisture regularly and allow it to dry slightly between waterings.
Newly propagated plants need care regarding sunlight exposure. Direct sunlight can scorch delicate leaves and hinder growth. Instead, place them in bright, indirect light until they establish themselves.
Do not rush the acclimatization process for cuttings or seedlings. Gradually introduce them to outdoor conditions if grown indoors. Sudden changes can cause stress and slow down growth.
Common Pests and Diseases
Identifying Common Pests
Pests can harm vanilla orchids. Common pests include mealybugs, aphids, and spider mites. Mealybugs appear as small white cottony masses on leaves and stems. Aphids are tiny green or black insects that cluster on new growth. Spider mites leave fine webbing on the plant.
Regular inspections help catch infestations early. Check the undersides of leaves and along stems for these pests. Early detection is crucial. It allows for quick action, reducing damage to your plant.
Preventing Plant Diseases
Preventing diseases is essential for healthy vanilla orchids. Proper watering keeps plants safe from fungal infections. Overwatering can lead to root rot, a common issue in orchids. Aim for consistent humidity levels around 50-70%.
Good air circulation also helps prevent diseases. Space your plants well to allow airflow. Avoid overcrowding them in pots or trays. Using sterilized tools when pruning or repotting reduces contamination risks. Clean tools prevent the spread of pathogens.
Treating Infections
Infections may show symptoms like discoloration or unusual growths on your orchids. Yellowing leaves or spots can indicate a problem. If you notice these signs, act quickly.
Using fungicides or insecticides can help treat infections effectively. Choose products labeled for use on orchids. Follow the instructions carefully for safety and effectiveness.
Isolating infected plants is another important step. This prevents the spread of pests and diseases to healthy plants nearby. Quarantine any new plants before introducing them to your collection.
Final Remarks
Caring for your vanilla orchid plant is a rewarding journey. By understanding its light, soil, watering, and temperature needs, you create an ideal environment for growth. Proper pruning and pest management ensure your plant thrives, while effective propagation methods allow you to expand your collection.
Now that you're equipped with the essentials of vanilla orchid care, it's time to put your knowledge into action. Start nurturing your plant today and watch it flourish. Dive deeper into this fascinating world of orchids and share your experiences with fellow enthusiasts. Happy gardening!
Frequently Asked Questions
What is the ideal light for a vanilla orchid?
Vanilla orchids thrive in bright, indirect sunlight. Place them near a window with filtered light to prevent leaf burn while promoting healthy growth.
How often should I water my vanilla orchid?
Water your vanilla orchid every 1-2 weeks, allowing the top inch of soil to dry out between waterings. Overwatering can lead to root rot.
What type of soil is best for vanilla orchids?
Use a well-draining potting mix, ideally one designed for orchids. A blend of bark, perlite, and sphagnum moss works well for their roots.
What temperature do vanilla orchids prefer?
Vanilla orchids prefer temperatures between 70°F to 85°F (21°C to 29°C) during the day and slightly cooler at night. Consistent warmth promotes growth.
How can I fertilize my vanilla orchid effectively?
Fertilize your vanilla orchid every 4-6 weeks during the growing season with a balanced liquid fertilizer diluted to half strength. This supports healthy growth.
What pests commonly affect vanilla orchids?
Common pests include aphids, mealybugs, and spider mites. Regularly inspect your plant and treat infestations promptly with insecticidal soap or neem oil.
How can I propagate my vanilla orchid?
Propagation can be done via cuttings or by planting aerial roots. Ensure cuttings have at least one node and keep them in a humid environment until rooted.
Image Source: Paid image from CANVA