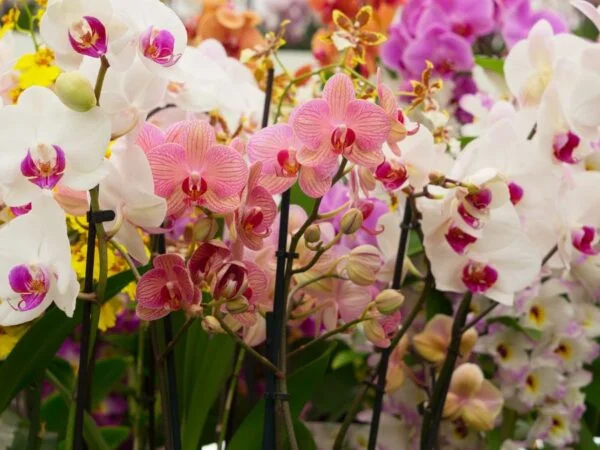
Are your orchids struggling to bloom, or are the roots bursting out of their container? It might be time for a repotting session. Knowing when and how to repot your Phalaenopsis orchids, aerial roots, and dead roots is crucial for their well-being. In this guide, we'll dive into the signs that indicate it's time for a new home, the best season for repotting, and the step-by-step process to ensure minimal stress on your delicate orchid plants. Whether you're a novice orchid enthusiast or a seasoned gardener looking to brush up on your knowledge, this comprehensive resource will equip you with all the essentials needed to care for your beloved Phalaenopsis orchids.
Key Takeaways
-
Timing is Key: Recognize the signs that indicate when your sympodial orchid needs repotting, such as overcrowded roots or a decomposed potting medium.
-
Before repotting, gather the necessary materials, including a new pot, fresh potting mix, and clay, to ensure a smooth process.
-
Gentle Handling: When removing the orchid from its current pot, handle it delicately to avoid damaging the roots, leaves, and medium.
-
Prune with Care: Trim any damaged or rotting roots and yellowing leaves to promote healthy growth in the new pot.
-
Choose the Right Mix: Select a well-draining potting medium suitable for orchids, ensuring proper aeration and moisture retention.
-
Step-by-Step Approach: Follow a systematic repotting process, including placing the orchid in the new pot and adding the potting mix, to provide an optimal environment for growth.
Recognizing Repotting Time
When to repot orchids phalaenopsis? It's essential to recognize the signs that indicate when your Phalaenopsis orchid needs repotting. One of the key indicators is overcrowded roots in the pot. When you notice the roots growing over the edge of the pot or experiencing stunted growth, it's likely time for a new container.
Moreover, bad potting media can also signal that it's time to repot your orchid. If you detect a moldy or sour smell emanating from the media, observe it breaking down into a muddy texture, or spot visible pests within it, these are clear signs that your Phalaenopsis requires fresh potting material.
Another crucial aspect to consider is water retention issues. Should you find that your potting mix is either excessively soggy and waterlogged or overly dry despite regular watering, this could be an indication that it's time to repot your orchid. If there is algae present on the surface of the potting mix, this may suggest poor drainage and call for immediate attention.
In addition to these factors, monitoring orchid health indicators plays a vital role in determining when to repot Phalaenopsis orchids. Keep an eye out for yellowing or browning leaves as well as drooping or wilting foliage; these are signs of distress and potential root problems. Furthermore, if there is a lack of new growth for an extended period despite providing proper care and favorable conditions during springtime (reference keyword), then it might be time to consider repotting your beloved Phalaenopsis orchid.
Preparing for Repotting
Preparation is key. Start by gathering the necessary materials, including a suitable pot size and type, fresh potting mix appropriate for orchids, and clean tools for repotting. The pot should be just large enough to accommodate the roots comfortably without leaving too much extra space.
For instance, a clear plastic or clay pot with drainage holes is ideal for allowing air circulation and preventing waterlogging. As for the potting mix, look for one specifically formulated for orchids that provides good drainage while retaining some moisture. Ensure that your tools are sterilized to prevent any potential spread of diseases during repotting.
Before proceeding with the actual repotting process, inspect your orchid thoroughly. Assess its overall health by checking the leaves and stems for any signs of damage or discoloration. Look out especially for pests such as aphids or mealybugs that may have taken residence on your plant.
Next, carefully examine the root condition through the drainage holes at the bottom of the current pot. Healthy roots should appear firm and greenish-white in color. However, if you notice mushy or discolored roots or detect a foul odor emanating from them, this could indicate root rot caused by overwatering or poor drainage.
Orchid Removal Process
The extraction process is crucial in ensuring the health and vitality of your phalaenopsis. Gently tapping the sides of the container helps loosen the roots, making it easier to slide the orchid out without causing damage. Once removed, it's essential to inspect and remove any old potting media clinging to the roots.
Root combing plays a significant role in maintaining your orchid's health during repotting. Carefully untangling compacted roots allows you to separate healthy ones from dead or decaying ones effectively. It's important to avoid using excessive force during this process as it can lead to root damage, impacting your orchid's ability to thrive.
Trimming Orchid Roots and Leaves
Identifying Dead Parts
When repotting orchids phalaenopsis, it's crucial to identify the dead parts before trimming. Dead roots are often brown, mushy, or shriveled. They might emit a foul odor or feel brittle and hollow when touched.
Identifying dead leaves is equally important in this process. Look for discolored, withered leaves that may be yellowing or have dry tips. These signs indicate that the leaves are no longer healthy and should be considered for removal during repotting.
It's essential to inspect the entire plant thoroughly to ensure all dead parts are identified before proceeding with the trimming process.
Cutting Technique
Using sterilized shears or scissors is imperative. This helps prevent any potential spread of diseases or infections during the trimming process.
Trimming only the dead or damaged roots is vital to promote healthy growth post-repotting. Similarly, removing unhealthy leaves ensures that nutrients are directed towards healthier parts of the plant, aiding in its overall well-being.
Making clean cuts while trimming orchid roots and leaves is essential as jagged cuts can lead to further damage and hinder recovery post-repotting.
Potting Mix Essentials
When to repot orchids phalaenopsis depends on the potting mix. The right mix is crucial for their growth.
Choosing the Right Mix
The potting mix should have well-draining and aerated components. This ensures that excess water doesn't accumulate around the roots, preventing rot. It should retain moisture while allowing air circulation, striking a balance between wet and dry conditions. The pH levels of the mix are also important; orchids thrive in slightly acidic environments.
A good example of a suitable potting mix for phalaenopsis orchids includes bark chips or sphagnum moss as they provide excellent drainage and aeration. These materials also hold moisture without becoming waterlogged, promoting healthy root development.
Pot Preparation
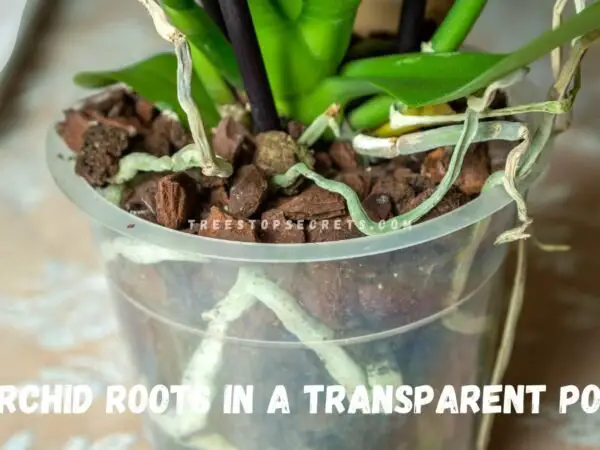
Before repotting your orchid, it's essential to prepare the new pot properly. Cleaning and sanitizing the new pot help eliminate any harmful pathogens that could harm your plant's delicate roots. Moreover, ensure that there are proper drainage holes in the new pot to prevent waterlogging which can lead to root rot.
Choosing a transparent pot for repotting offers an added advantage as it allows you to observe the health of your orchid's roots easily. By being able to see through the sides of the container, you can monitor root growth and detect any issues such as overcrowding or disease early on.
Repotting Phalaenopsis Orchids Step-by-Step
When repotting phalaenopsis orchids, it's crucial to ensure proper placement in the new pot. Begin by centering the orchid in the middle of the container. This allows for balanced growth and prevents overcrowding, which can lead to root rot.
Next, spread out the roots evenly within the pot. By doing so, you encourage healthy root development and prevent tangling or clumping of roots, which may impede nutrient absorption.
Properly placing your orchid also involves avoiding overcrowding of roots. This ensures that each root has ample space to grow and expand without competing with others for resources.
After placing your orchid in its new pot, gently tuck the potting mix around the roots. Be careful not to compact the media too tightly as this can restrict air circulation and water drainage essential for healthy root growth.
Avoid leaving any gaps within the potting mix as these spaces can lead to uneven moisture distribution and potentially cause certain parts of your orchid's roots to dry out.
If there are any remaining gaps after adding the initial layer of mix around your orchid, make sure to fill them with additional media. This step helps provide stability for your plant while preventing shifting during watering or handling.
Post-Repotting Care
Watering Needs
After repotting your phalaenopsis orchids, it's crucial to water them properly. Moistening the newly potted orchids lightly is essential to help them adjust to their new environment. Overwatering should be avoided immediately after repotting as it can lead to root rot and other issues. It's important to observe proper drainage after watering the repotted orchids. This ensures that excess water doesn't accumulate in the pot, which could harm the plant.
Positioning Orchids is another critical aspect of post-repotting care for phalaenopsis orchids. Finding suitable light conditions for specific types of orchids is vital for their growth and health after repotting. While they need light, direct sunlight exposure should be avoided initially after repotting as it can stress the plants during this delicate phase of adjustment. Maintaining consistent temperature and humidity levels is essential for ensuring that your newly repotted phalaenopsis orchids thrive in their new environment.
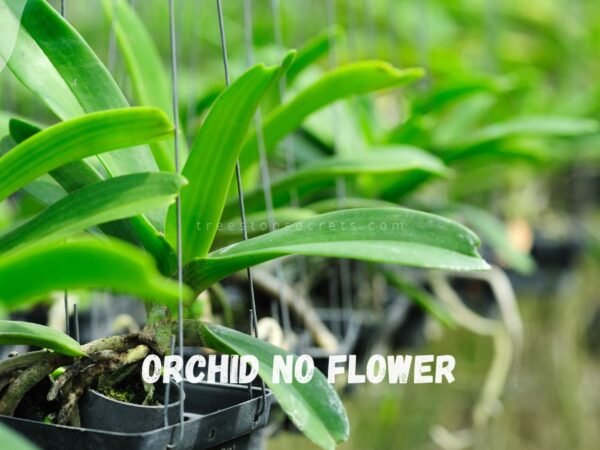
When to Expect Blooms
Bloom Cycle Understanding
Understanding the blooming cycle of your orchids is crucial for knowing when to expect blooms. Different species of orchids have their own typical flowering periods. For instance, Phalaenopsis orchids generally bloom once a year and can rebloom at various times throughout the year. Monitoring environmental factors such as light, temperature, and humidity also plays a significant role in predicting blooming periods. Orchids need adequate rest periods between bloom cycles to gather energy for future blooms.
A common mistake many gardeners make after repotting their Phalaenopsis orchids is expecting immediate blooms. However, it's important to give the plant time to acclimatize after being disturbed during repotting before anticipating flowers. This period allows the orchid to recover from any stress or shock caused by repotting and adjust to its new environment. Providing appropriate care during this post-repot recovery phase is essential for promoting healthy growth and future blooming potential.
Expert Tips for Successful Repotting
Avoiding Common Mistakes
When repotting orchids phalaenopsis, it's crucial to avoid over-potting by using excessively large containers. The roots of these plants prefer snug spaces, so a pot that is too big can lead to waterlogged soil and root rot. Refrain from using old or contaminated potting media as this can introduce diseases and pests to the plant. After repotting, regularly check for signs of stress or disease such as wilting leaves or unusual discoloration.
Another common mistake to avoid is repotting too frequently. Instead, establish a regular repotting schedule based on the growth of your orchid. This could be every one to two years depending on how fast the plant outgrows its container.
Long-term Orchid Health
To ensure long-term orchid health, monitor the roots regularly and adjust care accordingly. Healthy roots are typically green or white with silver tips, while unhealthy roots may appear brown, mushy, or have a foul odor.
Promoting overall plant vigor through proper repotting practices is essential for long-term orchid health. When you notice new growth emerging from the base of the plant, it's an indication that your orchid will soon need repotting.
Regularly inspecting your orchids' root systems will help you identify when they need attention.
Closing Thoughts
You've now mastered the art of repotting Phalaenopsis orchids! By recognizing the signs, preparing meticulously, and following the step-by-step process, you've set the stage for your orchid to thrive. Remember, a little extra care and attention during this critical period can make all the difference in how your orchid adapts to its new environment. Now, sit back and watch as your beautiful Phalaenopsis rewards your efforts with stunning blooms.
So, grab your gardening gloves and get ready to give your Phalaenopsis orchid the TLC it deserves. With your newfound knowledge, you're all set to tackle repotting like a pro. Happy repotting!
Frequently Asked Questions
When is the best time to repot my Phalaenopsis orchid?
The best time to repot your Phalaenopsis orchid is when you notice overcrowded roots or when the potting mix has broken down. Typically, this occurs every 1-2 years after flowering.
How do I know if my Phalaenopsis orchid needs repotting?
Check for crowded or overgrown roots escaping from the bottom of the pot, a soggy or deteriorating potting mix, and reduced water retention as signs that your Phalaenopsis orchid needs repotting.
What type of potting mix should I use when repotting my Phalaenopsis orchid?
Use a well-draining, coarse potting mix specifically designed for epiphytic orchids like Phalaenopsis. A blend of bark, sphagnum moss, and perlite provides excellent air circulation and moisture retention for healthy root growth.
Should I trim the roots and leaves of my Phalaenopsis orchid during repotting?
Trim only damaged or rotting roots using sterilized scissors. Avoid trimming healthy roots unless necessary. As for leaves, trim any yellowing or dead ones but leave healthy foliage intact to support photosynthesis and energy production.
After repotting my Phalaenopsis orchid, how should I care for it?
After repotting your Phalaenopsis orchid, place it in a warm location with indirect sunlight. Water sparingly until new root growth is established to prevent root rot. Resume regular watering once new growth appears.
Image Source: Paid image from CANVA