Did you know that old sprouty potatoes naturally sprout, indicating new growth? To plant potatoes, simply cut the sprouts and plant them. It's true! When potatoes start to develop fresh sprouts, it's a clear indication that they are entering their next stage of plant growth. Understanding the maturity of potatoes and the process of harvesting them can be incredibly valuable when making decisions about planting, storage, and dealing with old sprouty potatoes.
Knowing how long it takes for potatoes to sprout can help you plan your gardening or storage strategies more effectively, especially if you are interested in growing sprouty plants in the spring. Different potato varieties may have varying rates of sprouting, so understanding this process is essential for successful cultivation and storage of sprouts.

Potato sprouting is fascinating for those who love old sprouty potatoes. It is essential knowledge for any potato enthusiast looking to plant potatoes in the season. By understanding the natural process of planting and growing season potatoes, including new potatoes, and managing sprouts, you can improve your potato-growing efforts and maintain optimal storage conditions. So, if you've ever wondered about the timeline for potato sprouting or wanted insight into why some potatoes sprout faster than others, keep reading to learn about how long it takes for potato sprouts to appear and when you can plant them. It typically takes about 10-14 days for potato sprouts to emerge, and once they do, it's a sign that your potatoes are ready to be planted. After planting, it usually takes around 90-120 days for the potatoes to be ready for harvest.
Factors affecting potato sprouting time
Potatoes are a versatile and widely consumed vegetable that can be planted and harvested in numerous ways. With proper care, potatoes can sprout and grow into plants within a few days. However, before new potatoes make their way to our plates, they go through a natural process of sprouting on the potato plant. The time it takes to plant and harvest potatoes is influenced by various factors, including temperature, humidity levels, the age and condition of the tubers, and proper storage techniques. These factors can affect the number of days it takes for the potatoes to sprout during the season.
Temperature plays a crucial role in determining how quickly potatoes will sprout.
Potato tubers require specific soil temperatures to initiate the sprouting process during the planting season. The new potatoes are harvested once they have reached maturity. Generally, temperatures between 45°F (7°C) and 55°F (13°C) are considered ideal for encouraging sprouting in the potato plant. This is important for a successful harvest of season potatoes, which typically takes around a few days. In these cooler conditions, the growth hormones within the new potatoes are activated at an optimal rate, promoting healthy plant development in just a few days. However, if the temperature drops below the optimal range for sprouting new potatoes or rises too high, it can significantly impact the number of days it takes for the plant to sprout.
Humidity levels can also impact the speed at which potatoes start to sprout.
High humidity levels create a favorable environment for new potatoes to begin sprouting. The plant needs these conditions for the process to occur, which typically takes a few days. Moisture activates enzymes within the tubers that trigger growth. On the other hand, low humidity levels can slow down or even inhibit plant sprouting altogether. It's important to strike a balance when storing potatoes to maintain an appropriate level of moisture while preventing excess dampness that could lead to plant rotting.
The age and condition of the potato tubers can affect their sprouting time.
Newly harvested potatoes have higher dormancy periods compared to those that have been stored for longer durations. This is because the plant undergoes a natural process where it goes into a dormant state after being harvested. This is because the plant undergoes a natural process where it goes into a dormant state after being harvested. This means that freshly dug potatoes may take longer to sprout compared to ones purchased from a store or farmer's market. Damaged or bruised tubers tend to exhibit faster rates of sprouting due to increased exposure of growth-promoting enzymes.
Proper storage techniques can help delay or accelerate the onset of potato sprouting.
By employing suitable storage methods, you can control when your potatoes start to sprout. To delay sprouting, it is recommended to store potatoes in a cool, dark place with low humidity levels. This can be achieved by placing them in a paper bag or a well-ventilated container. Conversely, if you wish to accelerate the sprouting process for seed potatoes, storing them in warmer conditions with slightly higher humidity can help speed up the onset of sprouting.
Chitting potatoes for early planting
Chitting refers to the process of encouraging seed potatoes to produce short, sturdy shoots before planting them in the ground. This technique allows for earlier planting, which can result in an extended growing season for your potatoes.
By chitting your potatoes, you give each tuber a head start, ensuring more uniform growth and higher yields. The process involves selecting healthy seed potatoes and placing them in a cool, bright location with their eyes facing upwards. It's important to handle the potatoes carefully during this stage to avoid any damage that could hinder sprouting.
Chitting is especially beneficial if you live in an area with a shorter growing season or if you want to enjoy fresh homegrown potatoes as early as possible. By starting the chitting process several weeks before your intended planting date, you can get a jump-start on the growing season.
One advantage of chitted potatoes is their increased resistance to rotting in cold, wet soils. This can be particularly handy if you're dealing with frost-prone areas or heavy clay soil that tends to retain moisture. By allowing the potato tubers to develop strong shoots indoors before transferring them outside, you reduce the risk of losing plants due to unfavorable conditions.
To begin chitting your potatoes, follow these steps:
- Choose high-quality seed potatoes: Select disease-free and certified seed potatoes from reputable sources. This ensures that you start with healthy tubers that have a better chance of successful sprouting.
- Prepare a suitable location: Find a cool but well-lit spot where you can place your seed potatoes for chitting. A windowsill or greenhouse are great options. Ensure there is enough air circulation to prevent excess moisture buildup.
- Position the seed potatoes correctly: Place each potato with its most prominent eye facing upward on an egg carton or tray lined with newspaper or tissue paper. This helps support the tubers while allowing proper airflow around them.
- Wait for sprouting: Keep an eye on your chitting potatoes and wait for the shoots to emerge. This can take anywhere from a couple of weeks to a month, depending on the type of potato and environmental conditions.
Once the shoots have reached a suitable length (around 1-2 inches), your potatoes are ready for planting. Be sure to harden them off by gradually exposing them to outdoor conditions before transplanting into the ground.
Process of chitting potatoes
To successfully chit potatoes, you need to start by selecting healthy seed potatoes with good eyes. These eyes are the small indentations where shoots emerge. Look for seed potatoes that are firm and free from any signs of rot or disease. The healthier the seed potato, the better chances it has of sprouting successfully.
Once you have your seed potatoes ready, find a cool and well-lit area to begin the chitting process. Ideally, temperatures around 50°F (10°C) are suitable for encouraging sprouting. This could be a windowsill or a greenhouse, as long as it provides enough light without exposing the potatoes to direct sunlight.
Position the seed potatoes on trays or egg cartons with their eyes facing upwards. This allows proper air circulation between each tuber and prevents them from rotting due to excess moisture buildup. It also ensures that each potato gets equal access to light, promoting even growth.
Now comes the waiting game. Within a few weeks, you should start seeing short but strong shoots emerging from the eyes of your seed potatoes. These shoots indicate that your chitting process is successful and that your potatoes are ready for planting.
It's important to note that not all potato varieties require chitting before planting. Early varieties tend to benefit more from this process compared to maincrop varieties since they have a shorter growing season. However, chitting can still be done for maincrop varieties if desired.
Chitting helps jumpstart the growth process by allowing the potatoes to develop sturdy shoots before being planted in soil. This gives them a head start once they're in the ground and can lead to earlier harvests.
When it comes time to plant your sprouted potatoes, make sure you handle them with care so as not to damage the delicate shoots. Plant them in well-prepared soil with good drainage and cover them lightly with earth.
Ideal conditions for chitting potatoes
Creating the ideal conditions is crucial for a successful sprouting process. Whether you are an experienced gardener or a novice, understanding the right environment for chitting your seed potatoes is essential.
Choose a location that receives bright but indirect sunlight
To kickstart the chitting process, it's important to select a suitable location that provides bright but indirect sunlight. Placing your seed potatoes in an area with ample light exposure allows them to develop sturdy shoots without getting scorched by direct sunlight. A windowsill or greenhouse often makes an excellent spot for chitting.
Maintain consistent temperatures between 50°F and 60°F (10°C - 15°C)
Temperature plays a vital role in potato sprouting. During the chitting period, aim to maintain consistent temperatures between 50°F and 60°F (10°C - 15°C). This temperature range promotes healthy growth without encouraging excessive elongation of the shoots. Keeping your seed potatoes in such controlled conditions ensures they receive just the right amount of warmth for optimal development.
Ensure proper ventilation to prevent excessive moisture buildup
Proper ventilation is essential when chitting potatoes as it helps prevent excessive moisture buildup around the tubers. Excess moisture can lead to rotting and hinder successful sprouting. To ensure adequate airflow, choose a well-ventilated area where air can circulate freely around the seed potatoes. This will help maintain optimal humidity levels and reduce the risk of fungal diseases.
Avoid exposing the chitting potatoes to frost or extreme temperature fluctuations
Potatoes are sensitive to frost and extreme temperature fluctuations during their initial stages of growth. It is crucial to protect your chitting potatoes from such conditions as they can impede sprouting or damage emerging shoots. Make sure you place them in a location that is shielded from frost and away from areas prone to sudden temperature changes, such as drafty windows or doors.
Planting sprouted potatoes in the garden
There are a few key steps you should follow to ensure successful growth and a bountiful harvest. By waiting until the sprouts on your chitted potatoes are about 1-2 inches (2.5-5 cm) long, you can be confident that they are ready for planting.
To begin, prepare the soil by loosening it and incorporating organic matter for improved drainage and fertility. Potatoes thrive in well-draining soil that is rich in nutrients. By adding compost or well-rotted manure, you can create an ideal environment for your potato plants to grow.
Next, dig trenches or individual holes in the prepared soil, spacing them according to the recommended distance for your specific potato variety. This spacing ensures that each plant has enough room to develop without crowding its neighbors. As a general guideline, space rows about 30 inches (76 cm) apart with 12-15 inches (30-38 cm) between each seed potato.
Now it's time to plant your sprouted potatoes. Place each potato into the soil with the shoots facing upward, covering them with a layer of soil. Be gentle when handling the sprouts to avoid damaging them as they are delicate at this stage. The shoots need to be exposed above ground so they can receive sunlight and start growing.
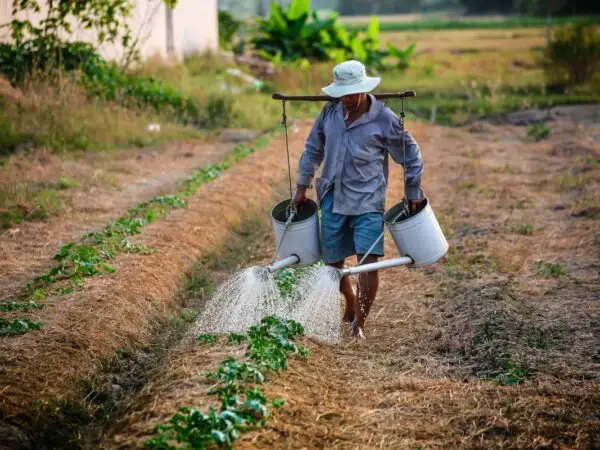
As your potato plants grow, make sure to provide adequate water and monitor their progress regularly. Keep an eye out for any signs of pests or diseases that may affect their health. Taking proactive measures such as applying organic pest control methods can help protect your crop throughout the growing season.
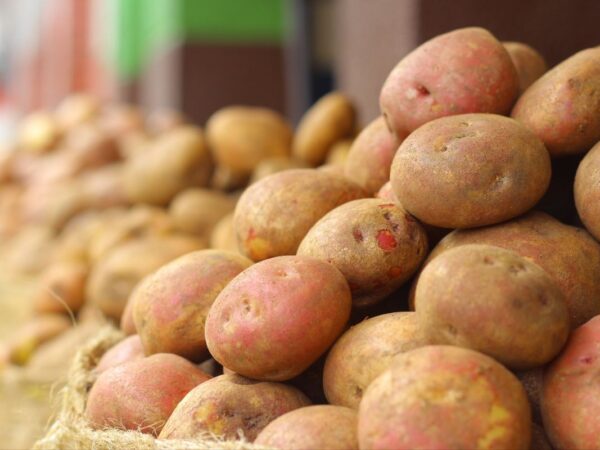
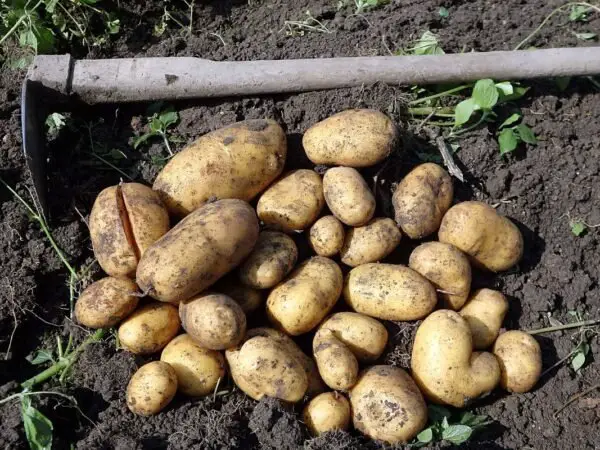
In terms of harvesting, new potatoes can typically be harvested about 10-12 weeks after planting when they have reached a desirable size. Gently dig around the base of the plant and carefully remove the tubers without causing damage. For mature potatoes, wait until the foliage has died back completely before harvesting. This ensures that the potatoes have reached their full size and are ready for storage or immediate consumption.
By following these steps and providing proper care, you can enjoy a successful potato harvest. Experiment with different potato varieties to discover which ones thrive in your garden and suit your taste preferences. Whether you choose to plant old sprouty potatoes or cut seed potato pieces, the joy of growing your own potatoes is both rewarding and delicious.
So, get ready to dig in and start planting those sprouted potatoes for a season filled with homegrown goodness!
Tips for successful potato planting
Watering potatoes
Proper watering is crucial. After planting your potatoes, make sure to water them thoroughly. This will help the tubers establish their roots in the soil. However, it's essential to strike a balance and avoid overwatering, as excessive moisture can lead to rotting.
Mulching for moisture conservation and weed suppression
To ensure your potato plants have adequate moisture and are protected from pesky weeds, consider using mulch. Applying a layer of organic material such as straw or wood chips around your potato plants can help conserve moisture in the soil by reducing evaporation. Moreover, mulch acts as a natural barrier against weeds, preventing them from competing with your potatoes for nutrients and sunlight.
Pest control: keeping an eye out for Colorado potato beetles
Colorado potato beetles can be a significant threat to your precious potato crop. These voracious pests feed on both leaves and stems of potato plants, potentially causing severe damage. Regular monitoring is key to catching any infestation early on. Inspect the undersides of leaves regularly for eggs or larvae and take appropriate measures if necessary.
If you spot Colorado potato beetles on your plants, there are several options available to control their population:
- Handpicking: Remove adult beetles and larvae manually from the plant.
- Neem oil spray: Apply neem oil solution according to package instructions.
- Insecticidal soap: Use insecticidal soap specifically formulated for controlling Colorado potato beetles.
- Biological controls: Consider introducing natural predators such as ladybugs or parasitic wasps that feed on these pests.
Remember that prevention is better than cure. Maintaining good garden hygiene by removing any decaying foliage or debris can help minimize pest populations.
Hilling up soil for tuber development
Hilling up soil around growing potato plants is a common practice among experienced gardeners. This technique involves gradually building up soil around the base of the plant as it grows taller. The benefits of hilling up include:
- Encouraging tuber development: As you mound soil around the stems, it provides additional space for potatoes to form and grow.
- Preventing greening: Exposing potato tubers to sunlight can cause them to turn green. By hilling up, you ensure that most of the tubers remain covered, minimizing the risk of greening.
To hill up your potato plants effectively, start by applying a layer of soil around six inches high when the plants reach about six inches in height. Repeat this process every few weeks until the plants stop growing or reach their maximum height.
By following these tips for successful potato planting, you'll increase your chances of a bountiful harvest while keeping pests at bay and ensuring optimal conditions for your precious spuds to sprout and thrive. Happy gardening!
Timeline and Best Practices for Potato Sprouting
Now that you know the factors affecting potato sprouting time and how to chit potatoes for early planting, it's time to put your knowledge into action. Remember, successful potato planting starts with proper chitting. Create an ideal environment for your potatoes by placing them in a cool, well-lit space and ensuring they have good ventilation. This process usually takes around 4-6 weeks, but keep an eye on your potatoes as they may sprout earlier or later depending on various factors.
Once your potatoes have sprouted, it's time to plant them in the garden. Choose a sunny spot with well-drained soil and prepare the ground by removing any weeds or debris. Dig trenches about 4 inches deep and place your sprouted potatoes in the trenches, making sure each one has enough space to grow. Cover them gently with soil and water thoroughly.
Remember, growing potatoes is a rewarding experience that requires patience and care. So roll up your sleeves, get ready to dig in the dirt, and enjoy the satisfaction of harvesting your own delicious homegrown spuds!
FAQs:
How often should I water my sprouted potatoes?
Watering frequency will depend on various factors such as weather conditions and soil moisture levels. As a general rule of thumb, aim to keep the soil consistently moist but not overly saturated. Check the moisture level regularly by sticking your finger into the soil near the plants' base – if it feels dry about an inch below the surface, it's time to water.
Can I chit store-bought potatoes?
Yes! You can definitely chit store-bought potatoes if you want to give them a head start before planting. Look for organic or locally sourced ones as they tend to have higher success rates due to their lower exposure to chemicals during storage.
What should I do if my potato plants become overcrowded?
If you notice that your potato plants are becoming overcrowded, it's essential to thin them out. Gently remove the weaker sprouts, leaving only the healthiest ones spaced about 12-15 inches apart. This will allow each plant to have enough space and resources to grow properly.
How long does it take for potatoes to mature after planting?
Potatoes typically take around 70-120 days to mature after planting, depending on the variety. Keep an eye on your plants and harvest them when the foliage turns yellow and starts to die back. Carefully dig up the tubers, brush off any excess soil, and let them cure in a cool, dark place for a week or two before enjoying your homegrown harvest.
Can I reuse sprouted potatoes from previous years?
While it may be tempting to reuse sprouted potatoes from previous years, it's generally not recommended. Over time, stored potatoes can lose vigor and become more susceptible to diseases. It's best to start with fresh seed potatoes each year for better results and healthier plants.
Image Source: Paid image from CANVA