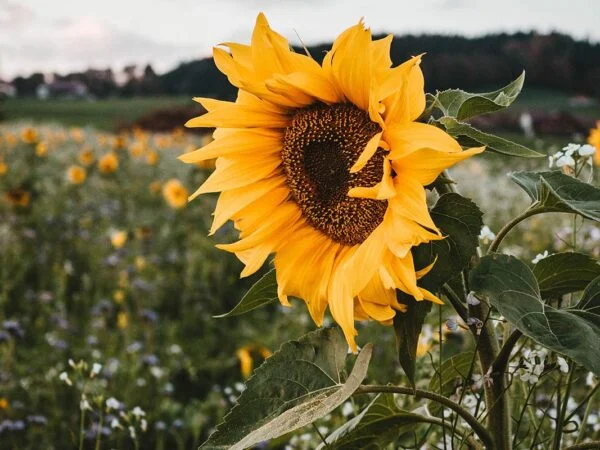
"Every project starts with a single step. This inspiring quote holds true even on a day dedicated to planting new inch-sized plants." If you're looking to fill your space and time with a fun and rewarding project, then look no further. Crop and harvest plants in minimal time and space. Growing sunflower microgreens in a jar is not only an enjoyable experience but also a cost-effective way to enjoy fresh greens right at home.
Sunflower microgreens are nutrient-rich plants that can be easily grown in any small area or room. They are a great crop to cultivate. With just a few simple steps, you can embark on this exciting journey of planting microgreens and watching your sunflower seeds transform into vibrant sprouts. These tiny plants can be a rewarding crop to grow. To start planting microgreens, all you need is a container, some sunflower seeds, a bit of medium, and proper light. These crops are small plants that can be easily grown at home. Whether you have a sunny windowsill or limited natural light, there are options to ensure successful growth of plants, such as sunflower microgreens. You can easily crop and harvest these nutritious greens for a fresh and healthy addition to your meals.
In this guide, we'll walk you through the process of growing sunflower microgreens in a pot from start to finish. So buckle up and get ready to discover the joy of cultivating your own nutritious sunflower microgreens crop at home.
Selecting Quality Sunflower Seeds
Selecting the right sunflower seeds is crucial. Let's dive into the key factors to consider when choosing your sunflower microgreens seeds. When selecting your plants, it is important to take into account the medium and place where they will be grown.
Organic vs Non-organic Seeds
Organic sunflower seeds are grown without the use of harmful pesticides and chemicals. These seeds can be used to grow microgreens in a medium such as a tray or pot. Opting for organic sunflower microgreen seeds ensures that your tray of sprouts will be free from any chemical residues that could potentially affect their growth or pose health risks. Supporting organic agriculture promotes sustainable farming practices and helps protect the environment. One way to do this is by growing sunflower microgreens in a tray.
On the other hand, non-organic sunflower seeds may contain traces of pesticides or chemical residues, which can hinder the sprouting process and compromise the overall quality of your microgreens tray. It is always advisable to prioritize organic options like sunflower microgreens for a healthier and more eco-friendly choice. When growing sunflower microgreens, using a tray is essential.
Pre-packaged Mix vs Single Variety
When selecting sunflower seeds for sprouting microgreens, you have two main options: pre-packaged mixes or single variety seeds. Each option offers its own unique advantages.
Pre-packaged mixes are a convenient choice as they provide a blend of different varieties, including sunflower microgreens, in one package. These microgreens mixes often include a combination of hulled sunflower seeds, black oil sunflowers, and other types of microgreens. By using pre-packaged mixes, you can enjoy an assortment of flavors and textures in your sunflower microgreens, adding variety to your meals.
On the other hand, if you prefer to focus on growing specific types of sunflower sprouts with distinct characteristics, single variety seeds are an excellent choice. This allows you to experiment with different varieties of sunflower microgreens individually and discover which ones suit your taste preferences best. Whether it's hulled sunflower seeds or black oil sunflowers specifically, single variety seeds give you more control over the outcome of your sprouts.
To summarize:
-
Choosing organic sunflower seeds ensures they are free from harmful pesticides.
-
Non-organic sunflower microgreen seeds may contain chemical residues that can affect the sprouting process.
-
Organic seeds are more environmentally friendly and support sustainable agriculture.
-
Pre-packaged mixes offer a variety of flavors and textures in one batch of sprouts.
-
Single variety seeds allow you to focus on growing specific types of sunflower sprouts.
Remember, the quality of your sunflower sprouts starts with selecting the right seeds. Take your time to consider whether organic or non-organic seeds align with your values, and decide between pre-packaged mixes or single variety seeds based on your taste preferences. With these considerations in mind, you'll be well on your way to growing delicious and nutritious sunflower sprouts in a jar.
Preparing Your Sprouting Jar
Choosing the Right Jar
To grow sunflower sprouts in a jar, it's important to select the right container. Opt for a wide-mouthed glass jar with a mesh lid. This type of jar allows proper air circulation while preventing any unwanted pests from getting in. Make sure the jar has enough capacity for the seeds to expand during the sprouting process. Clear jars are ideal as they allow you to easily monitor the growth progress of your sunflower sprouts.
Necessary Sprouting Equipment
In addition to a suitable jar, gather a few essential items to ensure successful sprouting. You'll need cheesecloth or mesh to cover the mouth of the jar, securing it with rubber bands. These materials act as a barrier, allowing water drainage while keeping the seeds inside. It's also helpful to have some water on hand for soaking the seeds before starting the sprouting process.
Consider using a tray or plate underneath your sprouting jar to catch any excess water that may drain out during rinsing and draining. This will help keep your countertop clean and tidy throughout the growing process. Having a spray bottle can be beneficial for misting your sprouts if they appear dry at any point during their growth.
Remember that these supplies are not only practical but also contribute to creating an ideal environment for your sunflower sprouts' development.
Now that you've prepared your sprouting jar and gathered all necessary equipment, you're ready to move on to the next step: soaking and rinsing your sunflower seeds.
The Soaking Process Explained
Duration of Soaking Sunflower Seeds
Soaking sunflower seeds is a crucial step in the sprouting process. To prepare your seeds for sprouting, soak them in water overnight or for up to 12 hours. This soaking period allows the seeds to absorb moisture and softens their outer shell, which aids in germination during the next steps.
Water Temperature and Quality
It's important to use room temperature filtered water. This ensures that the water is not too cold or too hot, providing an optimal environment for sprout growth. Using chlorinated tap water should be avoided as it may hinder seed germination or affect the taste of your sprouts. Consistently maintaining good water quality throughout the soaking process is essential for healthy and vibrant sprout development.
Now that you have a better understanding of how long to soak sunflower seeds and what kind of water to use, let's delve into why these factors are important.
Soaking sunflower seeds for an adequate amount of time allows them to rehydrate fully. This hydration process activates enzymes within the seed, triggering biochemical changes that initiate germination. The outer shell becomes softer through soaking, making it easier for roots to emerge during sprouting.
Using room temperature filtered water helps create an ideal environment for seed germination. Coldwater can shock the seeds, while hot water can damage their delicate structure. By using filtered water at room temperature, you provide a gentle and consistent environment that supports healthy seed development.
Avoiding chlorinated tap water is crucial because chlorine can have adverse effects on seed germination and overall sprout quality. Chlorine is often added to tap water as a disinfectant but can inhibit beneficial microorganisms necessary for successful sprouting. Chlorine may impart an unpleasant taste to your sunflower sprouts.
Consistency is key. By using filtered water throughout the soaking process, you eliminate potential variables that could hinder sprout growth. This ensures that your sunflower sprouts have the best chance of thriving and developing into flavorful additions to your meals.
To sum it up, soaking sunflower seeds for an appropriate duration and using room temperature filtered water are essential steps in growing sunflower sprouts in a jar. Soaking helps soften the outer shell, while proper water quality creates an optimal environment for seed germination. By following these guidelines, you'll be on your way to enjoying fresh and nutritious sunflower sprouts right from your own kitchen.
Step-By-Step Sprouting Guide
Draining and Rinsing Techniques
After soaking your sunflower seeds, it's important to drain any excess water from the jar. This helps prevent the growth of mold or bacteria, which can spoil your sprouts. Simply tilt the jar and let the water drain out through the mesh lid or cheesecloth.
To ensure optimal sprout development, make sure to rinse your sunflower seeds at least twice a day. Gently swirl them in fresh water, making sure all the seeds are coated. This rinsing process helps remove any residue and promotes healthy sprout growth. After rinsing, allow the water to drain completely before placing the jar back in its spot.
Proper drainage and regular rinsing are crucial for maintaining optimal moisture levels during the sprouting process. By removing excess water and providing fresh water regularly, you create an environment that supports healthy and vibrant sunflower sprouts.
Optimal Sprouting Conditions
To give your sunflower sprouts the best chance of success, it's essential to provide them with optimal growing conditions. Firstly, find a warm spot away from direct sunlight for your jar of sprouts. Sunlight can be too harsh for delicate sprouts, so keeping them in a warm but shaded area is ideal.
Air circulation is also important for successful sprouting. To ensure proper airflow around your jar, use a mesh lid or cover it with cheesecloth secured with a rubber band. This allows air to circulate freely while preventing dust or insects from entering.
Maintaining a consistent temperature within a specific range is vital for successful sunflower sprouting. Aim for temperatures between 65°F and 75°F (18°C to 24°C). This range provides an ideal environment for seed germination and subsequent growth.
Remember that patience is key when growing sunflower sprouts in a jar. It may take around 7-10 days for your sprouts to reach their desired length. During this time, make sure to maintain the optimal conditions we discussed earlier.
By following these steps and providing the right environment, you'll be well on your way to growing delicious and nutritious sunflower sprouts in a jar. Soak, drain, rinse, and provide optimal conditions - that's all it takes!
Monitoring Sunflower Sprout Growth
Recognizing Healthy Sprouts
Healthy sunflower sprouts are easy to spot. They have vibrant green leaves, a crisp texture, and show no signs of discoloration. These sprouts are the ones you want to consume as they indicate successful growth and optimal nutrition. On the other hand, it's crucial to avoid consuming sprouts that appear slimy or emit a foul smell. These are clear signs of spoilage and should be discarded immediately. Keep an eye out for any sprouts that display mold growth, as this can be harmful if ingested.
To ensure your sunflower sprouts remain healthy throughout their growth process, it's important to regularly inspect them. Take a close look at their appearance and texture every day or every few days. This way, you can catch any early signs of potential issues and address them promptly.
Dealing with Damping Off Disease
Damping off disease is a common problem when growing sunflower sprouts in jars. It refers to the wilting and rotting of seedlings due to fungal infection in the soil or growing medium. To prevent damping off disease from affecting your sunflower sprouts:
-
Ensure proper drainage: Poorly draining soil can create a favorable environment for fungal growth. Make sure your jar has adequate drainage holes or use a well-draining growing medium specifically designed for sprouting.
-
Avoid overwatering: Excessive moisture can contribute to damping off disease by creating damp conditions ideal for fungi to thrive in. Water your sunflower sprouts sparingly, ensuring that the soil remains slightly moist but not waterlogged.
If you do notice signs of damping off disease such as wilting or rotting seedlings, it's crucial to act quickly:
-
Remove affected sprouts: Carefully remove any affected sprouts from the jar immediately to prevent further spread of the disease.
-
Sterilize equipment: After removing the affected sprouts, it's important to sterilize your jar and any other equipment used in the sprouting process. This helps minimize the risk of disease transmission to future batches of sprouts.
By following these precautions and promptly addressing any signs of damping off disease, you can increase the chances of growing healthy sunflower sprouts in your jars.
Remember, monitoring the growth of your sunflower sprouts is essential for ensuring their overall health. Regular inspections allow you to spot any potential issues early on and take appropriate action. Taking preventive measures against damping off disease will help safeguard your sprouts from fungal infections. With proper care and attention, you'll be able to enjoy a bountiful harvest of fresh and nutritious sunflower sprouts.
Harvesting Your Sunflower Sprouts
When to Harvest for Best Flavor
Harvesting sunflower sprouts at the right time is crucial to ensure optimal flavor. It's best to wait until the sprouts reach a height of about 2 inches (5 cm) before harvesting. This allows them to develop their full flavor potential. If you wait too long, the sprouts may become bitter as they continue to mature. To determine if your sprouts are ready for harvest, give them a taste test. Trust your taste buds and harvest when they have reached the desired flavor.
Harvesting Equipment and Technique
To harvest your sunflower sprouts, you'll need a few simple tools and follow a specific technique. Start by using clean scissors or kitchen shears to cut the sprouts just above the soil level. Make sure your tools are clean to avoid any contamination that could affect the flavor and quality of your sprouts.
After harvesting, inspect your sunflower sprouts for any remaining seed hulls. Gently remove these hulls by hand or with a soft brush to ensure you're left with clean and fresh sprouts.
It's important not to harvest all of your sunflower sprouts at once unless you plan on using them immediately. Leave some behind so they can continue growing and provide you with an ongoing supply of fresh greens whenever needed.
Remember, growing sunflower sprouts in jars is an efficient way to have a continuous supply of nutrient-packed microgreens throughout the year without relying on outdoor space or direct sunlight.
Storing Sunflower Sprouts Effectively
Ideal Storage Conditions
To ensure the longevity and freshness of your harvested sunflower sprouts, it's crucial to store them properly. Start by finding a clean, airtight container that will fit in your refrigerator. This will help protect the sprouts from exposure to air and moisture, which can cause them to wilt or spoil.
To maintain the optimal moisture levels for your sunflower sprouts, place a damp paper towel at the bottom of the container before adding the sprouts. The dampness will provide a humid environment that keeps the sprouts crisp and fresh. Make sure not to oversaturate the paper towel as excess moisture can lead to mold growth.
Shelf Life Optimization
Sunflower sprouts are best enjoyed when they are fresh and packed with nutrients. To maximize their shelf life, it's recommended to consume them within 3 to 5 days after harvesting. This timeframe ensures that you're getting the most out of their nutritional benefits.
When storing sunflower sprouts in the refrigerator, be mindful of their surroundings. Avoid placing them near strong-smelling foods like onions or garlic, as they can easily absorb these odors, affecting their taste and aroma. It's also essential to regularly check on your stored sprouts for any signs of spoilage or decay. Discard any sprouts that appear slimy, discolored, or have an unpleasant odor.
By following these storage guidelines, you can prolong the freshness and quality of your sunflower sprouts, allowing you to enjoy them for an extended period.
Using Sunflower Sprouts in Recipes
Nutritional Benefits of Sunflower Seeds
Sunflower seeds are not only delicious but also packed with essential nutrients that can contribute to your overall health and well-being. These tiny powerhouses are rich in vitamins, minerals, healthy fats, and protein. One of the key nutrients found in sunflower seeds is vitamin E, which acts as a powerful antioxidant in the body. Antioxidants help protect our cells from damage caused by free radicals.
In addition to vitamin E, sunflower seeds contain other important minerals like magnesium and selenium. Magnesium plays a vital role in various bodily functions such as muscle and nerve function, while selenium supports the immune system and helps regulate thyroid function.
Incorporating sunflower sprouts into your diet is an excellent way to reap these nutritional benefits. Whether you're looking to boost your vitamin intake or add some extra protein to your meals, sunflower sprouts have got you covered.
Creative Culinary Ideas
Now that you know about the incredible nutritional benefits of sunflower sprouts let's explore some creative ways to incorporate them into your recipes:
-
Add Crunch and Flavor: Sunflower sprouts make a fantastic addition to salads, sandwiches, wraps, or smoothies. Their crisp texture adds a delightful crunch while their nutty flavor enhances the overall taste of your dish.
-
Garnish with Style: Take your soups or stir-fries to the next level by using sunflower sprouts as a garnish. Not only will they add visual appeal with their vibrant green color but they'll also provide an extra burst of freshness and taste.
-
Experiment Away: Don't be afraid to get creative in the kitchen! Try incorporating sunflower sprouts into various recipes for added nutrition. You can toss them into pasta dishes, sprinkle them on top of pizzas, or even blend them into homemade pesto for an interesting twist.
By incorporating sunflower sprouts into your recipes, you're not only adding a delicious and nutritious element to your meals but also boosting the overall health benefits of your dishes. So go ahead, get experimental, and let the sunflower sprouts shine in your culinary creations!
Continuing the Cycle with More Seeds
Additional Seed Varieties to Try Sprouting
Expand your sprouting repertoire by trying other seeds like broccoli, alfalfa, or radish. These seed varieties offer unique flavors and nutritional profiles when grown as sprouts. Just like sunflower sprouts, they are packed with vitamins, minerals, and enzymes that promote good health.
Adding different seed types to your sprouting routine adds diversity to your homegrown greens. You can experiment with combinations of seeds to create your own custom blends of sprouts. For example, mix broccoli and radish seeds for a spicy kick or combine alfalfa and sunflower seeds for a milder flavor.
Post-harvest Pot Reuse and Care
After harvesting your sunflower sprouts from the jar, it's important to clean the jars thoroughly before reusing them for another batch of sprouting. Residual moisture or organic matter can lead to mold or bacterial growth in subsequent batches.
To clean the jars effectively, rinse them with warm water and scrub away any residue using a brush or sponge. If you notice any stubborn stains or odors, you can add a few drops of dish soap to help remove them.
In addition to regular cleaning, it's also essential to sterilize the jars periodically to prevent contamination. You can do this by either soaking the jars in hot water for a few minutes or using a diluted bleach solution (1 part bleach to 10 parts water). Be sure to rinse the jars thoroughly after sterilization to remove any traces of bleach.
Proper care and maintenance of your sprouting pots ensure a hygienic environment for successful sprouting in subsequent batches. By following these steps, you can continue growing healthy and delicious sprouts without worrying about cross-contamination or spoilage.
Remember that each type of seed may have different requirements for optimal growth, so be sure to consult specific instructions for each variety you're trying. With a little experimentation and care, you'll soon become a pro at growing a variety of sprouts in jars!
Conclusion
Congratulations! You've now learned how to grow sunflower sprouts in a jar. By following the step-by-step guide provided, you'll be able to enjoy these nutritious and delicious sprouts right at home. From selecting quality sunflower seeds to harvesting and storing your sprouts effectively, you now have all the knowledge you need to successfully grow sunflower sprouts.
Now that you're equipped with this valuable information, it's time to put it into action. So grab your sprouting jar, some high-quality sunflower seeds, and get started on your journey to growing your own sunflower sprouts. Not only will you have a fresh and healthy addition to your meals, but you'll also experience the satisfaction of cultivating your own food. Happy sprouting!
FAQs
How long does it take for sunflower sprouts to grow in a jar?
Sunflower sprouts typically take about 7 to 10 days to grow in a jar. During this time, you'll need to provide them with adequate sunlight and water regularly to promote their growth.
Can I use any type of sunflower seeds for growing sprouts in a jar?
Yes, you can use any type of sunflower seeds for growing sprouts in a jar. However, it's recommended to use organic, untreated seeds specifically labeled for sprouting as they have a higher germination rate and are free from chemicals.
Do I need special equipment or materials to grow sunflower sprouts in a jar?
No, you don't need any special equipment or materials to grow sunflower sprouts in a jar. All you need is a clean glass jar, some organic sunflower seeds, water, and sunlight. It's an easy and cost-effective way to enjoy fresh sprouts at home.
How often should I water the sunflower sprouts in the jar?
You should water the sunflower sprouts in the jar once or twice daily. Make sure the soil is moist but not overly saturated. Using a spray bottle can help distribute the water evenly without disturbing the delicate roots.
Can I eat sunflower sprouts raw?
Yes, you can eat sunflower sprouts raw! They make a nutritious addition to salads, sandwiches, wraps, or smoothies. These crunchy greens are packed with vitamins and minerals like vitamin E, folate, and magnesium.
Image Source: Paid image from CANVA