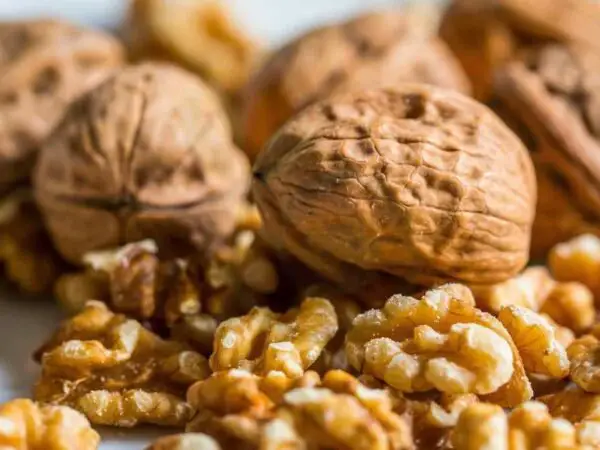
Did you know that black walnuts are not only delicious but also packed with nutrients like omega-3 fatty acids and antioxidants? Learning how to hull black walnuts can be a game-changer, allowing you to enjoy these nutritious nuts straight from your backyard. In this guide, we will walk you through the process of hulling black walnuts step by step, so you can easily access the tasty treasure hidden inside these tough shells.
Key Takeaways
- Identify the Right Time: Harvest black walnuts when they are ready, usually in the fall when the outer husk turns dark and starts to split.
- Master Harvesting Techniques: Use gloves and proper tools to gather black walnuts from the ground while avoiding any moldy or rotten ones.
- Efficient Hulling Method: Remove the outer husk by wearing gloves and using a hard surface like a concrete floor to crack them open.
- Optimal Drying Process: Dry the hulled walnuts thoroughly in a well-ventilated area for a few weeks to prevent mold growth.
- Effective Cracking Techniques: Crack the dried walnuts using a hammer or nutcracker, ensuring not to damage the nut inside.
- Extract Nut Meat Carefully: Extract the nut meat by cracking the shell with a nutcracker and picking out the pieces, ensuring no shell fragments remain.
Identifying Harvest Time
Optimal Season
Harvest black walnuts in mid to late September. Choose the fall season for walnut harvesting. Consider the ideal time for walnut collection.
Signs of Ripeness
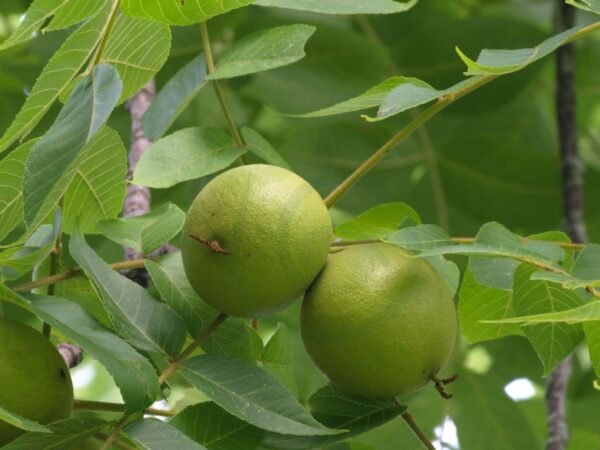
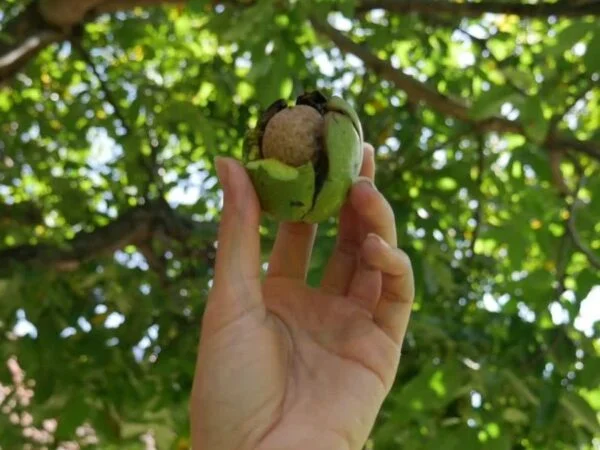
Check for hull denting with your thumb. Look for mature fruits ready for harvest. Identify the ripeness of walnuts by hull condition.
Harvesting Techniques
Gathering Nuts
Harvesting black walnuts involves picking or shaking the mature nuts from the tree. Once they fall to the ground, gather them promptly. It's crucial to assess nut quality before extensive harvesting to ensure freshness.
Safety Measures
When handling mature black walnuts, exercise caution due to their hard shells. Wear gloves to protect your hands from potential injuries during the harvesting process. Be cautious of falling walnuts while collecting them from the ground.
Hulling Black Walnuts
Preparation Steps
Hull walnuts immediately post-harvest to ensure freshness and ease of husk removal. Wash nuts thoroughly after hulling to eliminate any remaining debris or dirt. Sort nuts based on floating or sinking to identify viable ones for further processing.
Hull Removal Methods
Manual Techniques
- Consider stomping nuts underfoot for efficient hulling without the need for specialized tools.
- Explore manual methods like using an automobile wheel to apply pressure and crack the husks.
- Utilize traditional techniques such as rubbing the walnuts together to loosen the husks easily.
Tool Assistance
- Employ a hammer and nutcracker for precise cracking of hard walnut shells.
- Use a pick and pliers to extract kernels intact from the cracked shells effortlessly.
- Opt for tools specifically designed to assist in both hulling and cracking processes, ensuring efficiency.
Drying Process
Pre-drying Preparation
Dry nuts for two to three weeks post-washing. Place nuts in shallow layers on a wire screen to ensure proper airflow. Prepare nuts for drying in a well-ventilated area to prevent mold growth.
Ideal Conditions
Dry walnuts in a cool, dry environment to avoid spoilage. Opt for a shed or garage with good ventilation for the drying process. Ensure proper airflow during drying to achieve optimal results.
Time Frame
Allow nuts to dry for two to three weeks after washing. Consider the specific drying duration required for walnuts based on humidity levels. Plan the drying timeframe carefully to ensure thorough dehydration.
Cracking Techniques
Tools Needed
- Gather a hammer and nutcracker for cracking.
- Have a pick and pliers for kernel extraction.
- Prepare necessary tools for hulling and cracking.
Effective Methods
Traditional Cracking
Crack tough walnut shells with a hammer. Employ classic techniques for extracting kernels, using traditional methods.
Innovative Approaches
Explore soaking nuts before cracking for easier extraction. Try new methods to crack black walnut shells, experimenting with innovative cracking techniques.
Nut Meat Extraction
Separating Shells
To efficiently separate shells from nut meats, using a hammer or nutcracker is effective. Crack the shell carefully. Ensure a clean separation to avoid shell fragments in the nut meats. Extracting kernels without any shell contamination is crucial for quality.
Cleaning Nut Meats
Wash nuts thoroughly after hulling to remove any remaining debris or dirt. Cleaning the nut meats involves removing any leftover hull remnants and juices from the nuts. It's essential to ensure that the nut meats are completely free from any hull residues.
Preserving Quality
Storage Solutions
Store kernels in a plastic bag in the freezer to maintain freshness and prevent spoilage. This method helps preserve the quality of the black walnuts by keeping them at an optimal temperature. By storing the kernels properly, you can extend their shelf life and enjoy their rich flavor for longer periods.
Prevent walnut kernel oils from turning rancid by sealing them in airtight containers before placing them in the freezer. This step is crucial in maintaining the nutritional value and taste of the black walnuts. Proper storage is essential for ensuring that the kernels remain fresh and flavorful when used in various recipes.
Ensure proper storage conditions for nuts, such as walnut kernels, by keeping them away from moisture and direct sunlight. Moisture can cause mold growth, while exposure to sunlight can lead to nutrient loss. By following these storage guidelines, you can preserve the quality of black walnuts and enhance their taste when consumed.
Temperature Control
Maintain a consistent temperature for storage to prevent fluctuations that could impact the quality of black walnuts. Sudden changes in temperature can affect the texture and taste of the kernels, so it's important to store them in a controlled environment. By regulating the temperature, you can ensure that the walnuts retain their freshness.
Store walnuts in the freezer for freshness as cold temperatures help slow down any enzymatic activity that could lead to spoilage. Freezing black walnuts is an effective way to maintain their quality over time, especially if you plan on using them gradually. This method also helps preserve their natural flavor and aroma.
Control temperature to preserve walnut quality by monitoring storage conditions regularly. Make sure that the freezer maintains a constant temperature to prevent any damage to the black walnuts. By paying attention to temperature control, you can safeguard the overall quality of the kernels and enjoy their delicious taste whenever needed.
Safety and Cleanliness
Handling Tips
When handling black walnuts, it's essential to treat them delicately to prevent any damage. Wear gloves to protect your hands from stains, potential irritation caused by the hulls, and nuts. Implement proper techniques, such as using a nutcracker, to crack open the hard shell without harming the nut inside.
Cleanup Advice
After hulling black walnuts, make sure to clean up all hull debris promptly. Dispose of the remnants properly to avoid attracting pests or creating a mess in your surroundings. Maintain a clean workspace post-harvest to ensure hygiene and prevent any contamination.
Additional Tips
Flavor Enhancement
Enhance walnut flavor through proper storage. Store walnuts in the freezer to preserve their flavor and freshness. By doing so, you can maintain the enhanced taste of walnuts for a longer period.
Usage Ideas
Incorporate walnuts into various recipes to add a nutty crunch and rich flavor. Explore different ways to use cracked walnuts, such as topping salads or oatmeal. Experiment with walnut usage in cooking by adding them to baked goods like brownies or muffins.
Closing Thoughts
Congratulations on mastering the art of hulling black walnuts! By following the steps outlined, you're now equipped to enjoy the delicious nut meat from your harvest. Remember, timing is crucial for optimal results. Ensure you dry and store your nuts properly to maintain their quality and taste. Safety should always be a priority when working with these tough shells.
Now that you've learned the techniques for hulling black walnuts, why not share your newfound knowledge with friends and family? Encourage them to join in the fun of harvesting and processing these unique nuts. Get ready to savor the fruits of your labor and relish the satisfaction of enjoying home-hulled black walnuts. Happy hulling!
Frequently Asked Questions
How do I know when it's the right time to harvest black walnuts?
Black walnuts are ready for harvest when the outer husk turns a yellowish-green color and starts to split. This usually occurs in late summer or early fall. You can also shake the tree; if the nuts fall easily, they are ready.
How should I hull black walnuts effectively?
To hull black walnuts, wear gloves to avoid staining your hands. Use a hammer or nutcracker to crack the outer shell, then remove the nut meat inside. Soaking the nuts in a bucket of water for 24 hours can help soften the husks and make hulling easier.
What is the best way to dry black walnuts after harvesting?
After hulling, spread the black walnuts out in a single layer on a screen or mesh tray in a well-ventilated area. Allow them to dry for two weeks in a warm, dark place before storing them in an airtight container.
Remember that each step of this process will take time, but it-please don't lose any of its quality or flavor.
Place them on screens or racks so air can circine through every side of them. Leave enough space between each walnut and other nuts so that air can circulate around all sides.
We recommend placing them on baking sheets lined with parchment paper and turning them occasionally to ensure even drying. Once they are completely dry, store them in an airtight container at room temperature.
The drying process is very important as it determines how long your nuts will last and what their final texture will be like. To keep mold from forming during storage, make sure they are completely dried before sealing them up.
Store your dried fruits properly by placing them into an airtight container or ziplock bag once they have cooled down completely. Store them at room temperature away from direct sunlight or moisture.
It’s crucial that you allow your nuts to cool down completely before storing them so no condensation forms within your containers. If you see any signs of moisture forming inside, take everything out immediately and let it sit until completely dry again.
Remember not to put hot items directly into plastic bags as this could cause mold growth due to condensation.

Place the nuts into paper bags instead of plastic ones if you have high humidity levels where you live. at room temperature for about 15 minutes before transferring them into an air-tight container.

Remember that proper storage conditions are key here! It's better if you store these in an air-tight container rather than leaving them out where, say dust particles could settle on top of your precious cargo.
Keep reading for more information on how to preserve these delicious treats!
To prevent moisture from getting back into your food items after opening their packages, place uncooked rice grains inside with these stored foods; these will absorb any extra moisture present.
Make sure that there is no moisture left on top of your lids before sealing tightly; otherwise, mold could form during storage time.
In case you want only half of what has been made available by these instructions please consume within 1 week (if not refrigerated) or within 2 weeks (if refrigerated). If longer storage is needed then freeze it immediately after making sure all excess liquid has been removed from its packaging first!
To keep things fresh for longer periods without losing quality; always remember to follow good manufacturing practices while using any product. - Store under controlled temperatures - Keep away from direct sunlight - Protect from freezing - Maintain proper humidity levels - Avoid cross-contamination - Keep pests away - Store according to labeled instructions
Image Source: Paid image from CANVA

