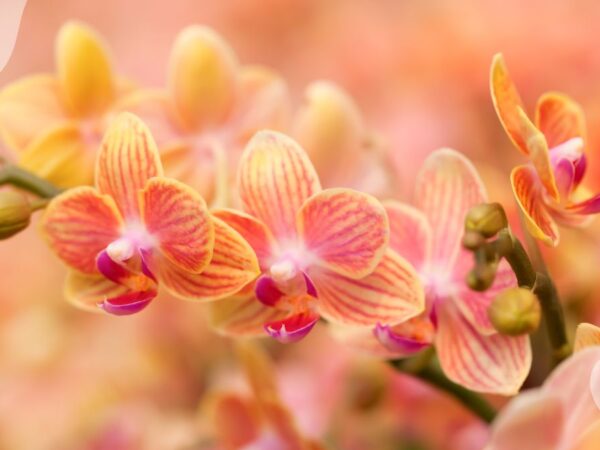
Repotting orchids can be a daunting task, especially when they are in full bloom. Many enthusiasts wonder if it's possible to repot their blooming orchids without causing harm. In this post, we'll delve into the delicate art of repotting orchids during their flowering stage and explore the dos and don'ts that will help your beloved blooms thrive.
Orchid care has evolved over time, with varying opinions on whether repotting during flowering is advisable. We'll uncover historical perspectives on this practice and provide expert insights to guide you through the process. Stay tuned as we debunk common myths and equip you with practical tips for successfully repotting blooming orchids while ensuring their continued growth and vibrancy.
Key Takeaways
-
Repot orchids when they are not in bloom to minimize stress and maximize chances of successful transition.
-
Look for signs such as overcrowded roots, yellowing leaves, or a soggy potting mix to recognize when orchids need repotting.
-
The best time to repot orchids is after they finish blooming and before the start of new growth.
-
Prepare for repotting by gathering necessary supplies like fresh potting mix, clean pots, pruning shears, and soil.
-
During the repotting process, carefully remove the orchid from its old pot, trim dead roots, and place it in a new pot with fresh potting medium.
-
Aftercare for repotted orchids involves providing proper watering, light, and humidity to support recovery and growth.
Repotting Orchids
Bloom Lifecycle
Repotting orchids is a crucial aspect of orchid care. It's necessary for the health of the roots and the pot, and ideally, it should be done every 1-2 years. The bloom lifecycle of an orchid plays a significant role in determining when to repot. While it's generally not recommended to repot when the orchid is blooming, there are exceptions.
During its blooming phase, the plant focuses its energy on producing stunning flowers rather than root growth. However, if you notice that your orchid has outgrown its pot or if the potting medium has broken down, leading to poor drainage or root health issues, then it may be necessary to repot even when in bloom.
Orchid Care
When an orchid is in bloom, it can last for several weeks, providing a beautiful display of colorful and delicate blooms. To ensure proper reblooming and overall health after this period, proper care of the pot becomes essential. This includes maintaining adequate light levels, humidity, and pot while avoiding overwatering.
Following the blooming phase comes a dormant period for most types of orchids. During this time, many pot species will enter into a resting state where they require less water and fertilizer. It's important to understand this cycle as part of orchid care because improper watering or disturbance during dormancy can lead to stress and affect future flowering.
Recognizing Repotting Signs
It's crucial to pay attention to the signs that indicate your orchid needs repotting. One of the key indicators is root health. Orchids require consistent attention, proper watering, and adequate light for healthy roots. Regularly inspecting the pot and roots for pests and diseases is essential.
The potting medium plays a vital role in an orchid's overall health. It should be firm, green, and provide good drainage in the pot to prevent root rot caused by overwatering. The potting medium also contributes significantly to the plant's ability to absorb nutrients and water efficiently.
Container size is another critical factor when considering repotting orchids. The right pot provides essential nutrients and aeration necessary for healthy growth. Common types of potting containers include bark and sphagnum moss, both of which offer excellent drainage properties.
Timing for Repotting
Timing is crucial. During the flowering phase, it's generally best to avoid repotting unless absolutely necessary. Orchids need time to establish themselves and should be allowed 1-2 years of growth before considering repotting.
Consider the orchid's root system size as well. If you notice that the roots are starting to outgrow their current container, it might be time for a larger pot. Adequate drainage is crucial during this phase as well, ensuring that excess water doesn't accumulate around the roots and pot.
During the dormancy period, specific care is needed when deciding whether to repot an orchid in bloom. It requires consistent light conditions, so any changes could impact its ability to thrive. Maintaining a stable temperature and humidity levels is essential during this stage.
Avoid moving the orchid pot excessively during its dormancy period since any sudden changes can cause stress and disrupt its blooming cycle.
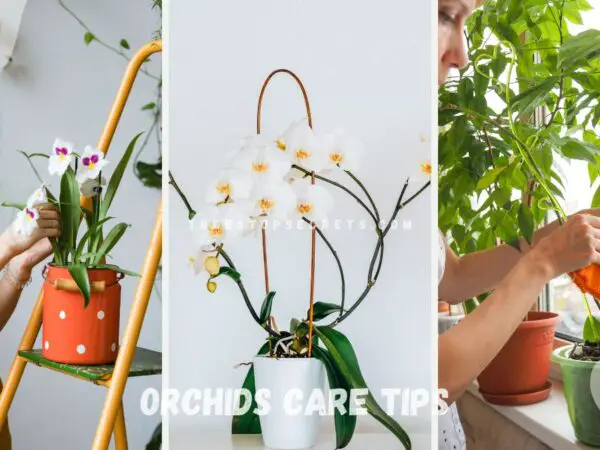
Preparing for Repotting
When repotting orchids that are in bloom, it's crucial to consider the specific needs of the plant during this phase. One important aspect to focus on is choosing the right soil. During the flowering phase, orchids require a different type of pot compared to when they are not blooming. This specialized soil in the pot helps support the orchid through its blooming cycle and prepares it for future growth.
Reduced watering and fertilization are typical practices during an orchid's flowering phase. The soil mix used when repotting should reflect these requirements by providing good drainage while retaining enough moisture to support the plant. An ideal mixture would consist of materials like bark chips, sphagnum moss, perlite, or pot. These components promote airflow around the roots and prevent waterlogging while still offering adequate hydration.
Selecting pots for repotting also plays a significant role in supporting a blooming orchid. The pot chosen must allow excess water to drain freely from the roots and provide ample space for air circulation. Orchids thrive in containers that offer good ventilation without causing root rot due to excessive moisture retention.
The Repotting Process
Orchid Handling
When repotting orchids that are in bloom, it's crucial to select pots with adequate drainage holes. This allows excess water to escape and prevents root rot. Consider using transparent pots, which enable you to monitor the health of the roots without disturbing them. Ensure that the new pot is large enough to accommodate potential growth, providing ample space for the roots and new shoots.
Transplanting orchids while they're blooming requires a delicate touch. When handling the plant, be sure to do so with care to avoid damaging any part of it. It's important not to touch the roots unnecessarily as this can cause stress or damage. Always use clean and sterilized tools when conducting maintenance on your orchid.
Transplanting Steps
Root Pruning
During repotting, if you notice any dead or decaying roots, these should be carefully trimmed away using sterile cutting tools. By doing this, you help prevent any further deterioration of root health and promote overall plant well-being. Applying cinnamon powder over these cut areas can also aid in preventing infections from developing.
Soil replacement is another essential step in repotting an orchid while it's still blooming. After trimming away unhealthy roots, replace the old soil with fresh potting mix specifically designed for orchids' needs.
Aftercare for Repotted Orchids
Watering Needs
Repotting orchids while in bloom is possible, but it requires careful aftercare to ensure the plants continue to thrive. Watering plays a crucial role in this process. After repotting, it's essential to water the orchid based on its specific needs. Typically, orchids should be repotted every 1-2 years to refresh the nutrients in the potting medium and provide ample space for new growth. This practice helps maintain optimal growing conditions for the plant.
When an orchid is blooming at the time of repotting, it's important to pay attention to its watering needs as well. The flowering period may influence how much water the plant requires during this time. As with any other time when watering your orchid, you must observe carefully and adjust according to its individual requirements.
Fertilization Tips
In addition to proper watering, fertilization also plays a critical role in caring for repotted blooming orchids. Following a regular but cautious fertilization schedule can help support healthy growth without overwhelming or damaging the plant's delicate root system.
Environmental factors such as temperature and humidity levels can impact how often you need to fertilize your newly potted orchid while it’s still blooming. It’s important not only that you follow a consistent feeding routine but also that you remain flexible enough to adapt based on these external influences.
After applying fertilizer, allow any excess water from subsequent watering sessions or rain showers to drain completely from the pot before giving more water again.
Troubleshooting Post-Repotting Issues
It's crucial to address any post-repotting issues promptly. Yellowing buds can be a common concern after repotting, indicating the need for proper care and attention. To combat this issue, using a balanced fertilizer formula is essential. Applying the fertilizer at quarter strength during active growth can provide the necessary nutrients without overwhelming the plant. However, it's important to reduce or stop fertilizing during dormancy to prevent overfeeding.
Wrinkled leaves on your orchid plants may signal stress or disease following repotting. This could be due to overwatering or insufficient light, both of which require immediate action. Checking the soil moisture level and ensuring adequate light exposure are vital steps in addressing this issue effectively. Promptly addressing these potential problems can help restore your orchid's health and vitality.
Black spots on orchid leaves are often indicative of dehydration or aging post-repotting. Adjusting the watering frequency based on the plant's needs is crucial in combating this issue effectively. Monitoring humidity levels within your orchid's environment is also essential for preventing black spots caused by dehydration.
Encouraging Reblooming
Ideal Temperature
When repotting orchids that are in bloom, it's crucial to consider the ideal temperature for their well-being. Orchids thrive best within a specific temperature range of 65-85°F (18-29°C). However, when repotting while they're blooming, you must ensure that the new environment maintains this optimal temperature range. Sudden changes or extreme fluctuations can stress the plants and affect their ability to rebloom successfully.
In addition to maintaining the right temperature during repotting, it's essential to be mindful of potential infections. Repotting orchids while in bloom may expose them to fungal or bacterial infections due to the disturbance of their root system. If you notice any signs of infection post-repotting, such as unusual discoloration or wilting leaves, it's vital to isolate the infected plants promptly. Once isolated, treating them with an appropriate fungicide or bactericide can help prevent further spread and promote recovery.
Light Requirements
Aside from addressing temperature concerns during repotting, paying attention to light requirements is equally important for orchids in bloom. While these plants typically thrive under moderate light conditions, they also benefit from a slight drop in temperature at night. This natural fluctuation mimics their native habitat and encourages healthy growth and blooming cycles.
When considering repotting your blooming orchids, protecting them from extreme shifts in light exposure is crucial for ensuring continued flowering success post-repotting. By maintaining consistent but gentle lighting conditions throughout the process and aftercare period following repotting activities will help minimize stress on your delicate blooms.
Orchid Health Maintenance
Clear Sticky Substance
Orchids can be repotted when in bloom, but it's essential to ensure their health during this process. Bright, indirect light is crucial for orchids, so if you're considering repotting while they're blooming, make sure the new location provides similar lighting conditions. Shielding them from direct midday sun is also important as it can cause damage to the delicate blooms and leaves.
Different orchid varieties may have specific light requirements, so it's essential to adjust according to each variety. When dealing with a clear sticky substance on your orchids' leaves or blooms, known as honeydew, it's often a sign of pests like aphids or scale insects. These pests can thrive in the warm and humid conditions that are ideal for growing orchids.
Leaf Drop Management
Leaf drop on an orchid plant can signal various issues including pest infestation such as aphids or scale insects. It could also indicate overwatering or underwatering problems. If you notice leaf drop on your blooming orchid plants, inspect them thoroughly for any signs of pests or other issues.
To manage leaf drop caused by pest infestation effectively without harming the blooming process of your orchid plants, consider using insecticidal soap treatment if necessary. This method helps control common pests like aphids and scales without damaging the delicate flowers and foliage of your beloved plants.
Enhancing Bloom Longevity
Maintaining the right humidity level is crucial for keeping your orchids healthy and promoting long-lasting blooms. Aim to keep the humidity between 40-60% to mimic their natural environment. You can achieve this by using humidifiers or placing trays filled with water and pebbles near your orchids. This will help prevent excessive leaf loss, ensuring that your orchids remain vibrant and blooming.
It's essential to be mindful of normal shedding of older leaves. As part of their natural growth cycle, orchids shed older leaves to make way for new growth. However, excessive leaf loss could indicate underlying issues such as inadequate watering or improper light exposure. By monitoring your plants closely, you can promptly address any issues that may arise, thus supporting the longevity of their blooms.
Using a urea-free fertilizer is another key aspect in maintaining healthy blooming orchids. Urea-free fertilizers provide essential nutrients without harming delicate roots or causing salt buildup in the potting medium. When repotting while in bloom, opt for a urea-free fertilizer specially formulated for orchids to support continuous flowering without disrupting their growth cycle.
Summary
You've now learned all about repotting orchids, from recognizing the signs to the aftercare and troubleshooting post-repotting issues. Remember, timing is crucial, and preparing adequately can make the process smoother for both you and your orchid. By following the right steps, you can encourage reblooming and ensure the longevity of your orchid's blooms.
Now it's time to put your newfound knowledge into action. Grab your gardening gloves and get ready to give your orchids the TLC they deserve. With the right approach, you'll soon see your orchids thriving and blooming beautifully. Happy repotting!
Frequently Asked Questions
Can I repot my orchid while it's in bloom?
Yes, you can repot your orchid while it's in bloom, but it may cause some stress to the plant. Try to avoid disturbing the flowers and roots as much as possible during the process. After repotting, provide extra care to help reduce any shock.
How do I know when my orchid needs repotting?
Look for signs such as overcrowded roots spilling over the pot or a breakdown of the potting medium. Also, if water runs straight through when watering or if there is foul-smelling decay, these are indications that your orchid needs repotting.
When is the best time to repot an orchid?
Ideally, after flowering and before new growth begins is a good time for most types of orchids. This timing allows them to recover from any disturbance before entering their active growing phase.
What should I do to prepare for repotting my orchid?
Get all necessary supplies ready – fresh potting mix suitable for your type of orchid, clean pots with drainage holes, and sterilized tools. Prepare a suitable workspace with good lighting and ventilation.
What should I do after I've finished repotting my orchid?
Aftercare involves placing your newly potted orchids in a location with appropriate light levels and humidity. Water sparingly at first and monitor closely for any signs of stress or complications post-repotting.
Image Source: Paid image from CANVA