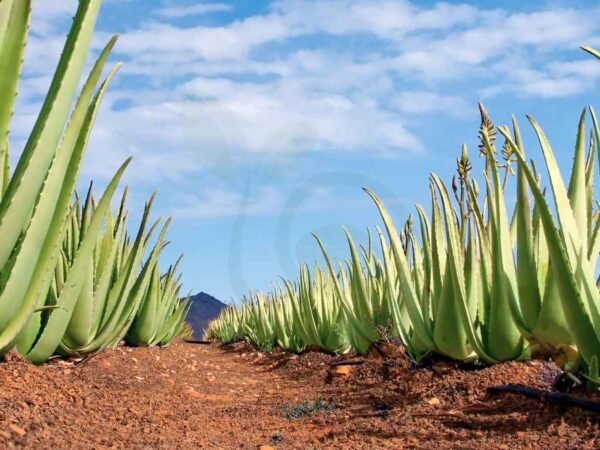
Did you know that aloe vera plants, succulents known for their healing properties, can easily perish if not cared for properly? If you're struggling to save a dying aloe vera plant, worry not about thorough watering, stem cuttings, roots, or pot! In this post, we will share practical tips to revive your ailing succulent back to health, including stem cuttings, thorough watering, and repotting. From identifying common issues like overwatering and inadequate sunlight to offering solutions such as adjusting watering schedules and repotting techniques, we've got you covered. With our expert advice, you'll soon be on your way to restoring your aloe vera plant's roots in its former vibrant glory.
Key Takeaways
- Recognize the Signs: Pay attention to wilting leaves, root rot, or discoloration as signs that your aloe vera plant in the pot needs help.
- Choose the Right Container: Select a well-draining pot to prevent waterlogging and root issues.
- Prepare for Repotting: Ensure the new container has enough space for roots and fresh, well-draining soil.
- Use Propagation Techniques: Consider propagating new plants from healthy offsets to rejuvenate your aloe vera collection.
- Water Wisely: Water sparingly and allow the soil to dry out between waterings to avoid overwatering.
- Provide Adequate Light: Place your aloe vera plant in a sunny spot to promote healthy growth and prevent etiolation.
- Prevent Pests and Diseases: Keep an eye out for common pests like mealybugs and scale, and treat promptly to maintain plant health.
- Monitor Plant Health: Regularly check your aloe vera plant for any changes in appearance or growth to address issues promptly.
Recognizing the Signs
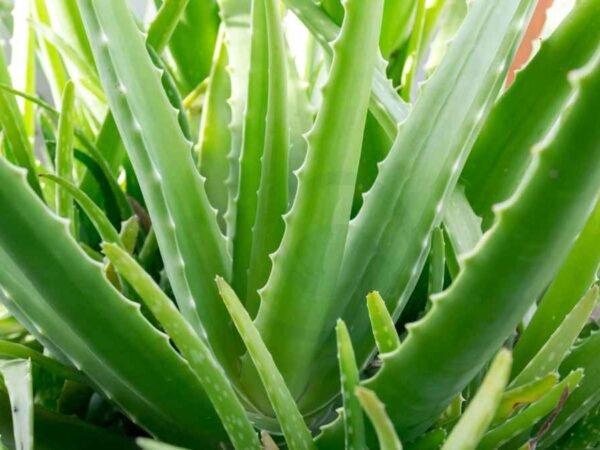
Unhealthy Symptoms
Aloe vera plants show wilting or drooping leaves when suffering. Yellow or brown discoloration indicates stress or disease. Mushy or soft spots signal overwatering.
Common Causes
Overwatering can lead to root rot, harming the plant. Inadequate sunlight affects aloe's growth. Small containers restrict aloe vera's roots and hinder its development.
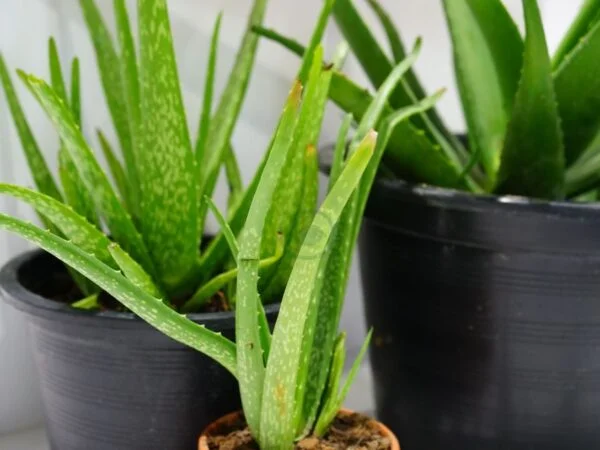
Choosing the Right Container
Container Size
When repotting a dying aloe vera plant, ensure the new container is slightly larger to accommodate growth. Opt for a pot that allows proper root development and drainage holes to prevent waterlogging.
Choosing a container that is just a bit bigger than the current one helps the plant thrive by offering more space for roots to spread out. This promotes healthier growth and prevents overcrowding, which can lead to root issues.
Drainage Importance
Emphasize the significance of drainage holes in containers when selecting a new pot for your aloe plant. Poor drainage can result in root rot, which is detrimental to the plant's health. Excess water accumulation can suffocate the roots, leading to decay.
Inadequate drainage poses a serious risk to aloe vera plants as they are susceptible to root rot when left sitting in waterlogged soil. Proper drainage ensures that excess water escapes, preventing damage caused by oversaturation.
Reusing Containers
When reusing old containers for your struggling aloe vera, it's crucial to sanitize them properly. Clean and disinfect reused pots with a mixture of mild soap and water or use a diluted bleach solution to eliminate any harmful bacteria.
Reusing containers after thorough cleaning not only saves money but also reduces waste. Consider using old containers as catch pots beneath newly potted aloe plants to collect excess water and avoid spillage.
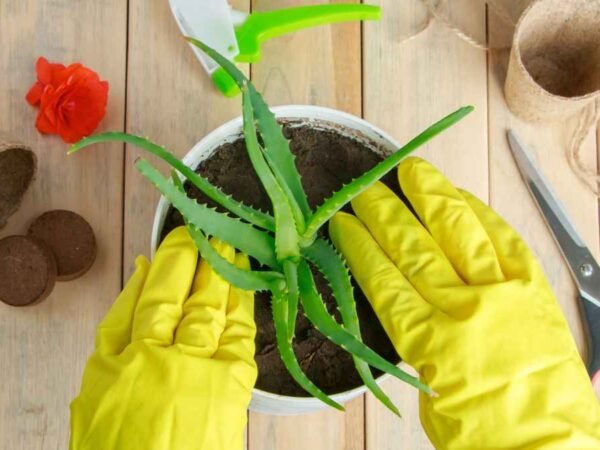
Preparing for Repotting
Selecting New Soil
When repotting a dying aloe vera plant, it's crucial to choose the right soil. Opt for a desert potting mix specifically designed for aloe plants. This mix mimics their natural habitat, ensuring optimal growth.
Selecting a soil mix that combines organic and inorganic materials is beneficial. Organic components provide essential nutrients, while inorganic materials enhance drainage, preventing root rot.
To support your aloe plant's health, ensure the soil provides proper nutrients and drainage. This balance is key to preventing waterlogging and nutrient deficiencies.
Pruning Roots
Before repotting your aloe vera plant, it's essential to inspect and prune its roots. Identify any unhealthy roots by looking for discoloration or mushy texture. Remove these roots carefully to promote new growth.
Pruning the roots before repotting helps stimulate healthy root development. By trimming damaged or decaying roots, you encourage the plant to focus its energy on growing new, strong roots.
The health of your plant's roots directly impacts its overall well-being. Ensuring a healthy root system promotes better water absorption and nutrient uptake, supporting the plant's vitality.
Pruning the Top
Trimming the top of your aloe vera plant is another critical step in reviving it. Remove any dead or damaged leaves using clean shears to prevent further stress on the plant. This process encourages new leaf growth.
Pruning the top of your aloe plant not only improves its appearance but also stimulates fresh growth. By cutting away dead or diseased parts, you allow space for healthy leaves to thrive.
Maintaining a healthy top is vital for your aloe vera plant's overall health. Regular pruning helps prevent disease spread, promotes air circulation, and encourages vigorous growth.
Propagation Techniques
Taking Cuttings
To propagate a dying aloe vera plant, taking cuttings is an effective method. Begin by selecting a healthy aloe plant with mature leaves. Using a sharp, clean knife, cut a leaf close to the base. Allow the cut end to dry and form calluses for a few days before planting it in well-draining soil. This process helps prevent rotting and promotes successful root development. Propagating through cuttings allows you to create new plants from the parent plant, ensuring the survival of your aloe vera.
Callusing Process
The callusing process is crucial for aloe cuttings as it helps prevent infections and promotes root growth. After taking the cuttings, leave them in a warm, dry place for about 2-3 days to develop calluses on the cut ends. These calluses act as protective layers that reduce the risk of rot when planted. They also stimulate root formation once the cutting is potted, increasing its chances of survival. Ensuring proper callusing significantly enhances the success rate of propagating aloe vera through cuttings.
Potting Cuttings
When potting cuttings, choose containers with drainage holes to prevent waterlogging. Fill the pot with well-draining cactus or succulent soil mix. Make a small hole in the soil using a pencil or stick and gently place the callused end of the cutting into it. Lightly pat down the soil around the cutting to secure it in place without compacting it too tightly. Water sparingly after potting and place the container in indirect sunlight to encourage growth. Proper potting ensures that the new plant has optimal conditions for rooting and growth.
Watering Practices
When to Water
Aloe vera plants require thorough watering only when the soil is completely dry. Signs of a thirsty aloe include wilting leaves and shriveling. To prevent overwatering, let the soil dry out between waterings, typically every 2-3 weeks. Adjust based on environmental conditions.
To maintain healthy aloe vera, it's crucial to understand the plant's watering needs. Overwatering can lead to root rot and ultimately kill the plant. A well-draining soil mix helps prevent water accumulation, promoting optimal growth. Establish a routine but be flexible based on seasonal changes.
- Signs of thirst: wilting leaves, shriveling
- Allow soil to dry between waterings
- Recommended watering schedule: every 2-3 weeks
How to Water
When watering your aloe plant, ensure you do so thoroughly but infrequently. Water at the base of the plant rather than from above to prevent moisture from accumulating in the rosette. This method mimics natural rainfall patterns for aloe plants.
Proper watering technique involves saturating the soil until excess water drains out of the pot's bottom holes. Avoid leaving standing water in the saucer as this can lead to root rot. For new propagations discussed earlier, follow similar watering guidelines tailored to their smaller size.
- Water at the base of the plant
- Prevent water accumulation in the rosette
- Mimic natural rainfall patterns
Ensuring Adequate Light
Light Requirements
Aloe vera plants thrive in bright sunlight, requiring at least six hours of direct light daily. Without adequate light, aloe plants may become leggy and lose their vibrant green color. Placing them near a sunny window is crucial for their growth.
Insufficient light can hinder the plant's ability to photosynthesize, leading to stunted growth and pale leaves. Aloe vera plants that do not receive enough light may struggle to produce the gel with its beneficial properties. To prevent this, ensure they are placed in areas with ample natural light.
For optimal growth, position aloe vera plants near south or west-facing windows where they can receive maximum sunlight exposure. If natural light is limited, consider using grow lights to supplement their light requirements indoors.
Adjusting Light Exposure
When transitioning aloe vera plants from low light conditions to brighter environments, it's essential to acclimate them gradually. Begin by placing the plant in an area with indirect sunlight for a few hours each day, gradually increasing the exposure over time.
Adjusting the light exposure too quickly can shock the plant, causing stress and potential damage. Sudden changes in light levels can lead to sunburn on the leaves or even sunscald, affecting the overall health of the plant. Slowly introducing them to more intense sunlight helps prevent such issues.
To acclimate indoor aloe vera plants, start by moving them closer to a well-lit window for short periods before extending their exposure gradually. Monitoring the plant's response and adjusting accordingly will help ensure a smooth transition without risking its health.
Preventing Pests and Diseases
Common Pests
Aloe vera plants are susceptible to common pests such as mealybugs, aphids, and spider mites. These pests can cause damage by feeding on the plant's sap, leading to wilting leaves and stunted growth. To identify pest infestations, look for sticky residue on the leaves or small webs underneath them. Check for tiny insects crawling on the plant.
Implementing natural pest control methods is beneficial for both the aloe plant and the environment. One effective method is using a mixture of water and mild dish soap to spray on the affected areas. This solution helps suffocate the pests without harming the plant. Another approach is introducing beneficial insects like ladybugs that feed on harmful pests.
- Natural pest control methods:
- Water and mild dish soap mixture
- Introducing beneficial insects like ladybugs
Disease Prevention
Preventive measures play a crucial role in safeguarding aloe vera plants against common diseases like root rot and leaf rot. Adequate ventilation is essential to prevent diseases as it helps maintain optimal air circulation around the plant, reducing humidity levels that promote fungal growth. Proper airflow also aids in drying out excess moisture in the soil, preventing conditions favorable for disease development.
Sanitation practices are vital in minimizing disease risks in aloe vera plants. Regularly clean your gardening tools before use to prevent transferring pathogens between plants. It's also advisable to remove dead or decaying leaves promptly to prevent fungal spores from spreading to healthy parts of the plant.
- Importance of ventilation for disease prevention:
- Maintains optimal air circulation
- Reduces humidity levels promoting fungal growth
Monitoring Plant Health
Growth Tracking
Aloe vera plants thrive when their growth is monitored consistently. By observing the plant's development over time, you can identify any potential issues early on. Look for signs of healthy growth, such as vibrant green leaves and steady increase in size. Documenting these changes can help in detecting any deviations from the norm.
- Regularly measure the plant's height and width to track its growth progress.
- Healthy aloe plants exhibit firm, plump leaves with a glossy texture.
- Any sudden changes in growth patterns may indicate underlying problems that need attention.
Adjustments and Care
When caring for a dying aloe vera plant, it's crucial to make necessary adjustments based on its response to treatments. If the plant shows signs of distress despite efforts, consider altering watering frequency or sunlight exposure. Consistent care and maintenance are key to reviving a struggling aloe plant.
- Tailor watering schedules according to the plant's moisture needs.
- Prune dead or yellowing leaves to promote new growth and overall health.
- Regularly inspect the plant for pests or diseases and take prompt action if detected.
Closing Thoughts
In caring for your aloe vera plant, you've learned to recognize signs of distress, choose the right container, repot effectively, propagate with finesse, water appropriately, provide ample light, prevent pests and diseases, and monitor its health. By mastering these aspects, you're well-equipped to revive a struggling aloe vera or ensure the thriving of a healthy one. Remember, consistency is key - keep an eye on your plant's needs and respond promptly to any issues that arise. Your dedication will be rewarded with a vibrant and flourishing aloe vera adding beauty to your space.
Take the knowledge gained here and put it into action. Your aloe vera plant will thank you with lush green leaves and robust growth. Embrace the role of a caring plant parent and watch as your efforts yield a rejuvenated and thriving botanical companion.
Frequently Asked Questions
How do I recognize signs of a dying aloe vera plant?
Aloe vera leaves turning brown or yellow, mushy stems, and stunted growth are signs of a dying plant.
What is the importance of choosing the right container for my aloe vera plant?
Choosing a well-draining pot with enough space for root growth is crucial to prevent waterlogging and root rot.
How should I prepare for repotting my aloe vera plant?
Prepare fresh well-draining soil mix, gently remove the plant from its current pot, inspect roots for damage, and place it in the new pot at the same depth.
What propagation techniques can I use to save my dying aloe vera plant?
You can propagate aloe vera through offsets (pups) or leaf cuttings to rejuvenate your struggling plant.
How can I ensure adequate light for my aloe vera plant?
Place your aloe vera in bright, indirect sunlight or near a window where it can receive at least 6 hours of sunlight daily. Rotate the plant occasionally for even light exposure.
Image Source: Paid image from CANVA