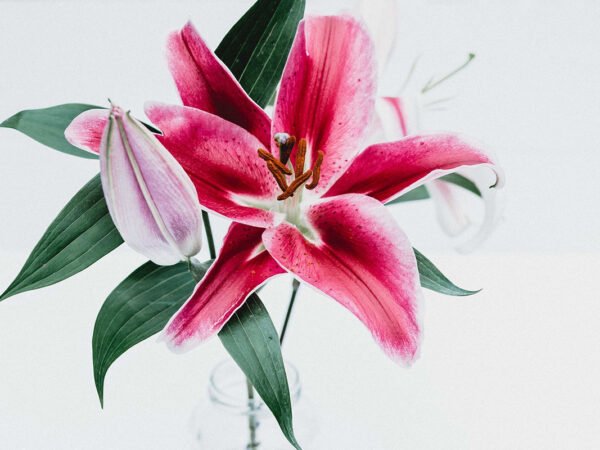
Did you know that there's a fragrant flower with captivating white flowers that symbolizes purity and new beginnings, making it the perfect choice for the Easter season? Enter the Easter Lily - a captivating plant native to Japan and Taiwan. With its trumpet-shaped white flowers and beautiful leaf, this fragrant lily, scientifically known as Lilium longiflorum, holds a special place in our hearts and gardens as one of the most beloved ones.
The fragrant white lilies take center stage during Easter, adorning churches, homes, and gardens all around the world. But what makes these elegant blooms so popular during this joyous holiday?
Read More:
- Easter Lily Indoor Care: Planting, Growing, and Tips
- Easter Lily Care: A Complete Guide
- Giant Lilies – Buy Orienpet Lily Bulbs and Uncover Their Beauty!
- Exploring the Unique Characteristics of Lily Leaves: A Comparative Analysis
The answer lies in the symbolism of the Easter Lily stem. The pure white petals of the Easter Lily represent purity, innocence, and hope - qualities closely associated with Easter's message of rebirth and renewal. As we celebrate the resurrection of Jesus Christ, these beautiful flowers remind us of the fresh start that comes with each new beginning. Potting and researching the Easter Lily in Bermuda adds to its significance.
Growing white lilies, such as Easter Lily plants, is a delightful experience for any gardener. Whether you choose to cultivate them from lily bulbs or purchase potted plants with blooming stems, their striking appearance will undoubtedly captivate your senses. Their fragrance fills the air with a sweet aroma that adds an extra touch of enchantment to any space, making them perfect for fall gardens in Bermuda.
Intriguingly enough, despite being native to Japan and Taiwan, the popularity of Easter Lilies has spread worldwide. Their ability to thrive in different climates has made them a beloved addition to gardens across continents. These beautiful flowers have a strong stem and can be grown in a pot. They are especially admired in the fall season.
So join us as we delve deeper into the fascinating world of Easter Lilies - from their origins in East Asia to their iconic presence during one of Christianity's most significant celebrations. Discover how these exquisite flowers continue to bring beauty and joy into our lives year after year.
Get ready for an uplifting journey filled with floral wonders, like the beautiful Easter lily plant!
History and Tradition of Easter Lily:
The Easter Lily, a symbol of purity and rebirth, has a rich history and deep-rooted traditions associated with it. Introduced to the United States in the late 1800s, this elegant flower quickly became intertwined with religious significance in Christianity. Let's delve into the captivating tale behind the Easter Lily and its enduring place in our celebrations.
In the late 1800s, a fervor for exotic plants swept across Europe. It was during this time that a Bermuda lily known as Lilium longiflorum found its way to our shores. The captivating beauty of this delicate white flower caught the attention of horticulturists, who were captivated by its enchanting fragrance and graceful appearance.
Religious Significance in Christianity
The Easter Lily holds immense religious importance within Christianity. It is believed to symbolize purity, divinity, and resurrection. The trumpet-shaped blooms represent the trumpet call that will awaken believers on Judgment Day according to Christian beliefs. This profound symbolism has made the Easter Lily an integral part of church decorations during Easter festivities.

Traditional Gift During Easter Celebrations
Since its arrival in America, the Easter Lily has become a traditional gift during Easter celebrations. Its pristine white petals are reminiscent of purity and new beginnings—a fitting representation for the resurrection of Jesus Christ celebrated on Easter Sunday. Many people exchange potted Easter Lilies as gifts or use them as centerpieces on their festive tables.
The tradition of gifting Easter Lilies can be traced back to early 1900s when they gained popularity across various states in America. Today, these beautiful flowers continue to be cherished tokens exchanged among friends and family members during this joyous season.
Commercial Cultivation in California and Oregon
Easter Lilies are primarily cultivated commercially in California and Oregon due to their favorable climate conditions for bulb production. These regions offer fertile soil, moderate temperatures, and an abundance of sunshine—ideal for nurturing the growth of these delicate flowers.
The cultivation process begins with carefully selected bulbs that are planted during late summer or early fall. The bulbs require a period of cold dormancy before they can sprout and bloom. After several months, the lilies start to emerge from the ground, their slender stems reaching towards the sky. Skilled growers meticulously tend to these plants, ensuring they receive adequate water, nutrients, and protection from pests.
As spring approaches, the Easter Lilies burst into full bloom, painting the fields with their radiant white blossoms. Once ready for harvest, these exquisite flowers are carefully hand-picked by skilled workers who ensure that only the finest specimens make their way to market.
Growing and Caring for Easter Lilies
Easter lilies are beautiful and fragrant flowers that symbolize purity, hope, and new beginnings. To ensure the healthy growth of these stunning blooms, it is best to grow them from bulbs rather than seeds. Bulbs provide a head start for the plant, allowing it to establish roots and develop new growth more efficiently.
When planting your Easter lily bulbs, make sure to choose a location with well-draining soil enriched with organic matter. This will provide the necessary nutrients for the plant's growth. These flowers thrive in full sun or partial shade, so select an area that receives ample sunlight during the day but also offers some relief from intense heat.
Regular watering is essential for the proper development of Easter lilies. However, it is crucial to strike a balance and avoid overwatering as this can lead to root rot and other issues. Aim to keep the soil consistently moist but not waterlogged. One way to determine if your lilies need watering is by checking the top inch of soil – if it feels dry, it's time to water them.
To further enhance the growth of your Easter lily plant, consider incorporating some additional care practices into your routine.
Fertilizing:
Easter lilies benefit from regular fertilization throughout their growing season. Use a balanced fertilizer with equal parts nitrogen (N), phosphorus (P), and potassium (K) to promote healthy foliage and abundant blooms. Apply the fertilizer according to package instructions or consult with local growers for specific recommendations.
Mulching:
Applying a layer of organic mulch around your Easter lilies helps retain moisture in the soil while preventing weed growth. It also acts as insulation during extreme temperatures, protecting the bulbs from frost during colder months.
Staking:
As Easter lilies grow taller, they may require staking for support. Use stakes or bamboo poles around each plant and gently tie them together using soft twine. This will prevent the stems from bending or breaking under the weight of the flowers.
Deadheading:
To encourage continuous blooming, it is essential to remove faded flowers promptly. This process, known as deadheading, redirects the plant's energy towards new growth and prevents seed production. Simply pinch off the spent blooms at their base, being careful not to damage any emerging buds or leaves.
With proper care and attention, your Easter lilies will reward you with a profusion of elegant blooms that fill your garden with their delightful fragrance. Remember to monitor their water needs, provide adequate sunlight or shade, and offer regular fertilization for optimal growth. By following these guidelines and incorporating additional care practices like mulching and staking, you can enjoy vibrant Easter lilies year after year.
So why wait? Start growing your own Easter lilies today and witness the beauty of these remarkable flowers unfold before your eyes. Happy gardening!
Sources:
- The Old Farmer's Almanac: How to Grow Lilies
- [University of Illinois Extension: Easter Lily](https://extension.illinois.edu/bulbs/easterlily.
Soil and Water Requirements for Easter Lilies
Well-draining soil prevents root rot
One of the key factors in successfully growing Easter lilies is ensuring that they are planted in well-draining soil. This is crucial because excessive moisture can lead to root rot, which can be detrimental to the health of the plant. When water sits around the roots for too long, it deprives them of oxygen and creates an environment where harmful pathogens can thrive.
To avoid this issue, it's important to choose a soil mix that allows water to drain freely. Sandy loam or loamy soil with good organic matter content is ideal for Easter lilies. These types of soils strike a balance between retaining enough moisture for the plants' needs while also allowing excess water to escape quickly.
If you have heavy clay soil, which tends to retain water, you can improve its drainage by incorporating organic matter such as compost or well-rotted manure into the planting area. This will help loosen up the soil and create channels through which excess water can flow away from the roots.
pH level between 6.3 and 6.8 is ideal for growth
The pH level of the soil plays a crucial role in determining how well Easter lilies grow. These plants prefer slightly acidic to neutral conditions, with a pH range between 6.3 and 6.8 being optimal.
Maintaining the right pH level ensures that essential nutrients are available to the plants in forms they can easily absorb. It also helps promote healthy root development and overall growth.
To test your soil's pH level, you can use a simple home testing kit or send a sample to a professional laboratory for more accurate results. If your soil's pH falls outside the desired range, you can make adjustments by adding amendments like lime or sulfur accordingly.

Water thoroughly but allow the soil to dry slightly between waterings
Proper watering practices are vital for Easter lilies to thrive. These plants require regular watering, but it's crucial to strike a balance and avoid overwatering.
When watering your Easter lilies, make sure to water thoroughly until the soil is evenly moist. This encourages deep root growth and helps the plant access nutrients from deeper layers of the soil.
However, it's equally important to allow the soil to dry slightly between waterings. Overly wet conditions can lead to root rot, as mentioned earlier. By allowing the top inch or so of soil to dry out before watering again, you prevent excessive moisture buildup and promote healthier root development.
Mulching helps retain moisture in the soil
Mulching around Easter lilies offers several benefits, including helping to retain moisture in the soil. By adding a layer of organic mulch such as shredded bark or compost around the base of the plants, you can reduce evaporation and slow down water loss from the soil surface.
Mulching also helps regulate soil temperature, keeping it cooler during hot summer months and warmer during colder periods. It suppresses weed growth, which competes with Easter lilies for nutrients and water.
When applying mulch, ensure that you leave a small gap around the stem of each plant to prevent excess moisture accumulation against its base. Apply a layer about 2-3 inches thick and replenish it as needed throughout the growing season.
Temperature and Humidity Conditions for Easter Lilies:
Ideal Temperatures for Thriving Easter Lilies
Easter lilies are a delicate and beautiful flower that requires specific temperature conditions to thrive. These stunning blooms prefer temperatures between 60°F (15°C) to 75°F (24°C). This temperature range provides the perfect balance for their growth and development.
When the temperature is too high, above 75°F (24°C), it can cause stress to the plant, leading to stunted growth and wilting flowers. On the other hand, temperatures below 60°F (15°C) may slow down their growth rate significantly.
Cooler Nights Promote Bud Formation
One interesting aspect of growing Easter lilies is that cooler nighttime temperatures actually promote bud formation. When the temperature drops during the night, it signals to the plant that it's time to prepare for blooming. This natural mechanism helps ensure a more abundant display of flowers.
If you're growing Easter lilies outdoors, you can take advantage of this by placing them in an area where they receive cooler temperatures at night. However, if you're cultivating them indoors or in a controlled environment, you may need to adjust the temperature manually or use fans or air conditioning units to mimic natural nighttime cooling.
Moderate Humidity Levels for Optimal Growth
In addition to temperature, humidity levels also play a crucial role in creating favorable conditions for Easter lilies. Aim for moderate humidity levels around 40% to 60%. This range provides adequate moisture without creating an excessively damp environment that could lead to fungal diseases or rot.
To maintain appropriate humidity levels, you can use various methods such as misting the leaves with water or placing trays filled with water near your plants. These techniques help increase humidity around your Easter lilies without causing waterlogged soil or excessive moisture on their foliage.
Protecting from Extreme Heat or Cold Conditions
While Easter lilies thrive in specific temperature and humidity conditions, it's important to protect them from extreme heat or cold. High temperatures above 75°F (24°C) can cause the flowers to wilt and shorten their lifespan. Similarly, freezing temperatures below 32°F (0°C) can damage the delicate blooms.
If you're growing Easter lilies outdoors, consider providing shade during hot summer days to shield them from scorching sun rays. On the other hand, during colder months or frosty nights, cover your plants with a protective layer such as a frost cloth or bring potted lilies indoors to safeguard them from freezing temperatures.
By maintaining optimal temperature and humidity conditions for your Easter lilies, you can ensure they grow healthy and produce a vibrant display of flowers. Remember to monitor the weather forecasts regularly and take appropriate measures to protect your plants from extreme conditions.
So there you have it! The ideal temperature range for thriving Easter lilies is between 60°F (15°C) to 75°F (24°C). Cooler nighttime temperatures promote bud formation, while moderate humidity levels around 40% to 60% create optimal growth conditions. Protecting these delicate flowers from extreme heat or cold will help them flourish and bring joy with their stunning blossoms.
Maximizing Bloom Length in Easter Lilies:
Adequate Sunlight for Vibrant Blooms
To ensure your Easter lilies produce vibrant and long-lasting blooms, providing them with adequate sunlight is crucial. These beautiful flowers thrive when exposed to at least six hours of direct sunlight each day. Placing them in a spot where they can bask in full sun will help maximize their bloom length.
When choosing the perfect location for your Easter lilies, consider areas that receive ample sunlight throughout the day. A south-facing window or a spot in your garden that isn't obstructed by shade from trees or buildings are ideal options. By allowing your lilies to soak up the sun's rays, you're providing them with the energy they need to produce healthy and abundant blooms.
Consistent Temperature for Optimal Growth
Maintaining a consistent temperature during the blooming period of your Easter lilies is another key factor in maximizing their bloom length. These flowers prefer temperatures between 60°F and 75°F (15°C to 24°C) during this critical phase.
Avoid placing your lilies near drafty windows or doors as sudden temperature fluctuations can negatively impact their growth. It's best to keep them away from heating vents or air conditioning units as well. By ensuring a stable and comfortable environment for your lilies, you'll encourage steady growth and prolonged blooming.
Prompt Removal of Faded Flowers
To promote continuous blooming and extend the lifespan of your Easter lilies' blooms, it is essential to promptly remove any faded flowers. This practice encourages the plant to redirect its energy towards producing new buds instead of wasting resources on spent blossoms.
Regularly inspect your plants for faded flowers and gently pinch or snip them off at their base using clean gardening shears or scissors. Be careful not to damage any emerging buds nearby. Removing faded flowers also helps maintain an aesthetically pleasing appearance while allowing fresh blooms to take center stage.
Balanced Fertilization for Healthy Growth
Providing your Easter lilies with the necessary nutrients is vital for their overall health and bloom length. Regularly applying a balanced fertilizer every two weeks during their active growth phase will ensure they receive the essential elements required for robust blooming.
When selecting a fertilizer, opt for one specifically formulated for flowering plants. These fertilizers typically contain a balanced ratio of nitrogen (N), phosphorus (P), and potassium (K) – often represented as NPK on the packaging. Following the manufacturer's instructions, apply the fertilizer to the soil around your lilies, taking care not to over-fertilize, as this can lead to burning or stunted growth.
Remember to water your lilies thoroughly after fertilizing to help distribute the nutrients evenly throughout the root zone. A good rule of thumb is to water until the top inch of soil feels moist. By providing your Easter lilies with regular and appropriate fertilization, you'll support healthy growth and encourage an abundance of beautiful blooms.
Incorporating these practices into your care routine will help you maximize bloom length in your Easter lilies. By ensuring adequate sunlight exposure, maintaining consistent temperatures, promptly removing faded flowers, and providing balanced fertilization, you'll be rewarded with stunning blooms that bring joy and beauty into your home or garden.
Transferring Easter Lilies to the Garden:
So, you've got your Easter lilies and now you're wondering how to transfer them to your garden. Well, fret not! I'm here to guide you through the process step by step. By following these instructions, you'll ensure that your beautiful lilies thrive in their new outdoor home.
Planting lily bulbs outdoors after all frost danger has passed
The first thing you need to keep in mind is timing. You should plant your Easter lilies outdoors only after all frost danger has passed. These delicate beauties can be quite sensitive to cold temperatures, so it's important to wait until early spring when the weather starts warming up.
Once the frost danger has passed, choose a suitable location in your garden for planting the lily bulbs. Make sure the area receives ample sunlight and has well-drained soil. Easter lilies prefer moist but not waterlogged soil, so good drainage is essential for their healthy growth.
Choosing a location with well-drained soil and good air circulation
When selecting a spot for your Easter lilies, pay attention to both soil quality and air circulation. These factors play a crucial role in ensuring that your plants thrive and produce vibrant blooms.
Easter lilies prefer loamy soil that retains moisture without becoming waterlogged. If your garden's soil is heavy clay or sandy, consider amending it with organic matter such as compost or well-rotted manure to improve its texture and drainage capabilities.
Good air circulation around the plants helps prevent diseases such as botrytis blight that can affect their overall health. Avoid planting them too close together or near structures that obstruct airflow. This will help keep your Easter lilies happy and disease-free.
Digging a hole deep enough so that bulbs are covered by about three inches of soil
Now let's get our hands dirty! When it comes time to plant your Easter lily bulbs, dig a hole that is deep enough to cover the bulbs with about three inches of soil. This depth ensures that the bulbs are adequately protected and allows for healthy root development.
Gently place the bulbs in the hole, making sure they are positioned upright with their growing tips facing upwards. If you're planting multiple bulbs, space them at least twelve inches apart to allow for proper growth and prevent overcrowding.
Spacing bulbs at least twelve inches apart for proper growth
Spacing is crucial. By giving each bulb enough room to grow, you'll encourage robust foliage and abundant blooms. Aim to space your lily bulbs at least twelve inches apart.
This spacing not only allows adequate air circulation but also prevents competition for nutrients and moisture in the soil. When plants are too close together, they can become stunted and susceptible to diseases or pests. So give your Easter lilies some breathing space, and they'll reward you with their stunning display of flowers.
Long-Term Care: Keeping Your Easter Lily Year to Year
After blooming, cut back the stem but leave foliage intact
Once your Easter lily has finished blooming, it's important to provide the right care to ensure its long-term survival. Start by cutting back the stem of the flower once it begins to fade. However, make sure to leave the foliage intact. The leaves play a crucial role in providing energy for the bulb to store and prepare for the next growing season.
By leaving the foliage untouched, you allow the plant to continue photosynthesizing and absorbing nutrients from sunlight. This process helps strengthen the bulb and promotes healthy growth in future seasons. So, resist the temptation to trim or remove any leaves until they turn yellow naturally.
Continue watering and fertilizing until leaves turn yellow
Watering and fertilizing are essential tasks during this post-blooming period. While your Easter lily is still green and vibrant, continue watering it regularly. Ensure that you provide enough water so that it reaches deep into the soil around the bulb.
Fertilization is equally important as it provides vital nutrients needed for healthy growth. Use a balanced fertilizer formulated specifically for bulbs or flowering plants. Follow the instructions on the package regarding dosage and frequency of application.
Maintain this regular watering and fertilization routine until you notice that the leaves start turning yellow. This change indicates that your Easter lily has entered its dormant phase.
Store bulbs in a cool, dry place during dormant period
During its dormant period, which typically lasts several weeks or months depending on your location, your Easter lily will need a cool and dry environment for optimal storage. Find a suitable place such as a basement or garage where temperatures remain consistently cool but don't dip below freezing.
Before storing them away, gently dig up each bulb from their planting location in either containers or garden beds. Shake off any excess soil but avoid washing the bulbs, as this can remove their protective outer layer. Place the bulbs in a breathable container such as a mesh bag or wooden crate to prevent moisture buildup.
Ensure that the storage area is well-ventilated and away from direct sunlight. Excessive heat or light exposure can cause damage to the bulbs and hinder their ability to produce flowers in the following season.
Replant bulbs in the garden or containers in early spring
As winter fades and spring approaches, it's time to bring your Easter lilies out of their dormant state and reintroduce them into your garden or containers. The ideal time for replanting is early spring when temperatures begin to rise, but frost is no longer a concern.
Choose a suitable location that receives partial shade, as direct sunlight can be too intense for these delicate plants. Prepare the soil by incorporating organic matter such as compost or well-rotted manure to improve drainage and fertility.
Dig holes deep enough so that each bulb sits about 6 inches below the surface. Space them apart according to their specific planting requirements, usually around 12 inches apart. Gently place each bulb into its designated hole with the pointed end facing upwards.
Cover the bulbs with soil, firming it gently around them without compacting it too tightly. Water thoroughly after planting to settle the soil and provide hydration for your Easter lilies' fresh start.
By following these care instructions year after year, you can enjoy beautiful blooms from your Easter lilies while ensuring their long-term health and vitality.
Remember, proper care involves cutting back stems but leaving foliage intact after blooming, continuing watering and fertilizing until leaves turn yellow, storing bulbs in a cool dry place during dormancy, and replanting bulbs in early spring for another season of vibrant growth.
So get ready to nurture your Easter lilies through each season with love and care!
Toxicity of Easter Lilies to Cats:
Cats are curious creatures, known for their playful and inquisitive nature. However, this curiosity can sometimes lead them into dangerous situations, especially. One such plant that poses a significant threat to our feline friends is the Easter lily. It's essential for cat owners to be aware of the toxicity associated with these beautiful flowers in order to keep their pets safe.
All parts of the lily plant are highly toxic to cats
Every part of the plant contains toxins that can be extremely harmful if ingested by cats. From the petals and leaves to the stem and even the pollen, each component poses a potential danger. These toxins can cause severe health issues in our furry companions, primarily affecting their kidneys.
Ingestion can cause kidney failure and even death
If a cat ingests any part of an Easter lily, it can have devastating consequences on their health. The toxins present in these flowers can lead to acute kidney failure, which is a life-threatening condition if not treated promptly. Symptoms may include vomiting, loss of appetite, lethargy, dehydration, and increased urination or lack thereof.
It's important for cat owners to understand that time is crucial when dealing with lily poisoning. The longer a cat goes without veterinary attention after ingesting an Easter lily, the higher the risk becomes for irreversible damage or even fatality.
Keep Easter lilies out of reach of cats or opt for cat-safe alternatives
Prevention is key. The best course of action is simply keeping these flowers out of reach. Place them in areas where your cat cannot access them or consider displaying them in rooms that your pet does not frequent.
Alternatively, if you still want some floral decorations during the Easter season, there are cat-safe alternatives available. Opt for non-toxic plants such as orchids, roses, or sunflowers, which can bring a touch of beauty to your home without posing any harm to your furry friends.
Immediate veterinary attention is crucial if a cat ingests any part of an Easter lily
In the unfortunate event that your cat does come into contact with an Easter lily, it's vital to seek immediate veterinary attention. Time is of the essence in preventing further damage to their kidneys. Contact your veterinarian or an emergency animal hospital right away and provide them with all the necessary information regarding the ingestion.
Do not induce vomiting without professional advice, as it may cause more harm than good in certain situations. The veterinarian will guide you on the appropriate steps to take based on your specific circumstances.
Remember, cats are curious creatures by nature, so it's our responsibility as pet owners to ensure their safety. By being aware of the toxicity associated with Easter lilies and taking preventive measures, we can protect our feline companions from potential harm and enjoy a worry-free holiday season together.
Dealing with Pests and Diseases in Easter Lilies:
Pesky Pests: Aphids, Mites, and Slugs
Dealing with pests is a crucial task. Common culprits that can wreak havoc on your beautiful blooms include aphids, mites, and slugs. These tiny creatures may seem harmless at first glance, but they can quickly multiply and cause significant damage if left unchecked.
To protect your Easter lilies from these pesky invaders, consider using insecticidal soap or neem oil. These natural remedies are effective in controlling aphids, mites, and slugs without harming the delicate flowers or posing a threat to pets or beneficial insects. Simply spray the affected areas thoroughly according to the product instructions for best results.
Fungal Troubles: Botrytis Blight and Root Rot
In addition to pests, fungal diseases pose another challenge. Two common fungal issues that you should be aware of are botrytis blight and root rot. These diseases can greatly impact the health of your plants if not addressed promptly.
Botrytis blight is characterized by grayish-brown spots on leaves and petals. It thrives in damp conditions with poor air circulation, making it important to provide adequate ventilation for your lilies. If you notice any signs of botrytis blight, remove infected parts immediately to prevent its spread.
Root rot occurs when the roots of your Easter lily become waterlogged due to overwatering or poorly draining soil. This condition deprives the plant of oxygen and leads to root decay. To prevent root rot, ensure proper drainage by using well-draining soil mixtures specifically formulated for potted plants.
Sanitation Practices: A Key Preventive Measure
Maintaining proper sanitation practices is crucial when dealing with pests and diseases in Easter lilies. Regularly inspect your plants for any signs of infestation or disease, such as wilting leaves, discolored petals, or unusual growth patterns. Promptly remove any affected parts to prevent further spread.
To minimize the risk of contamination, clean your gardening tools after each use. This helps prevent the transfer of pests or pathogens from one plant to another. Avoid overcrowding your Easter lilies as this can create a favorable environment for pests and diseases to thrive.
Propagating Easter Lilies: A Step-by-Step Guide
The Most Common Method: Propagation through Bulb Division
One of the most common ways to propagate Easter lilies is through bulb division. This method allows you to create new plants from existing bulbs, ensuring a continuous supply of beautiful lilies in your garden.Bulb division is a tried and true technique that yields excellent results.
Timing is Key: Divide Bulbs in Late Summer or Early Fall
To successfully propagate Easter lilies through bulb division, it's crucial to choose the right time for this process. Late summer or early fall, when the bulbs are dormant, is the ideal period for dividing them. During this time, the bulbs have finished flowering and are preparing for their next growth cycle. Dividing them at this stage ensures minimal disruption and maximizes their chances of successful propagation.
Separating Bulblets from the Main Bulb with Clean Tools
When dividing Easter lily bulbs, it's essential to use clean and sharp tools to minimize the risk of damage or infection. Start by carefully removing the main bulb from its pot or garden bed. Gently brush off any excess soil to expose the bulblets attached to its base. These bulblets are small offshoots that can be separated from the main bulb and grown into individual plants.
Using a clean knife or gardening shears, carefully detach each bulblet from the main bulb. Make sure each bulblet has some roots attached for better chances of successful propagation. Take your time during this step to ensure you don't accidentally damage any of the bulblets or their roots.
Planting Divisions Immediately or Storing Them Until Planting Time
Once you have separated the bulblets from the main bulb, you have two options: planting them immediately or storing them until planting time arrives. If you choose to plant them right away, prepare a suitable planting location in your garden or pots. Ensure the soil is well-draining and amend it with organic matter for optimal growth.
Dig holes that are deep enough to accommodate the bulblets' roots without bending or crowding them. Place each bulblet in its hole, ensuring that the top of the bulb is level with the soil surface. Gently backfill the hole and lightly firm the soil around each bulb.
If you prefer to store the divisions until planting time, make sure to keep them in a cool and dry place. Use paper bags or mesh containers that allow air circulation but prevent excessive moisture buildup. Check on them regularly to ensure they remain healthy and free from any signs of rot or disease.
Tips for Successful Propagation
To increase your chances of successful propagation when dividing Easter lilies, here are some additional tips:
- Choose Healthy Bulbs: Select bulbs that are firm and free from any signs of damage or disease.
- Disinfect Tools: Before dividing bulbs, disinfect your tools using a solution of 10% bleach or rubbing alcohol to prevent the spread of pathogens.
- Label Divisions: If you're dividing multiple varieties of Easter lilies, label each division with their respective names to avoid confusion during planting.
- Provide Adequate Watering: After planting or potting divisions, water them thoroughly and maintain consistent moisture levels throughout their growth.
- Protect from Frost: If there's a risk of frost after planting, cover young plants with mulch or protective cloths to shield them from cold temperatures.
By following these steps and tips, you can successfully propagate Easter lilies through bulb division. Enjoy watching these beautiful flowers thrive in your garden as they bring joy and elegance during the spring season!
Conclusion: The Beauty and Significance of Easter Lilies
Easter lilies are not just beautiful flowers; they hold a significant place in history and traditions associated with the Easter season. Understanding how to grow, care for, and maximize the bloom length of these stunning flowers can enhance your enjoyment of them. Being aware of their toxicity to cats and learning how to deal with pests and diseases can help ensure their longevity. If you're interested in propagating Easter lilies, we have provided a step-by-step guide as well.
In conclusion, Easter lilies bring joy and symbolism to the celebration of Easter. By following the guidelines outlined in this article, you can cultivate these magnificent flowers successfully while enjoying their beauty year after year.
Now that you are equipped with valuable knowledge about Easter lilies, why not add them to your garden or surprise someone special with a bouquet? Embrace the beauty and significance of these flowers during the Easter season and create an enchanting atmosphere around you.
FAQs
Q: Can I plant Easter lilies directly into my garden?
A: Yes! Transferring Easter lilies to your garden is possible by following simple steps such as selecting an appropriate location, preparing the soil adequately, and providing proper care throughout the process.
Q: Are there any long-term care tips for keeping Easter lilies thriving from year to year?
A: Absolutely! Long-term care involves practices like pruning after blooming, protecting bulbs during winter months, providing sufficient water and nutrients during growth periods, and ensuring adequate sunlight exposure.
Q: Are Easter lilies toxic to cats?
A: Yes, unfortunately. It's important to note that all parts of an Easter lily are highly toxic to cats if ingested. Keep them out of reach from curious feline friends or consider opting for cat-friendly flower alternatives.
Q: How can I deal with pests or diseases that may affect my Easter lilies?
A: Pests like aphids, mites, and snails can pose a threat to your Easter lilies. Employing measures such as regular inspection, proper watering techniques, and using organic pest control methods can help prevent infestations. Being aware of common diseases like botrytis blight and rust can aid in early detection and treatment.
Q: Can I propagate Easter lilies on my own?
A: Yes! Propagating Easter lilies is possible through bulb division or by collecting seeds. By following the step-by-step guide provided in this article, you can successfully propagate these beautiful flowers and expand your collection.
Remember to refer back to this article whenever you have questions or need guidance on caring for your Easter lilies. Enjoy the beauty they bring to your life during the Easter season and beyond!
Image Source: https://unsplash.com/