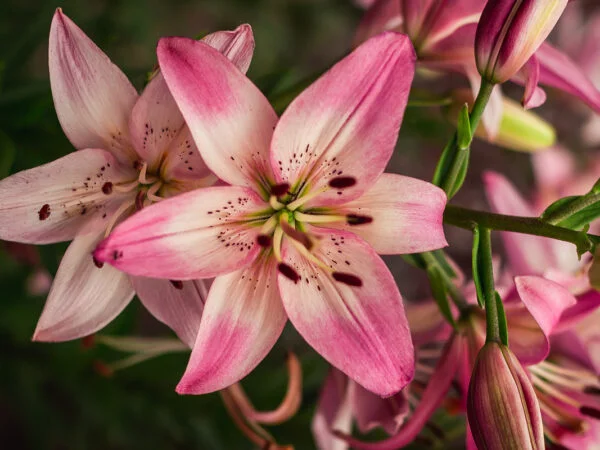
Are you ready to bring the beauty of lilium longiflorum, also known as Easter lilies, indoors? These delicate perennials have captivated people for centuries with their elegant blooms and sweet fragrance. But how do you ensure that your Easter lily thrives as a houseplant? Look no further! In this guide, we will reveal the secrets to successful Easter Lily Indoor Care.
Caring for potted lilies, such as the Lilium longiflorum, as a houseplant may seem daunting at first, but fear not! With our expert tips and tricks, you'll be able to provide the ideal environment for your potted plant to flourish. From understanding the basics of indoor care to discovering the importance of proper maintenance, we've got you covered.
- Exploring the Unique Characteristics of Lily Leaves: A Comparative Analysis
- Dark Lilies Unveiled: Explore 18 Dramatic Varieties
- Cactus Types: 15 Best for Home Gardening
- Cactus Care Guide: Tips for Growing Healthy Cacti
Imagine having vibrant, eye-catching blooms of lilium longiflorum brightening up your living space all year round as a houseplant. By mastering the art of Easter Lily indoor care during the winter months, you can enjoy these stunning flowers even when it's not springtime. Whether you're a seasoned gardener or a beginner looking for a new plant companion, our comprehensive guide will equip you with everything you need to know about lilium longiflorum houseplants and caring for them during the winter months.
So get ready to dive into the world of Easter lilies as houseplants. Say goodbye to wilting flowers and hello to thriving blossoms with healthy anthers that will leave your guests in awe. Let's embark on this journey together and unlock the secrets of successful Easter Lily indoor care, even during the winter months when they need a cover if placed outside!
Remember: easter lily indoors is key.
Choosing the Right Easter Lily Plant:
Whether you're a seasoned gardener or just starting out, there are a few tips you should keep in mind to ensure successful cultivation of a potted plant indoors. These factors will help with the growth and care of your Easter Lily flower, including managing pollen.

Tips for selecting a healthy and vibrant Easter Lily plant:
- When choosing an Easter Lily plant as a gift, look for sturdy stems that can support the weight of its beautiful blooms. Examine the flower stems closely to ensure they are strong and straight, without any signs of bending or wilting. This indicates good care and a healthy plant that will make a perfect gift.
- Check the leaves: Healthy Easter Lily plants have deep green leaves that are free from any discoloration, spots, or damage outside. Avoid plants with yellowing or drooping leaves as they may be an indication of poor health.
- Inspect the buds outside: The buds on an Easter Lily plant should be tightly closed and show no signs of wilting or browning. This indicates that the plant is fresh and will continue to bloom beautifully once you bring it home.
- Assess root health: Lift the pot slightly to check the roots of the Easter Lily plant. The roots should appear white or light-colored, indicating good health. Avoid plants with dark or mushy roots as they may be suffering from root rot.
Factors to consider when choosing an Easter Lily for indoor cultivation:
- Lighting requirements: Before purchasing an Easter Lily plant, consider the lighting conditions in your home. These lilies prefer bright but indirect light, so make sure you have a suitable spot where they can receive adequate sunlight without being exposed to direct rays.
- Temperature preferences: While Easter Lilies, a type of plant indoors, thrive in cooler temperatures between 60-65°F (15-18°C), they can tolerate slightly higher temperatures as well. Ensure that your home provides an environment within this range to promote optimal growth and blooming of lily pollen.
- Humidity levels: Easter Lilies appreciate moderate humidity, so if your home tends to be dry, consider placing a tray of water near the plant or using a humidifier to create a more humid environment. This will help prevent the leaves from drying out and promote healthy growth of lily pollen.
- Space availability: Take into account the size of the Easter Lily plant you're considering and ensure that you have enough space in your home for it to grow comfortably. These plants can reach heights of 2-3 feet (60-90 cm) and will require adequate room for their foliage and blooms.
How to identify a high-quality Easter Lily plant at the store:
- Look for reputable sellers: Purchase your Easter Lily plants from trusted nurseries or garden centers known for their quality products. This increases the likelihood of getting a healthy and well-cared-for plant.
- Check for signs of pests or diseases, such as aphids or spider mites, on the leaves and stems of your easter lily indoors. Also, be on the lookout for common diseases like powdery mildew or botrytis blight. It's important to avoid purchasing plants with visible pest infestations or disease symptoms, including lily pollen.
- Choose well-developed bulbs: If possible, opt for Easter Lily plants that are sold as bulbs rather than those already in full bloom. Bulbs allow you to witness the entire growth process, ensuring a longer-lasting and more rewarding experience.
- Seek advice from experts: Don't hesitate to ask nursery staff or experienced gardeners about their recommendations for selecting high-quality Easter Lily plants. They can provide valuable insights based on their expertise and help you make an informed decision.
Ensure success by picking the perfect Easter Lily variety for your home:
- Consider the bloom time of different varieties of Easter Lilies when choosing which ones to plant indoors. Select a variety that aligns with your desired bloom time so you can enjoy the vibrant flowers when they are most appealing to you.
- Explore fragrance options for your indoor plants: Easter Lilies come in various fragrances, ranging from mild to strong. Select a variety that suits your preferences and enhances the ambiance of your home with its delightful scent.
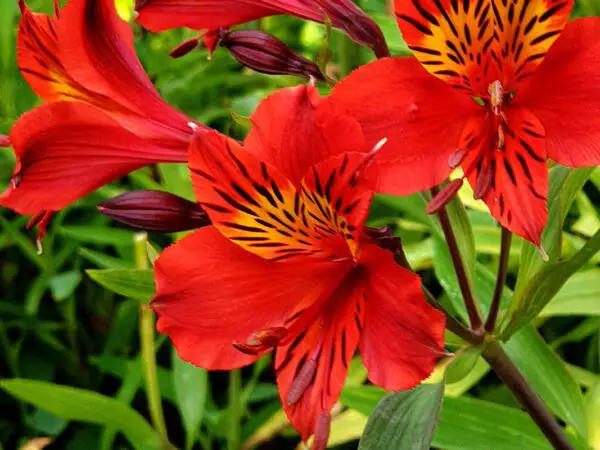
- Assess flower color: While white is the traditional color for Easter Lilies, there are also varieties available in shades of pink and yellow. Choose a color that complements your indoor decor or simply brings you joy.
- Consider plant height: Easter Lily plants can vary in height, so consider how tall you want your plant to be when fully grown. This will help you select a variety that fits well within your space and doesn't overpower other plants or furniture nearby.
Easter Lily Indoor Care: Watering and Feeding Tips
Watering Your Indoor Easter Lily
Knowing how often and how much water your indoor Easter lily needs is crucial for its health and longevity. These beautiful plants require regular watering, but it's important not to overdo it. A good rule of thumb is to water your Easter lily when the top inch of soil feels dry to the touch. This ensures that the plant receives adequate moisture without becoming waterlogged.
To maintain optimal soil moisture levels, consider using a well-draining potting mix for your Easter lily. This helps prevent water from sitting in the roots, which can lead to root rot and other issues. When watering, make sure to evenly moisten the soil throughout the pot, allowing excess water to drain out freely.
Best Watering Techniques for Your Easter Lily
Proper watering techniques are essential for keeping your indoor Easter lily healthy and thriving. Instead of simply pouring water onto the surface of the soil, try these methods to ensure thorough hydration:
- Bottom watering: Place your potted Easter lily in a tray or saucer filled with about an inch of water. Allow the plant to soak up moisture from below through its drainage holes until the topsoil feels adequately moist.
- Submerging: For a more intensive hydration method, you can fully submerge your potted Easter lily in a basin or sink filled with room temperature water. Leave it submerged for about 15 minutes before removing and allowing excess water to drain away.
These techniques help ensure that every part of the easter lily's root system receives sufficient hydration, promoting healthy growth and vibrant blooms when grown indoors.
Choosing Suitable Fertilizers for Your Potted Easter Lily
Feeding your indoor Easter lily with appropriate fertilizers is essential for providing it with essential nutrients throughout its growth cycle. Look for fertilizers specifically formulated for flowering plants or those high in phosphorus, which promotes blooming. Organic options such as compost or well-rotted manure can also be beneficial.
When applying fertilizer, follow the instructions on the packaging carefully to avoid overfeeding. Generally, it's recommended to fertilize your Easter lily every 2-3 weeks during its active growth phase. Be sure to water the plant before and after applying fertilizer to prevent root burn.
The Importance of Proper Drainage
Proper drainage is crucial for preventing overwatering issues that can harm your indoor Easter lily. Without adequate drainage, excess water accumulates in the pot, leading to root rot and other problems. To ensure proper drainage:
- Choose a suitable pot: Opt for a container with drainage holes at the bottom to allow excess water to escape.
- Use well-draining soil: Select a high-quality potting mix specifically designed for indoor plants, ensuring it has good drainage properties.
- Monitor watering habits: Avoid excessive watering and always check if the top inch of soil is dry before watering again.
By providing your Easter lily with proper drainage conditions, you create an environment where it can thrive without being subjected to harmful moisture levels.
Temperature and Humidity for Healthy Easter Lilies:
Ideal Temperature Range for Growing Healthy Indoor Easter Lilies
So, you've decided to bring the beauty of Easter lilies indoors. Great choice! But do you know the ideal temperature range to ensure their healthy growth? Let's dive in and find out.
Easter lilies thrive in temperatures between 60 and 75 degrees Fahrenheit (15-24 degrees Celsius). This range provides the perfect balance between warmth and coolness. Temperatures below this range can hinder their growth, while excessively high temperatures can cause damage.
Maintaining a stable temperature within this range is crucial. Fluctuations outside this sweet spot can stress your lily plant, leading to stunted growth or even premature wilting. To keep your indoor Easter lilies happy, avoid placing them near drafty windows or heating vents that may expose them to extreme temperature variations.
The Impact of Humidity Levels on Your Potted Lily Plant
Humidity plays a vital role in the overall health of your Easter lily. These elegant flowers prefer moderate humidity levels ranging from 40% to 60%. If the air becomes too dry, it can lead to dehydration of the leaves and petals, causing them to wither prematurely.
To combat low humidity levels, consider using a humidifier or employing simple tricks like placing a tray filled with water near your lily plant. As the water evaporates, it increases moisture in the air surrounding your plant.
On the other hand, excessive humidity can create an environment conducive to fungal diseases such as botrytis blight. This condition causes dark spots on leaves and flowers, eventually leading to decay. To prevent this, ensure proper ventilation by opening windows or using fans.
Adequate Ventilation: Balancing Temperature and Humidity Indoors
While maintaining stable temperatures is important for your indoor Easter lilies' well-being, ensuring adequate ventilation is equally crucial. Proper air circulation helps prevent the accumulation of moisture, reducing the risk of fungal diseases and maintaining healthy growth.
To achieve optimal ventilation, open windows or use fans to circulate fresh air throughout the room. Avoid overcrowding your lilies with other plants as it can impede airflow. Keep an eye out for signs of poor ventilation, such as condensation on windows or a musty smell in the room.
Remember that temperature and humidity go hand in hand. Striking a balance between these factors is key to ensuring their thriving growth indoors.
Adjusting Temperature and Humidity Settings Accordingly
Now that you understand the significance of temperature and humidity for your indoor Easter lilies, it's time to put that knowledge into action. Here are some practical tips to help you create an ideal environment:
- Temperature Control: Keep your lilies away from direct heat sources like radiators or fireplaces that can cause overheating. If temperatures drop below 60 degrees Fahrenheit at night, consider moving them to a slightly warmer location or using a space heater if necessary.
- Humidity Management: Monitor humidity levels regularly using a hygrometer, readily available at gardening stores or online retailers. If levels fall below 40%, employ humidifiers or try grouping your lily plants together to create a microclimate with increased moisture.
- Ventilation Enhancement: Open windows during mild weather conditions to allow fresh air circulation. Use fans strategically placed near your plants to improve airflow without causing excessive drafts.
By implementing these adjustments according to the needs of your Easter lilies, you'll be well on your way to providing them with an optimal indoor environment for healthy growth and stunning blooms.
So there you have it! Now you're equipped with the knowledge needed to ensure proper temperature and humidity settings for growing vibrant Easter lilies indoors. Remember, keeping them cozy with the right temperature, humidity, and ventilation will reward you with breathtaking blooms that bring joy to your space.
Creating the Ideal Soil Conditions for Your Easter Lily:
To ensure the healthy growth of your potted Easter lily, it is crucial to create the ideal soil conditions. The right soil will provide a well-draining environment that promotes root health and allows your plant to thrive. Here are some essential tips to help you achieve the perfect soil for your Easter lily:
Choose Well-Draining Soil
When selecting soil for your Easter lily, opt for a well-draining variety. This type of soil allows excess water to flow away from the roots, preventing waterlogging and potential root rot. Look for potting mixes specifically designed for indoor plants or mixtures labeled as "fast-draining." These soils usually contain ingredients like perlite or vermiculite, which enhance drainage.
Add Organic Matter
Improving the structure of your soil is another vital step in creating optimal conditions for your Easter lily. Adding organic matter, such as compost or well-rotted manure, can significantly enhance the texture and fertility of the soil. Organic matter helps retain moisture while allowing excess water to drain efficiently. It also provides essential nutrients that support healthy growth.
Maintain Slightly Acidic pH
Easter lilies prefer slightly acidic soil with a pH level between 6.0 and 6.5. To maintain this acidity level, you can use a pH testing kit available at most gardening stores. If your soil's pH is too high (alkaline), you can lower it by incorporating elemental sulfur or aluminum sulfate into the soil following package instructions.
Avoid Compacted or Heavy Soils
Compacted or heavy soils can be detrimental to your Easter lily's root system by restricting oxygen flow and causing poor drainage. These conditions increase the risk of root rot and other fungal diseases. Therefore, it is crucial to avoid using compacted clay-based soils or heavy garden soils when potting your Easter lily. Instead, opt for lighter potting mixes that allow roots to breathe freely.
Ensure Proper Aeration
Proper aeration is essential for the overall health of your Easter lily. Before planting, make sure to loosen the soil in your pot or container. This step will enhance air circulation and prevent the soil from becoming overly compacted over time. You can achieve this by gently breaking up any clumps and ensuring there are no large chunks of soil remaining.
How Much Water?
While not explicitly mentioned in the talking points, it's important to discuss how much water your Easter lily needs. Overwatering can be as harmful as underwatering, so finding the right balance is crucial. As a general rule, water your Easter lily thoroughly when the top inch of soil feels dry to the touch. Allow excess water to drain away completely and avoid leaving your plant sitting in standing water.
During active growth periods, such as spring and summer, you may need to water more frequently. However, reduce watering during dormant periods like winter when growth slows down. Remember that environmental factors like temperature and humidity can also affect watering needs, so always monitor your plant's moisture levels closely.
Potted Easter Lilies: Essential Plant Care Tips
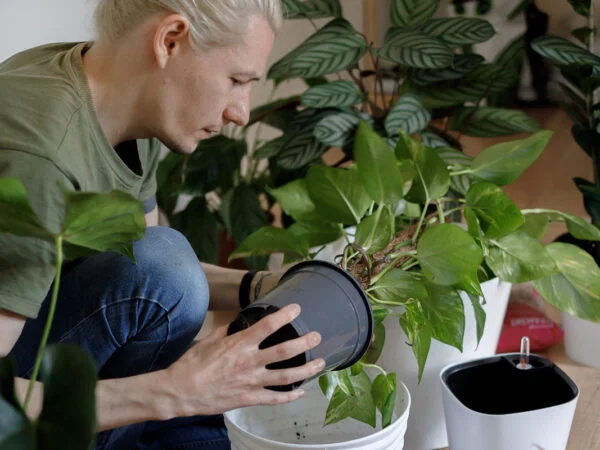
Selecting the Perfect Pot for Your Potted Easter Lily
Choosing the right container is crucial for the health and growth of your potted Easter lily. Opt for a pot that has drainage holes to prevent waterlogging, as excessive moisture can lead to root rot. Consider the size of the pot - it should be large enough to accommodate the plant's root system but not excessively spacious. A pot that is too big may result in overwatering or slow growth. Terracotta or clay pots are excellent choices as they provide good airflow to the roots.
Soaking Up That Sunshine: Providing Adequate Sunlight
Potted Easter lilies thrive when placed near a bright window where they can receive ample sunlight. These plants require at least six hours of indirect sunlight each day to maintain their vibrant blooms and healthy foliage. If you don't have a suitable spot with enough natural light, consider using artificial grow lights to supplement their lighting needs. Remember, though, that direct sunlight can scorch their delicate leaves, so finding a balance is key.
Water Wisely: Avoid Overwatering Your Potted Easter Lily
Overwatering is one of the most common mistakes made when caring for potted Easter lilies. To prevent this, allow the top inch of soil in your pot to dry out between waterings. Stick your finger into the soil - if it feels dry at this depth, it's time to water again. When watering, ensure that excess water drains out through the holes in the bottom of your pot; standing water can suffocate the roots and cause damage.
Pruning for Perfection: Maintaining Your Plant's Appearance
To keep your potted Easter lily looking its best, regular pruning is essential. Remove faded flowers by cutting them off at their base; this encourages new blooms and prevents energy wastage on seed production. Trim any yellowing or damaged leaves to maintain the plant's overall aesthetics. Use clean and sharp pruning shears to make precise cuts, ensuring you don't harm the healthy parts of the plant.
Shielding from Drafts and Temperature Extremes
Potted Easter lilies are sensitive to drafts and extreme temperature fluctuations. Avoid placing them near doors, windows, or vents where they may be exposed to cold drafts or sudden changes in temperature. These plants prefer a consistent environment with temperatures ranging between 60°F (15°C) and 75°F (24°C). If necessary, use curtains or blinds to shield your Easter lily from direct contact with cold air currents.
By following these essential care tips for potted Easter lilies, you can ensure that your indoor plants thrive and bring joy during the Easter season. Remember to choose an appropriate pot size, provide adequate sunlight, water wisely, prune regularly, and protect them from drafts and temperature extremes. With proper care and attention, your potted Easter lilies will reward you with their stunning blooms year after year.
Propagating Easter Lilies: Expanding Your Collection
Learn the Art of Bulb Division
Propagating Easter lilies through bulb division is a fantastic way to expand your collection and enjoy more of these stunning blooms. By understanding the process of separating offsets from the main bulb, you can successfully propagate new Easter Lily plants at home.
The Perfect Time for Division and Replanting
Timing is crucial. To ensure the best chances of success, it's important to choose the right time of year. Typically, early spring or fall is ideal for this task. This allows the bulbs to establish themselves before their next blooming season.
Separating Offsets: A Step-by-Step Guide
Dividing Easter Lily bulbs involves separating offsets, which are small bulblets that develop around the main bulb. Here's a step-by-step guide to help you through the process:
- Dig up the main bulb: Carefully dig up the main bulb using a garden fork or trowel, being cautious not to damage any roots.
- Gently remove soil: Shake off excess soil from the bulb, ensuring you have a clear view of any offsets.
- Identify and separate offsets: Look for smaller bulblets attached to the main bulb by thin stems known as stolons. Carefully detach these offsets from the main bulb.
- Trim roots and foliage: Trim any long roots or excessive foliage on both the main bulb and offsets.
- Plant separately: Plant each offset in its own pot or location in your garden bed, ensuring they have enough space for root development.
- Provide proper care: Water thoroughly after planting and continue regular watering as needed until new growth appears.
By following these steps, you can successfully propagate new Easter Lily plants from offsets.
Expanding Your Collection with Favorite Varieties
Expanding your Easter Lily collection is an exciting endeavor. With the ability to propagate new plants, you can enjoy a wider range of colors and varieties. Whether you prefer the classic white trumpet-shaped blooms or desire unique cultivars with vibrant petals, propagating Easter lilies allows you to curate a diverse collection.
Ensuring Success: Tips for Propagation
To ensure successful propagation of your favorite Easter Lily varieties, it's essential to provide proper care and attention. Here are some tips to help you along the way:
- Choose healthy bulbs: Select bulbs that are firm and free from any signs of damage or disease.
- Use well-draining soil: Plant your bulbs in a well-draining potting mix or garden bed to prevent waterlogged roots.
- Provide adequate sunlight: Place your potted bulbs or plant them in a location that receives at least six hours of direct sunlight each day.
- Water moderately: Avoid overwatering by allowing the top inch of soil to dry out before watering again.
- Fertilize appropriately: Apply a balanced fertilizer formulated for flowering plants during the growing season to promote healthy growth and abundant blooms.
By following these tips, you can increase your chances of successfully propagating Easter lilies and expanding your collection with thriving plants.
Protecting Against Pests and Diseases:
Pests and diseases can wreak havoc on your indoor Easter Lily plants if left unchecked. By identifying common pests, taking preventive measures, recognizing signs of diseases, and treating infestations promptly, you can ensure the health and vitality of your plants.
Identify common pests that can infest indoor Easter Lily plants
It's important to be familiar with the common culprits that may invade your green foliage. Aphids and spider mites are two notorious pests that can cause significant damage if not dealt with swiftly.
Aphids are tiny insects that feed on the sap of your plant's leaves. They reproduce rapidly, forming colonies that suck the life out of your lilies. To identify aphid infestation, look for clusters of small insects on the undersides of leaves or curled leaves caused by their feeding activity.
Spider mites are another troublesome pest known for their ability to spin fine webs on plant surfaces. These minuscule arachnids pierce through leaf tissues, sucking out vital fluids and leaving behind a stippled appearance. If you notice yellowing or speckled leaves accompanied by webbing, chances are spider mites have made themselves at home on your Easter Lily.
Take preventive measures to avoid pest infestations in your indoor garden
Prevention is key. Regular inspections should become a part of your plant care routine. Check both sides of the leaves for any signs of pests or eggs. Inspect new additions to your collection before introducing them into the same area as existing plants since they could potentially bring unwanted hitchhikers along.
To deter pests from settling in, consider using natural remedies such as neem oil spray or insecticidal soap. These organic solutions act as deterrents while being safe for both humans and pets. If the infestation becomes severe, you may need to resort to chemical solutions specifically formulated for indoor use. Always follow the instructions provided by the manufacturer and exercise caution when applying any chemicals.
Recognize signs of diseases in your Easter Lily plant
In addition to pests, diseases can also pose a threat to your indoor Easter Lily's well-being. Two common diseases that affect these plants are botrytis blight and root rot.
Botrytis blight, caused by the fungus Botrytis cinerea, manifests as brown spots on leaves or flowers. These spots gradually enlarge and become covered with a grayish-brown fuzzy mold. Flowers may also develop a water-soaked appearance before wilting completely. Good air circulation is crucial in preventing this disease, as it thrives in humid conditions.
Root rot is often caused by overwatering or poor drainage, leading to fungal infections that attack the roots of your lilies. Signs of root rot include yellowing or wilting foliage, stunted growth, and an unpleasant odor emanating from the soil. To prevent root rot, ensure proper drainage by using well-draining soil and pots with drainage holes.
Treat pest infestations promptly with recommended solutions
If you discover an infestation on your indoor Easter Lily plants, it's important to take action promptly to minimize damage and prevent further spread. Organic pest control options like insecticidal soaps or neem oil sprays can be effective against aphids and spider mites.
When applying these solutions, make sure to cover both sides of the leaves thoroughly for maximum effectiveness. Repeat treatments may be necessary depending on the severity of the infestation.
For more stubborn or extensive pest problems, chemical pesticides designed for indoor use can provide a stronger solution. However, exercise caution when using chemicals indoors and follow all safety guidelines provided by the manufacturer.
Take necessary precautions to prevent diseases in your indoor garden
Preventing diseases in your indoor Easter Lily garden starts with providing optimal growing conditions. Good air circulation is essential, as it helps reduce humidity and minimize the risk of fungal infections like botrytis blight.
Troubleshooting Common Issues with Easter Lilies:
Yellowing Leaves and Drooping Stems
Are your indoor Easter lilies showing signs of yellowing leaves or drooping stems? Don't worry, you're not alone! These issues can be quite common, but they are also relatively easy to address.
Yellowing leaves in Easter lilies often indicate a problem with watering. Overwatering can lead to root rot, which causes the leaves to turn yellow and eventually wilt. On the other hand, underwatering can also cause the leaves to yellow and become dry.
To troubleshoot this issue, adjust your watering practices accordingly. Check the moisture level of the soil by sticking your finger about an inch deep into it. If it feels dry at that depth, it's time to water your plant. However, if it feels moist or wet, hold off on watering for a few more days.
When watering your Easter lily, make sure to do so thoroughly until water drains out from the bottom of the pot. This ensures that all roots receive adequate moisture without sitting in stagnant water.
Nutrient Deficiencies and Fertilization
Another common problem with indoor Easter lilies is nutrient deficiencies. If you notice stunted growth or pale leaves, it may be a sign that your plant is lacking essential nutrients.
To address this issue, consider providing appropriate fertilization. Choose a balanced fertilizer specifically formulated for flowering plants and follow the instructions on the packaging for application rates.
When fertilizing your Easter lily, remember not to overdo it. Too much fertilizer can burn the roots and cause further damage. It's best to err on the side of caution and apply slightly less than recommended rather than risking overfertilization.
Pests and Diseases
Pests and diseases can also wreak havoc on your beloved Easter lily. Common culprits include aphids, spider mites, mealybugs, and fungal diseases like powdery mildew.
Inspect your plant regularly for signs of infestation or disease. Look for tiny insects, webbing, or white cotton-like clusters on the leaves and stems. If you suspect a pest problem, isolate the affected plant to prevent further spread.
For minor infestations, you can try removing pests by gently wiping them off with a damp cloth or using insecticidal soap. However, if the problem persists or becomes severe, it's best to seek professional advice from a local garden center or plant expert.
Seeking Professional Advice
If you've tried troubleshooting common issues with your Easter lily but are still unable to resolve persistent problems, don't hesitate to seek professional advice. Sometimes, certain issues may require specialized knowledge or treatment methods that go beyond what can be easily resolved at home.
A knowledgeable professional will be able to assess the specific problems affecting your Easter lily and provide tailored recommendations for care and treatment. They can guide you in identifying any underlying issues and help ensure the long-term health of your plant.
Remember, even experienced gardeners encounter challenges with their plants from time to time. Seeking assistance when needed shows dedication and care towards your indoor Easter lilies.
So don't let common issues discourage you! With proper troubleshooting techniques and a little extra attention, you'll soon have vibrant and healthy Easter lilies brightening up your indoor space.
Planting Easter Lilies in Outdoor Gardens:
If you're looking to add a touch of elegance and beauty to your outdoor garden, planting Easter lilies is a fantastic choice. These stunning flowers, also known as Lilium longiflorum, are synonymous with the Easter season and can bring a burst of color and fragrance to your garden.
Choose a suitable location in your garden that receives partial sunlight
Partial sunlight is key. These delicate blooms thrive when they receive around six hours of sunlight each day, so finding an area with filtered or dappled light is ideal. Avoid areas with direct afternoon sun exposure, as it can be too intense for these beauties.
Consider creating a cozy corner in your garden where the lilies can bask in the morning sun while being protected from harsh midday rays. This will provide them with just the right amount of light to flourish throughout the growing season.
Prepare the soil by incorporating organic matter and ensuring good drainage
To give your Easter lilies the best chance at thriving outdoors, it's important to prepare the soil properly. Start by loosening up the soil using a fork or spade, removing any weeds or debris that may hinder their growth.
Next, incorporate organic matter such as compost or well-rotted manure into the soil. This will enrich it with essential nutrients and improve its overall structure. Ensure that the soil has good drainage capabilities by adding sand or perlite if necessary. Well-draining soil prevents waterlogging and root rot, which can be detrimental to these plants.
Plant Easter lily bulbs at the appropriate depth
When planting Easter lily bulbs in your outdoor garden, depth matters! Dig a hole that is approximately six inches deep to accommodate the bulbs. This depth ensures that the bulbs are adequately covered and protected while allowing them to establish strong root systems.
Place the bulbs in the hole with their pointed ends facing upward, gently covering them with soil. It's crucial not to plant them too shallow or too deep, as this can affect their growth and overall health. Once planted, pat down the soil lightly to secure the bulbs in place.
Space the bulbs adequately to allow room for growth and airflow between plants
To ensure optimal growth and prevent overcrowding, it's essential to provide enough space between each Easter lily bulb. Aim for a spacing of at least 12 inches between each bulb. This allows ample room for the plants to spread out as they grow, promoting good airflow and reducing the risk of diseases.
Proper spacing also prevents competition for nutrients and sunlight among neighboring plants. By giving your Easter lilies enough space, you'll encourage healthy development and vibrant blooms throughout the season.
Water newly planted Easter lilies thoroughly and provide regular irrigation as needed
After planting your Easter lilies, give them a thorough watering to settle them into their new home. Ensure that water reaches deep into the soil, encouraging root establishment. Subsequently, monitor soil moisture levels regularly and water when necessary.
While these flowers appreciate moist soil, overwatering can be detrimental. Avoid letting water accumulate around the base of the plant or creating soggy conditions that may lead to rotting roots. Strike a balance by providing adequate irrigation without drowning your Easter lilies.
Caring for Outdoor Easter Lilies: Watering and Feeding Guidelines
Understanding the watering needs of outdoor Easter lilies based on weather conditions
Understanding their watering needs is crucial. These beautiful flowers require a consistent level of moisture to thrive but can also suffer from overwatering. The key is to strike the right balance depending on the prevailing weather conditions.
During periods of heavy rainfall, you may not need to water your Easter lilies as frequently. However, if you experience a dry spell or notice that the top inch of soil has become dry, it's time to provide supplemental irrigation. Remember that these plants prefer slightly moist soil, so avoid letting them completely dry out between waterings.
Providing supplemental irrigation during dry spells to prevent drought stress
Outdoor Easter lilies are susceptible to drought stress, which can hinder their growth and affect their overall health. To prevent this from happening, it's important to provide additional water during extended periods without rain.
When watering your outdoor Easter lilies during dry spells, aim for deep watering rather than light sprinkling. This ensures that the moisture reaches the roots where it is needed most. Use a garden hose or a drip irrigation system and allow the water to penetrate deeply into the soil.
Applying balanced fertilizer according to package instructions to promote healthy growth
Feeding your outdoor Easter lilies with a balanced fertilizer is essential for promoting healthy growth and vibrant blooms. Look for fertilizers specifically formulated for flowering plants or bulbs and follow the package instructions carefully.
Typically, you should apply fertilizer in early spring when new growth emerges and then again after blooming has finished. This helps replenish nutrients in the soil and prepares the plant for future growth cycles. Be cautious not to over-fertilize as excessive amounts can lead to burned roots or stunted growth.
Monitoring soil moisture levels regularly and adjusting watering frequency accordingly
To ensure optimal care for your outdoor Easter lilies, it's crucial to monitor the moisture levels in the soil regularly. This can be done by simply inserting your finger into the soil up to the second knuckle. If it feels dry at that depth, it's time to water.
Remember that different weather conditions and soil types may affect how quickly moisture evaporates from the ground. Therefore, it's important to adjust your watering frequency accordingly. During hot and dry periods, you may need to water more frequently, while cooler or rainy days may require less frequent watering.
Maintaining a layer of organic mulch around outdoor Easter lilies to conserve moisture
One effective way to conserve moisture and protect the roots of your outdoor Easter lilies is by maintaining a layer of organic mulch around them. Mulching not only helps retain soil moisture but also suppresses weed growth and regulates soil temperature.
Apply a 2-3 inch layer of organic mulch such as shredded bark or compost around the base of your Easter lilies, ensuring that you leave a small gap between the mulch and the stems. This will prevent excessive moisture retention against the plant, which could lead to rotting.
Post-Easter Care for Your Easter Lily Plant:
Congratulations on bringing home a beautiful Easter lily plant! Now that the holiday has passed, it's important to provide the right care to ensure your plant thrives. Here are some essential tips to help you with post-Easter care for your Easter lily:
- Choosing the Right Easter Lily Plant: Selecting a healthy and vibrant Easter lily is crucial for its long-term success. Look for plants with sturdy stems, no signs of wilting or damage, and buds that are just starting to open.
- Easter Lily Indoor Care: Watering and Feeding Tips: Proper watering is key to keeping your Easter lily healthy. Water the plant when the top inch of soil feels dry, ensuring excess water drains out of the pot. Fertilize every two weeks with a balanced liquid fertilizer to promote growth.
- Temperature and Humidity for Healthy Easter Lilies: Maintaining suitable temperature and humidity levels will greatly benefit your Easter lily. Keep it in a cool room with temperatures between 60-65°F (15-18°C) during the day and slightly cooler at night. Aim for moderate humidity levels by placing a tray filled with pebbles and water beneath the pot.
- Creating the Ideal Soil Conditions for Your Easter Lily: Well-draining soil is essential for preventing root rot in your Easter lily plant. Use a mixture of equal parts peat moss, perlite, and compost to create an ideal growing medium.
- Potted Easter Lilies: Essential Plant Care Tips: If you plan on keeping your Easter lily in a pot indoors, make sure it has proper drainage holes and is placed in bright but indirect sunlight. Rotate the pot regularly to encourage even growth.
- Propagating Easter Lilies: Expanding Your Collection: If you wish to propagate your Easter lilies, you can do so by collecting the bulb scales after the flowers have withered. Plant them in a separate pot and provide the same care as for mature plants.
- Protecting Against Pests and Diseases: Keep an eye out for common pests like aphids, mites, and mealybugs. Regularly inspect your Easter lily plant for any signs of damage or infestation and take appropriate measures to control pests. Avoid overwatering to prevent fungal diseases.
- Troubleshooting Common Issues with Easter Lilies: Yellowing leaves, drooping flowers, or bud drop may occur due to various reasons such as improper watering, insufficient light, or pest issues. Identify the problem early on and address it accordingly to ensure your plant's health.
- Planting Easter Lilies in Outdoor Gardens: If you want to transplant your Easter lily outdoors, choose a location with well-draining soil and partial shade. Plant the bulbs at a depth of 6 inches (15 cm) during fall for blooms in the following summer.
- Caring for Outdoor Easter Lilies: Watering and Feeding Guidelines: Provide regular waterings to keep the soil slightly moist but not overly saturated. Apply a slow-release fertilizer in early spring and again after flowering to support healthy growth.
Remember that proper care is crucial for the long-term health of your Easter lily plant. By following these post-Easter care tips, you'll be able to enjoy its beauty for years to come!
FAQs: Easter Lily Indoor Care
Q: How often should I water my indoor Easter lily?
A: Water your indoor Easter lily when the top inch of soil feels dry to the touch.
Q: Can I place my Easter lily near a window with direct sunlight?
A: It's best to provide bright but indirect sunlight for your Easter lily rather than exposing it directly to intense sunlight.
Q: How can I prevent my Easter lily from drooping?
A: Ensure your Easter lily is receiving adequate water and avoid overwatering. Drooping may also occur if the plant is exposed to extreme temperatures or lacks proper light.
Q: Should I remove the yellowing leaves from my Easter lily?
A: It's normal for older leaves to turn yellow and wither. Gently remove them to maintain the plant's appearance, but be careful not to damage healthy foliage.
Q: Can I grow Easter lilies from seed?
A: While it's possible to grow Easter lilies from seeds, it requires patience and expertise. It's more common to propagate them through bulb scales for easier success.
These FAQs should help address some common concerns about caring for your Easter lily plant. If you have any other questions or need further assistance, feel free to reach out. Happy gardening!
Image Source: Paid image from CANVA