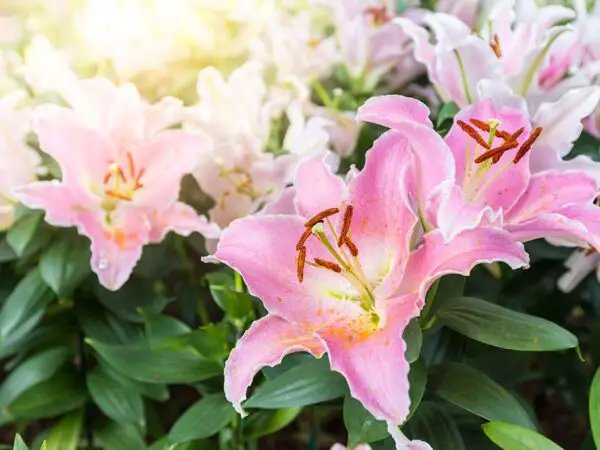
Are you ready to dive into the fascinating world of lilium longiflorum, also known as Easter lilies, care? These beautiful flowers with their elegant petals and sweet scent have captured the hearts of many. But how do you ensure that your Easter lilies stay healthy and vibrant for as long as possible?
Proper care is key when it comes to easter lily care. Whether you're a seasoned gardener or just starting out, learning the basics of lilium longiflorum care is essential. From understanding why these flowers with their beautiful petals are so popular to discovering the secrets of maintaining their longevity and ensuring their pollen remains intact, we've got you covered. Don't forget to protect your easter lilies from the first frost!
Read More:
- Sunflower Seeds Allergy Symptoms
- Cactus Types: 15 Best for Home Gardening
- Cactus Care Guide: Tips for Growing Healthy Cacti
Imagine being able to enjoy stunning Easter lilies, also known as lilium longiflorum, in your home or garden. With a little knowledge and some tender loving care, you can make this dream a reality for your lily plant. Provide the lilium longiflorum with everything it needs to thrive, including proper stem care. This applies to those of us in the US as well.
We'll explore the importance of proper watering for the easter lily plant, sunlight requirements, soil conditions, and more. Plus, we'll share expert tips and tricks to help you achieve those picture-perfect blooms on the easter lily plant stem.
So get ready to embark on an exciting journey into the world of STEM. Get your STEM gloves on and let's start nurturing these magnificent STEM plants together!
Choosing the right location for planting Easter lilies outdoors
Choosing the right location is crucial for their growth and blooming. The ideal spot will provide the necessary sunlight, temperature, and soil conditions that these beautiful flowers need to thrive. Let's explore some factors you should consider when selecting a place to plant your outdoor Easter lilies.
Factors to consider when choosing a spot
To ensure your Easter lilies flourish in your garden, it's important to take into account several factors. These include sunlight exposure, temperature range, and soil conditions.
Sunlight: Easter lilies require full sun or at least six hours of direct sunlight each day. Look for an area in your garden that receives ample sunlight throughout the day. Avoid spots with excessive shade from trees or buildings as this can hinder their growth and flowering.

Temperature: Consider the climate in your region and choose a spot suitable for growing Easter lilies. These plants thrive in USDA hardiness zones 4-9. If you live in colder climates (zone 3 or below), it's best to plant them indoors or treat them as annuals during springtime. On the other hand, if you reside in warmer regions (zone 10-11), such as the southern islands, make sure to provide partial shade during hot summer months.
Soil conditions: Easter lilies prefer well-draining soil that is rich in organic matter. Before planting, prepare the ground by adding compost or aged manure to improve fertility and drainage. Ensure that the pH level of the soil falls within the slightly acidic range of 6.0-6.5.
Selecting the perfect planting location
Now that you know what factors are important when choosing a location for your outdoor Easter lilies let's dive deeper into finding that perfect spot.
- Evaluate different areas: Take a walk around your garden and observe which areas receive the most sunlight. Look for a place that is easily accessible and visible, as Easter lilies make a stunning display when in full bloom.
- Consider existing plants: Take note of any nearby trees or large plants that may cast shade on your chosen spot. While some partial shade during the hottest part of the day can be beneficial, too much shade can inhibit flower production.
- Check soil drainage: Ensure that the area you select has good drainage to prevent waterlogging, which can lead to root rot. Avoid low-lying areas or spots where water tends to accumulate after rainfall.
- Room for growth: Easter lilies grow up to three feet tall, so choose a location with enough space for them to reach their full height without obstruction from other plants or structures.
Storing and planting Easter lily bulbs
Once you have found the perfect spot for your outdoor Easter lilies, it's time to store and plant the bulbs properly.
- Buying quality bulbs: Purchase healthy bulbs from a reputable store or nursery. Look for firm bulbs with no signs of disease or damage.
- Preparing the bulbs: If you are not planting immediately, store the bulbs in a cool and dry place until ready for planting. Keep them away from fruits and vegetables as they release ethylene gas, which can cause premature aging of the bulbs.
- Planting depth: Dig a hole about six inches deep in well-prepared soil. Place each bulb with its pointed end facing upwards into the hole at least six inches apart from each other.
- Covering and watering: Gently backfill the hole with soil, ensuring that it covers the bulb completely while leaving an inch of space between the top of the hole and ground level. Water thoroughly after planting to settle the soil around the bulb.
By following these guidelines, you will be able to choose an ideal location for planting your outdoor Easter lilies. Remember to consider factors like sunlight, temperature, and soil conditions to ensure your flowers have the best chance of thriving. With proper care and attention, you'll be rewarded with stunning blooms that bring joy to your garden year after year.
So go ahead and find that perfect spot in your garden where these beautiful Easter lilies can shine and brighten up your outdoor space!
Step-by-step guide to planting Easter lilies successfully
Are you ready to embark on a journey towards beautiful blooming Easter lilies? Follow our easy-to-follow steps for successful Easter lily planting and create an optimal environment for growth. With our detailed instructions, you can plant your Easter lilies with confidence and watch them thrive.
Prepare the soil for your Easter lilies
Before diving into the planting process, it's crucial to prepare the soil properly. Here are some steps to ensure your Easter lilies have a healthy foundation:
- Choose the right location: Find a spot in your garden that receives ample sunlight, preferably 6-8 hours a day. Easter lilies love bright light, so avoid shady areas.
- Test the soil: Conduct a soil test to determine its pH level and nutrient content. Ideally, Easter lilies prefer slightly acidic soil with a pH range of 6.0-6.5. If necessary, amend the soil by adding organic matter or sulfur to adjust the pH accordingly.
- Improve drainage: Ensure that the soil has good drainage properties by incorporating organic matter like compost or well-rotted manure into it. This helps prevent waterlogging and ensures proper root development.
- Remove weeds and debris: Clear any weeds or debris from the planting area as they can compete with your Easter lilies for nutrients and hinder their growth.
Planting your Easter lilies step-by-step
Now that you've prepared the soil, let's dive into planting your Easter lilies using our step-by-step guide:
- Choose healthy bulbs: Select firm and plump bulbs without any signs of damage or decay. Healthy bulbs are more likely to produce vibrant blooms.
- Dig holes: Dig holes in the prepared soil that are approximately 6-8 inches deep and spaced about 12-18 inches apart to allow sufficient room for growth.
- Place bulbs: Gently place the bulbs in the holes with their pointed ends facing upwards. Ensure that they are positioned at a depth where the top of the bulb is just below the soil surface.
- Backfill and firm: Carefully backfill each hole with soil, gently pressing it around the bulbs to eliminate air pockets. Firmly but gently press down on the soil to secure the bulbs in place.
- Water thoroughly: After planting, give your Easter lilies a good watering to settle the soil and provide initial moisture. Avoid overwatering as it can lead to rotting of the bulbs.
- Mulch and protect: Apply a layer of organic mulch around your newly planted Easter lilies to help retain moisture, suppress weed growth, and regulate soil temperature. This also provides protection during colder months.
Create an optimal environment for your Easter lilies
To ensure your Easter lilies thrive and produce magnificent blooms, create an optimal environment by following these additional steps:
- Watering: Regularly water your Easter lilies during dry spells or when rainfall is insufficient. Aim for moist (but not soggy) soil conditions throughout their growing season.
- Fertilization: Feed your Easter lilies with a balanced slow-release fertilizer in early spring as new growth emerges. Follow package instructions for proper application rates.
- Staking support: As your Easter lilies grow taller, provide staking support using bamboo stakes or plant supports to prevent them from bending or breaking under their own weight.
- Deadheading spent flowers: Remove faded flowers promptly to encourage continuous blooming and redirect energy towards bulb development.
- Winter care: In colder regions, apply a layer of mulch or straw over the planting area before winter sets in to protect the bulbs from freezing temperatures.
- Pest control: Keep an eye out for common pests like aphids, snails, or slugs. If necessary, use organic pest control methods to protect your Easter lilies without harming beneficial insects.
By following these steps and providing the right care, you can enjoy a bountiful display of beautiful Easter lilies year after year. Remember, patience is key as it may take a season or two for your bulbs to establish fully and showcase their true potential. Happy planting!
Optimal Soil and Water Requirements for Easter Lilies
Discover the specific soil requirements that promote healthy growth in Easter lilies.
To ensure your Easter lilies thrive, it is crucial to provide them with the right soil conditions. These delicate flowers prefer well-draining soil that is rich in organic matter. A loamy or sandy soil texture works best, as it allows excess water to drain away while retaining enough moisture for the plants' needs.
When planting your Easter lilies, prepare the soil by incorporating compost or well-rotted manure. This will enhance the soil's fertility and improve its ability to hold moisture without becoming waterlogged. Adding a layer of mulch around the base of the plants can help regulate soil temperature and retain moisture.
Understand how much water is needed to keep your Easter lilies hydrated without overwatering them.
Proper watering is essential for maintaining healthy Easter lily plants. While these flowers require consistent moisture, overwatering can lead to root rot and other issues. It's important to strike a balance between keeping the soil moist and avoiding excessive saturation.
A good rule of thumb is to water your Easter lilies when the top inch of soil feels dry. Use a gentle stream of water at ground level, allowing it to soak into the root zone rather than wetting the foliage. Deep watering once or twice a week should be sufficient, but adjust based on factors such as weather conditions and humidity levels.
Maintain optimal moisture levels in the soil to ensure thriving Easter lily plants.
To maintain optimal moisture levels in the soil, consider factors such as drainage, evaporation rates, and humidity levels in your environment. Well-draining soil prevents water from pooling around the roots, reducing the risk of rotting or fungal diseases.
Monitoring evaporation rates can help you determine how frequently you should water your Easter lilies. In hot and dry climates, more frequent watering may be necessary, while cooler and more humid conditions may require less frequent watering. It's important to strike a balance that keeps the soil consistently moist but not overly saturated.
Learn about the ideal balance of soil and water necessary for vibrant, healthy flowers.
Finding the ideal balance between soil and water is crucial for vibrant Easter lily flowers. The right combination ensures that the plants receive adequate nutrients while maintaining proper hydration levels. Here are some tips to achieve this balance:
- Soil pH: Easter lilies prefer slightly acidic to neutral soil with a pH range of 6.0 to 7.0. Test your soil's pH using a home testing kit or consult a local garden center for assistance in adjusting it if needed.
- Fertilization: Regular fertilization promotes healthy growth and abundant blooms in Easter lilies. Use a balanced fertilizer with equal proportions of nitrogen, phosphorus, and potassium (NPK). Apply it according to package instructions, typically every four to six weeks during the growing season.
- Mulching: Applying a layer of organic mulch around your Easter lilies helps regulate soil temperature, reduce weed growth, and retain moisture. Organic materials like straw or shredded bark work well as mulch options.
- Humidity: While Easter lilies thrive in moderate humidity levels, excessive moisture can lead to fungal diseases such as botrytis blight. Ensure proper air circulation around the plants by spacing them adequately apart and avoiding overcrowding.
By understanding these optimal requirements for soil and water, you can provide your Easter lilies with an environment conducive to their growth and flowering potential.
Remember, creating an ideal habitat for your Easter lilies involves finding the right balance of factors such as soil composition, watering frequency, drainage capacity, and humidity levels specific to your region or climate conditions. With proper care and attention to these details, you'll be rewarded with vibrant and healthy Easter lilies that add beauty to your garden or indoor space.
Fertilizing techniques to maintain the health of Easter lilies
When and how often should you fertilize your plants for best results?
To ensure the overall health and vitality of your Easter lilies, it is crucial to implement effective fertilizing techniques. Understanding when and how often to fertilize your plants is essential for optimal growth and blooming. Fertilizer provides essential nutrients that support strong and vigorous plant development, leading to beautiful blooms during the Easter season.
Timing plays a significant role. It is recommended to start applying fertilizer in early spring, just as new growth begins to emerge. This will provide a nutrient boost as the plants enter their active growing phase. Continue regular applications every four weeks throughout the growing season until late summer or early fall.
The frequency of fertilization depends on various factors such as soil quality, weather conditions, and the specific fertilizer used. Generally, applying fertilizer every four weeks ensures a steady supply of nutrients for sustained growth. However, it's important not to over-fertilize as excessive amounts can lead to nutrient imbalances or even kidney failure in sensitive plants like lilies.
Maintain nutrient-rich soil by implementing proper fertilization practices with ease
Properly maintaining nutrient-rich soil is crucial for the long-term health of your Easter lilies. Implementing effective fertilization practices will ensure that your plants receive all the necessary nutrients they need for robust growth and vibrant blooms.
Before planting your Easter lilies, prepare the soil by incorporating organic matter such as compost or well-rotted manure. This will help improve soil fertility and provide a solid foundation for healthy root development. Consider performing a soil test to determine any deficiencies or imbalances in nutrients that may require specific amendments.
When selecting a fertilizer for your Easter lilies, choose one with balanced ratios of nitrogen (N), phosphorus (P), and potassium (K). Look for a slow-release or controlled-release fertilizer to provide a steady supply of nutrients over an extended period. This will prevent nutrient leaching and minimize the risk of over-fertilization.
During application, ensure that the fertilizer is evenly distributed around the base of the plant, avoiding direct contact with the foliage or stems. Gently work the fertilizer into the top layer of soil and water thoroughly afterward to help activate nutrient absorption.
Provide essential nutrients through fertilization, ensuring strong and vigorous growth
Fertilizing your Easter lilies provides them with vital nutrients necessary for robust growth and abundant blooms. By understanding which nutrients are crucial for their development, you can ensure that your plants receive everything they need to thrive.
Nitrogen (N) is essential for promoting healthy leaf and stem growth in Easter lilies. It aids in chlorophyll production, enhancing photosynthesis and overall plant vigor. Phosphorus (P) supports root development, flower formation, and improved blooming potential. Potassium (K) plays a crucial role in disease resistance, water regulation within cells, and overall plant health.
In addition to these primary macronutrients, Easter lilies also require secondary macronutrients such as calcium (Ca), magnesium (Mg), and sulfur (S). These elements contribute to various physiological processes within the plant, including enzyme activation, cell division, and protein synthesis.
Micronutrients like iron (Fe), manganese (Mn), zinc (Zn), copper (Cu), boron (B), molybdenum (Mo), and chlorine (Cl) are equally important but needed in smaller quantities. They play critical roles in enzyme function, hormone production, photosynthesis facilitation, and overall metabolic processes.
By selecting a well-balanced fertilizer containing all these essential nutrients or using specific fertilizers designed for flowering plants like Easter lilies, you can provide your plants with everything they need for strong and vigorous growth.
Extending the blooming period of Easter Lilies with proper care
Easter lilies are a beautiful addition to any home or garden, but their blooms can be short-lived if not properly cared for. With our expert tips, you can learn how to prolong the blooming period of your Easter lilies and enjoy their beauty for weeks on end. Discover effective strategies and techniques to maximize the lifespan of your Easter lily flowers and make them last longer.
Prolonging the Blooms
One of the key factors in extending the blooming period of Easter lilies is providing proper care right from the start. By following these proven methods, you can ensure that your lilies bloom for an extended time:
- Choose healthy bulbs: When selecting Easter lily bulbs, opt for those that are firm and free from any signs of damage or disease. Healthy bulbs have a better chance of producing long-lasting blooms.
- Plant at the right time: Plant your Easter lily bulbs in early spring, allowing them enough time to establish their roots before they start flowering. This will help promote stronger plants with more robust blooms.
- Find the perfect spot: Place your potted Easter lilies in a location that receives bright light but avoids direct afternoon sun. Too much heat can cause wilting and shorten the lifespan of the blooms.
- Water properly: Keep the soil evenly moist but not waterlogged. Overwatering can lead to root rot and other issues that may affect blooming. Aim to water deeply once a week, allowing excess water to drain away.
- Fertilize regularly: Use a balanced fertilizer formulated for flowering plants to provide essential nutrients throughout the growing season. Follow package instructions for application rates and frequency.
- Protect from frost: If there's a risk of frost in your area, cover your outdoor Easter lily plants with a layer of mulch or bring potted lilies indoors overnight. Frost can damage the blooms and shorten their lifespan.
Maximizing the Lifespan
To ensure your Easter lilies continue to bloom for as long as possible, there are additional care techniques you can implement:
- Remove spent flowers: As soon as a flower starts to fade, carefully pinch it off at the base. This encourages the plant to direct its energy towards producing new blooms rather than seed production.
- Prevent blight: Keep an eye out for signs of blight, a fungal disease that can affect Easter lilies. If you notice any discolored or spotted leaves, remove them promptly to prevent further spread.
- Control temperature and humidity: Maintain a comfortable temperature range of around 60-75°F (15-24°C) and moderate humidity levels in the room where your Easter lilies are placed. Extreme temperatures and overly dry or humid conditions can cause premature wilting.
- Avoid ethylene exposure: Ethylene gas, which is released by certain fruits like bananas and apples, can accelerate flower aging and cause early wilting. Keep your Easter lilies away from ripening fruits to prevent this gas from affecting their blooms.
By following these care techniques, you can maximize the lifespan of your Easter lily flowers and enjoy their beauty for weeks on end. Remember that each bulb may produce multiple blooms over several days or even weeks, giving you plenty of time to appreciate their exquisite appearance.
So go ahead and implement these tips to extend the blooming period of your Easter lilies. With proper care and attention, you'll be able to savor their stunning blossoms for years to come!
Understanding the natural blooming season of Easter lilies
Insights into the natural blooming season and cycle of Easter lilies
Easter lilies, known for their elegant white trumpet-shaped flowers, have a distinct blooming season that is tied to their natural growth patterns. By understanding these patterns, you can better anticipate when your Easter lilies will bloom and plan your care accordingly.
Easter lilies typically bloom during the spring season, specifically in early summer. This timing coincides with the transition from winter to warmer weather. As temperatures rise and daylight hours increase, Easter lilies awaken from their dormant state and begin their journey towards blooming.
Factors influencing the timing and duration of Easter lily blooms
Several factors influence when Easter lilies bloom and how long their blossoms last. The most crucial factor is the changing seasons. These flowers require a period of cold dormancy during winter to prepare for their vibrant display in spring.
The first frost marks an important milestone for Easter lilies. After this initial freeze, they enter a period of rest where they conserve energy until conditions become favorable again. Once winter recedes and temperatures start rising consistently above freezing point, it signals the start of the growing season for Easter lilies.
Another influential factor is sunlight exposure. These plants thrive in full sun or partial shade, so ensuring they receive adequate light is crucial for proper growth and timely blooming. Without sufficient sunlight, Easter lily bulbs may not develop properly or may take longer to mature.
Soil moisture levels also play a role in determining when Easter lilies will bloom. They prefer well-draining soil that retains some moisture but doesn't become waterlogged. Overly wet or dry conditions can hinder their growth and delay flowering.
Seasonal behavior of Easter lilies for better care planning
Understanding the seasonal behavior of Easter lilies allows you to plan your care routine effectively throughout the year. Here are some key points to consider:
- Early Spring: As winter starts to wane, monitor the soil moisture levels and gradually increase watering frequency. This helps wake up the bulbs from their dormant state and prepares them for growth.
- Spring: Once temperatures consistently stay above freezing, it's time to move your Easter lilies outdoors if they were kept indoors during winter. Find a sunny or partially shaded spot in your garden where they can receive adequate light. Ensure the soil is well-draining and amend it with organic matter if needed.
- Early Summer: This is when you can expect your Easter lilies to burst into bloom, showcasing their magnificent white flowers. Keep an eye on soil moisture levels and water regularly, making sure not to overwater or let the soil dry out completely.
- Summer: After blooming, Easter lilies may start producing seed pods that contain black seeds. If you wish to collect these seeds for propagation purposes, allow the pods to mature fully before harvesting them.
- Winter: As temperatures drop again in late fall, it's time to prepare your Easter lilies for dormancy once more. Gradually reduce watering frequency and apply a layer of mulch around the base of the plants to protect them from extreme cold.
By aligning your care routine with the natural blooming season of Easter lilies, you can ensure optimal growth and vibrant blooms year after year.
Remember that while these guidelines provide general information about Easter lily care, individual variations may occur based on factors like climate and specific cultivars. Observing your plants closely and adapting care accordingly will help you develop a deeper understanding of their unique needs.
Reblooming Techniques for Continuous Easter Lily Blooms
Unlock the secrets to encourage reblooming in your Easter Lilies for continuous floral displays.
Easter lilies, with their elegant white flowers and vibrant yellow anthers, are a delightful addition to any garden or indoor space. But wouldn't it be wonderful if you could enjoy their beauty throughout multiple seasons? With the right techniques, you can unlock the secret to encouraging reblooming in your Easter lilies and experience a consistent cycle of flowering year after year.
Learn effective techniques to stimulate new growth and subsequent blooms in your plants.
To ensure your Easter lilies continue to grace your garden with their gorgeous blooms, it is crucial to provide them with proper care. Start by selecting healthy bulbs that are firm and free from any signs of damage or decay. Plant them in well-draining soil enriched with organic matter, ensuring they have adequate sunlight and water. As these beautiful flowers grow, make sure to remove any spent blooms promptly. This process, known as deadheading, encourages the plant to focus its energy on producing new flowers rather than setting seeds.
In addition to regular deadheading, fertilizing your Easter lilies will help promote healthy growth and reblooming. Use a balanced fertilizer specifically formulated for flowering plants during the growing season. Apply it according to the instructions provided by the manufacturer. Remember not to over-fertilize as excessive nutrients can lead to leggy growth without many flowers.
Another technique that can stimulate new growth is called bulblet propagation. Bulblets are small bulb-like structures that develop at the base of mature bulbs. Gently detach these bulblets from the mother bulb once they have reached a decent size but before they become too large or start sprouting roots of their own. Plant them in separate pots filled with well-draining soil mix and keep them moist until they establish roots. These bulblets will eventually grow into new plants, providing you with more Easter lilies and increasing your chances of continuous blooms.
Discover how to maintain a consistent cycle of flowering throughout multiple seasons with reblooming strategies.
To achieve a continuous cycle of flowering in your Easter lilies, it is essential to understand their natural growth cycle. After the flowers fade, the plant enters a period of dormancy. During this time, it's crucial to reduce watering gradually and allow the foliage to die back naturally. Once the leaves turn yellow and dry up completely, cut them back to about an inch above the soil level.
After the dormant period, it's time to prepare your Easter lilies for reblooming. If you had planted them outdoors, dig up the bulbs carefully without damaging them and store them in a cool, dry place for several weeks. This resting period allows the bulbs to recharge their energy reserves before they are ready for planting again.
When spring arrives, it's time to bring your Easter lilies out of hibernation. Replant them in well-prepared soil and provide adequate sunlight and water as they start growing again. With proper care and attention throughout the growing season, you can enjoy a new round of beautiful blooms from your rejuvenated bulbs.
Master the art of encouraging repeated blooms in your beloved Easter Lilies.
Encouraging repeated blooms in your beloved Easter lilies requires patience and consistency. By following these reblooming techniques, you can master the art of keeping these stunning flowers flourishing year after year:
- Select healthy bulbs: Choose firm bulbs free from damage or decay.
- Plant in well-draining soil: Ensure good drainage by adding organic matter.
- Provide proper sunlight: Place your Easter lilies where they will receive at least six hours of direct sunlight each day.
- Water adequately: Keep the soil evenly moist but not waterlogged.
- Deadhead spent blooms: Remove faded flowers promptly to divert energy towards new growth.
- Fertilize appropriately: Use a balanced fertilizer for flowering plants during the growing season, following the manufacturer's instructions.
- Propagate bulblets: Detach and plant bulblets to increase your Easter lily collection and chances of continuous blooms.
- Allow dormancy: Let the foliage die back naturally, reduce watering gradually, and cut back the leaves after they turn yellow and dry up completely.
- Store bulbs during dormant period: If necessary, dig up bulbs carefully and store them in a cool, dry place for several weeks before replanting in spring.
Identifying and Treating Common Pests and Diseases in Easter Lilies
Familiarize yourself with common pests that may affect your Easter Lilies and learn how to identify them accurately.
One of the most important aspects is understanding the potential pests that can wreak havoc on these beautiful flowers. By familiarizing yourself with common pests and learning how to identify them accurately, you can take proactive measures to protect your plants.
Here are some common pests that may affect your Easter Lilies:
- Aphids: These small, soft-bodied insects can be found feeding on the leaves and stems of your lilies. They reproduce quickly and can cause significant damage if left untreated.
- Lily Leaf Beetles: These bright red beetles are known for their voracious appetite for lily foliage. They chew holes in the leaves, leaving behind a skeletonized appearance.
- Spider Mites: These tiny arachnids are difficult to see with the naked eye but leave behind fine webbing on the leaves of your lilies. They suck sap from the plant, causing yellowing and wilting.
- Slugs and Snails: These slimy creatures can munch on young shoots and leaves, leaving irregular holes in their wake.
To accurately identify these pests, carefully inspect your Easter Lilies regularly. Look out for signs such as distorted growth, discoloration, chewed leaves, or webbing. If you spot any of these symptoms or notice the presence of pests themselves, it's time to take action.
Take proactive measures against diseases that can harm or kill Easter Lilies by recognizing symptoms early on.
In addition to pests, diseases can also pose a threat to your beloved Easter Lilies. By recognizing symptoms early on, you can take proactive measures to prevent further damage or even save an infected plant.
Here are some common diseases that can affect Easter Lilies:
- Botrytis Blight: This fungal disease causes brown spots on the leaves and flowers, often accompanied by a fuzzy gray mold. It thrives in humid conditions.
- Root Rot: Overwatering or poorly drained soil can lead to root rot, which causes the roots to become mushy and discolored. Affected plants may wilt and eventually die.
- Gray Mold: Similar to Botrytis Blight, gray mold is caused by a fungus that attacks weakened or injured plant tissue. It appears as a fuzzy gray coating on leaves, stems, and flowers.
To prevent the spread of diseases, it's crucial to act swiftly when you notice any symptoms. Remove infected plant parts immediately and dispose of them properly. Avoid overhead watering, as moisture promotes the growth of fungi.
Learn effective treatment methods for common pests and diseases, ensuring healthy plants.
When pests or diseases strike your Easter Lilies, it's essential to know how to effectively treat them in order to maintain healthy plants.
Here are some treatment methods for common pests and diseases:
Pests:
- Use insecticidal soap or neem oil spray to control aphids and spider mites.
- Handpick lily leaf beetles off your plants and drop them into soapy water.
- Create barriers such as copper tape or diatomaceous earth around your lilies to deter slugs and snails.
Diseases:
- Prune affected parts of the plant using sterilized tools to prevent the spread of fungal infections.
- Apply fungicides labeled for use on lilies according to the instructions provided.
- Improve drainage in your garden beds by adding organic matter or creating raised beds if root rot is an issue.
By employing these treatment methods promptly and consistently, you can help ensure the health and vitality of your Easter Lilies.
Safeguard your Easter Lilies from potential threats by understanding pest control measures.
In addition to treating pests and diseases, it's crucial to take preventive measures to safeguard your Easter Lilies from potential threats.
Propagating Easter Lilies for Future Growth
If you're a fan of potted Easter lilies and want to expand your collection or share these beautiful bulbs with others, learning how to propagate them is the way to go. By exploring different approaches such as division, bulb offsets, or scaling, you can easily multiply your Easter lily plants and enjoy their stunning white flowers year after year.
Division: Splitting Up the Lily Bulbs
One popular method of propagating Easter lilies is through division. This technique involves splitting up the bulbs into smaller sections that can be replanted and grown into new plants. Here's how you can do it:
- Start by selecting healthy Easter lily bulbs that have finished blooming.
- Gently remove the bulbs from their pots or garden beds and shake off any excess soil.
- Carefully separate the individual bulbs by gently pulling them apart or using a sharp knife to cut them into sections.
- Ensure each divided bulb has some green leaves attached along with a portion of the stem and roots.
- Plant the divided bulbs in well-draining soil, making sure they are spaced adequately apart.
- Water the newly planted divisions thoroughly but avoid overwatering to prevent rotting.
By following these steps, you can propagate your potted Easter lilies through division and create multiple new growths from a single plant.
Bulb Offsets: Expanding Your Lily Collection
Another effective method for propagating Easter lilies is by utilizing bulb offsets. These are small bulblets that develop around the base of mature lily bulbs, ready to sprout into new plants. Here's what you need to do:
- Wait until late summer or early fall when the foliage of your Easter lilies starts dying back naturally.
- Carefully dig up the bulbs from the ground or remove them from their pots.
- Gently separate the bulb offsets from the parent bulb, making sure they have a few roots attached.
- Plant the offsets in well-prepared soil, ensuring they are placed at a suitable depth with their tips just below the surface.
- Water the newly planted offsets regularly to keep the soil moist but not waterlogged.
By using bulb offsets, you can quickly expand your Easter lily collection and enjoy an abundance of these stunning flowers in your garden.
Scaling: A Delicate Propagation Technique
Scaling is a more advanced propagation technique that involves carefully removing small scales from an Easter lily bulb and using them to grow new plants. While it requires precision and patience, scaling can be a rewarding way to propagate Easter lilies. Here's how you can give it a try:
- Select a mature Easter lily bulb with healthy green leaves and firm scales.
- Remove any loose outer scales from the bulb, leaving behind only those that are tightly attached.
- Using a sharp knife or razor blade, carefully cut off some scales from around the base of the bulb.
- Place these scales in a plastic bag filled with damp sphagnum moss or vermiculite to keep them moist.
- Store the bag in a cool and dark place for several weeks until bulblets start forming at the base of each scale.
- Once bulblets have developed, plant them individually in pots filled with well-draining soil mix.
- Provide adequate light, warmth, and moisture to help these bulblets grow into healthy Easter lily plants.
Scaling may require some practice and experimentation to achieve success, but once mastered, it opens up exciting possibilities for propagating Easter lilies.
Tips for growing Easter lilies in pots: care and decorative options
Growing Easter lilies in pots: Best practices for success
Growing Easter lilies in pots can be a rewarding experience, allowing you to enjoy the beauty and fragrance of these stunning flowers right on your doorstep. To ensure your potted Easter lilies thrive, it's important to follow some best practices:
- Choose the right pot: Select a pot that provides enough room for the roots to grow. A 6-8 inch diameter pot is usually suitable for a single bulb. Ensure it has drainage holes at the bottom to prevent waterlogging.
- Pick the perfect variety: There are various varieties of Easter lilies available, each with its unique characteristics. Consider factors such as height, bloom time, and color when selecting a variety that suits your preferences.
- Provide adequate sunlight: Place your potted Easter lily in an area that receives bright but indirect sunlight. Too much direct sun can scorch the leaves, so providing some shade during the hottest part of the day is beneficial.
- Watering routine: Keep the soil consistently moist but not overly saturated. Water thoroughly when the top inch of soil feels dry to the touch. Avoid letting water accumulate in saucers or trays beneath the pot, as this can lead to root rot.
- Mulch for moisture retention: Apply a layer of organic mulch around your potted Easter lily to help retain moisture and regulate soil temperature. This will also deter weed growth and provide an attractive finishing touch.
Caring for potted Easter lilies: Keeping them healthy and vibrant
Proper care is essential for maintaining healthy and vibrant potted Easter lilies throughout their blooming period. Here are some tips to ensure their well-being:
- Fertilize wisely: Feed your potted Easter lily with a balanced slow-release fertilizer once every month during the growing season. Avoid over-fertilization, as it can lead to excessive foliage growth at the expense of flower production.
- Deadheading spent blooms: Regularly remove faded or wilted flowers by gently pinching them off at the base. This encourages the plant to focus its energy on producing new blooms, resulting in a longer flowering period.
- Prevent pests and diseases: Keep an eye out for common pests like aphids and mites, which can damage your Easter lilies. Use organic insecticidal soap or neem oil to control infestations. Ensure good air circulation around the plant to prevent fungal diseases.
- Supporting tall varieties: Some Easter lily varieties can grow quite tall and may require support to prevent them from toppling over. Insert stakes or use decorative plant supports around the pot to provide stability while maintaining an aesthetic appeal.
- Post-bloom care: After your potted Easter lily finishes blooming, you have two options: you can either discard it or continue caring for it in hopes of reblooming next year. If you choose the latter, reduce watering gradually and allow the foliage to wither naturally before cutting it back completely.
Decorating potted Easter lilies: Adding visual appeal
Make your potted Easter lilies even more visually appealing by incorporating creative decorative options:
- Colorful companions: Pair your potted Easter lilies with complementary flowering plants such as pansies or violas in vibrant hues. The contrasting colors will create an eye-catching display.
- Elevate with stands: Place your pots on decorative stands of varying heights to add dimension and visual interest to your garden or patio area.
- Seasonal accents: Embrace the festive spirit by adorning your potted Easter lilies with colorful ribbons, bows, or miniature ornaments during holidays like Easter or Christmas.
- Grouping arrangements: Create an impressive display by grouping pots of Easter lilies together. Vary the pot sizes and heights to add depth and create a visually stunning arrangement.
Mastering the art of Easter lily care
Congratulations on taking the first step towards becoming an expert in Easter lily care! By following the guidelines provided in this guide, you will be well-equipped to ensure the health and vitality of your Easter lilies. Let's summarize the key points discussed in each section:
1. Choosing the right location for planting Easter lilies outdoors
Select a location that offers full sunlight or partial shade for your Easter lilies. Avoid areas with strong winds or excessive heat to prevent damage to the delicate blooms.
2. Step-by-step guide to planting Easter lilies successfully
Follow a simple step-by-step process when planting your Easter lilies, including preparing the soil, digging a hole of appropriate depth, placing the bulbs correctly, and covering them with soil.
3. Optimal soil and water requirements for Easter lilies
Ensure your Easter lilies are planted in well-draining soil enriched with organic matter. Water them regularly but avoid overwatering as it can lead to root rot.
4. Fertilizing techniques to maintain the health of Easter lilies
Apply a balanced fertilizer during different stages of growth to provide essential nutrients for healthy development and vibrant blooms.
5. Extending the blooming period of Easter Lilies with proper care
Implement various techniques such as deadheading spent flowers, removing yellow leaves, and providing adequate water and sunlight to extend the blooming period of your Easter lilies.
6. Understanding the natural blooming season of Easter lilies
Easter lilies naturally bloom during late spring or early summer. By understanding their natural blooming season, you can plan accordingly and enjoy their beauty at its peak.
7. Reblooming techniques for continuous Easter Lily blooms
With proper care after flowering, you can encourage reblooming in subsequent years by cutting back spent stems, providing sufficient light and nutrients, and adjusting watering practices.
8. Identifying and treating common pests and diseases in Easter Lilies
Learn to identify common pests and diseases that can affect Easter lilies, such as aphids, mites, or fungal infections. Take appropriate measures like using organic pest control methods or applying fungicides when necessary.
9. Propagating Easter Lilies for future growth
Expand your collection of Easter lilies by propagating them through bulb division or through the collection of seeds. Follow the recommended techniques to ensure successful propagation.
10. Tips for growing Easter lilies in pots: care and decorative options
Discover the joys of growing Easter lilies in pots by following specific care instructions tailored for container gardening. Explore creative ways to decorate your pots with seasonal themes or personal touches.
Now that you have mastered the art of Easter lily care, it's time to put your knowledge into action! Remember to provide consistent care throughout the year, adapting it according to each stage of growth. Enjoy the beauty and fragrance these stunning flowers bring into your life!
FAQs: Easter Lily Care
Can I grow Easter lilies indoors?
Yes, you can grow Easter lilies indoors as long as they receive adequate sunlight and are planted in well-draining soil within a suitable pot size.
How often should I water my Easter lilies?
Water your Easter lilies regularly but avoid overwatering. Aim for moist soil without allowing it to become waterlogged.
What is the best time to plant Easter lily bulbs?
The ideal time for planting Easter lily bulbs is during late fall or early winter before the ground freezes.
How do I prevent my Easter lilies from drooping?
To prevent drooping, ensure your Easter lilies are adequately supported with stakes or cages as they grow taller.
Can I cut off wilted flowers from my Easter lily plant?
Yes, removing wilted or spent flowers, a process known as deadheading, helps redirect energy toward new growth and encourages continuous blooming.
Image Source: Paid image from CANVA