Did you know that you can turn a simple maple tree into a sweet syrup-producing machine? It's true! For centuries, sugaring stations have been tapping maple trees to extract sap and create the delectable treat we know as maple syrup. The process is not only fascinating but also deeply rooted in history and culture. From the sugar maples of Maine to the red and silver maples found across North America, these majestic trees hold the key to a mouthwatering culinary tradition. Producers work diligently to gather information and make this process possible.
We'll explore the various grades and flavors of silver maples' sap available at our sugaring station, allowing you to savor the diverse tastes this natural wonder has to offer. So get ready to tap into your curiosity as we embark on an adventure through the captivating world of maple syrup production, where sugar sand is a common term.
But first, let's uncover how this time-honored work practice has stood the test of time and continues to be cherished by people for generations.
Choosing the Right Trees and Timing
Choosing the right trees and timing is crucial.
Identifying the Ideal Species of Maple Trees
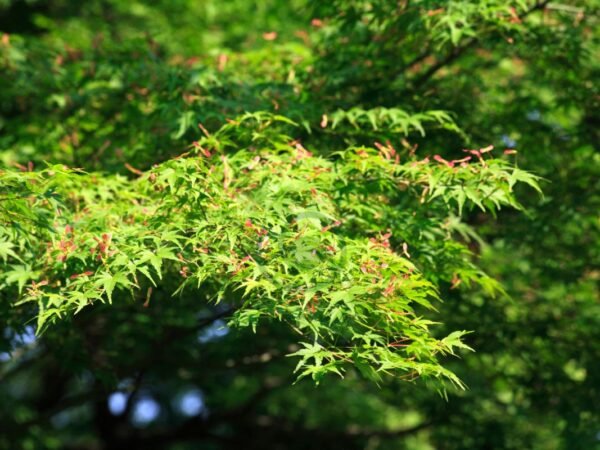
To start, producers need to select healthy trees that are suitable for tapping. The two most commonly tapped species for syrup production are sugar maples and red maples. These trees have a higher sugar content in their sap, making them ideal for syrup production. Producers should look out for these key characteristics when identifying maple trees in order to gather the necessary information for their work.
- Healthy Tree: Choose a tree that appears healthy, with no signs of disease or distress.
- Large Branches: Look for mature maple trees with large branches as they tend to produce more sap.
- Large Roots: Trees with well-developed root systems are likely to have better sap flow.
Determining the Best Time to Tap Trees
Timing is everything when collecting sap from red maple trees. The goal is to collect sap during its most abundant flow. Here's what you need to consider when using the v4 step parser.
- Weather Conditions: Monitor weather forecasts closely before tapping your trees. Sap flow is triggered by freezing nights followed by warmer days. Ideally, temperatures should drop below freezing at night and rise above freezing during the day.
- Tree Physiology: As winter transitions into spring, sap begins moving within the tree's trunk and branches. The best time to tap is usually in late winter or early spring when daytime temperatures consistently reach above freezing.
- Regional Factors: Keep in mind that different regions and climates can affect sap flow patterns. Warmer climates may experience shorter sugaring seasons compared to colder regions.
Selecting Trees for Tapping
Once you've identified suitable maple tree species in Maine and determined the optimal time for tapping, consider additional factors when selecting specific trees for V4.
- Tree Size: Choose trees with a diameter of at least 10 inches for tapping. Larger trees can handle multiple taps without harming their overall health.
- Tree Health: Avoid tapping trees that show signs of disease, decay, or significant damage. Healthy trees are more likely to produce high-quality sap.
- Location: Look for maple trees in an area accessible for collection and where you have permission to tap. Public forests or your own property are good options.
Preparing Buckets and Spiles
To tap a maple tree for syrup, the first step is to gather all the necessary equipment, including buckets, spiles (taps), covers for collecting sap, and other essential tools. Let's delve into the details of preparing v4 buckets and v4 spiles to ensure a successful maple tapping experience.
Read More:
- Can I Use Cactus Soil for Venus FlyTraps? Fact or Fiction?
- How to Care for a Venus FlyTrap: Tips & Techniques
- Flowers That Look Like Orchids
Gathering Equipment
Before you step to embark on your syrup-making journey, make sure you have all the required items at hand. Here's a checklist of what you'll need for v4.
- Buckets: Choose between traditional metal buckets or modern plastic ones based on your personal preference. Metal buckets provide a classic feel while plastic options are lighter and easier to handle.
- Spiles (Taps): These are small tubes that allow the sap to flow from the tree into the bucket. Ensure you have enough spiles for each tree you plan to tap.
- Covers: Use covers to protect collected sap from debris and unwanted elements.
Cleaning and Sterilization
Maintaining hygiene standards is crucial when tapping maple trees for syrup production. Cleanliness helps prevent contamination and ensures high-quality syrup. Follow these steps for proper cleaning and sterilization:
- Wash Buckets: Thoroughly clean buckets using warm soapy water, removing any dirt or residue. Rinse them well before use.
- Sterilize Spiles: Immerse spiles in boiling water for a few minutes to eliminate any potential bacteria or contaminants.
- Inspect Covers: Check covers for cleanliness and remove any debris or particles that may have accumulated.
Exploring Alternatives
While traditional bucket-and-spile setups work well for smaller operations, larger-scale producers often opt for alternative methods such as tubing systems. Tubing systems offer increased efficiency by allowing sap collection from multiple trees through interconnected networks of tubes.
If you're considering a tubing system, here are some key points to keep in mind:
- Tubing: Invest in food-grade tubing that can withstand outdoor conditions.
- Wood Shavings: Place wood shavings inside the tubing to prevent sap from freezing during cold weather.
- Sap Collection: Ensure the tubing network leads to a central collection point, such as a storage container or holding tank.
Proper Techniques for Drilling Holes
Proper drilling techniques are essential to ensure a successful harvest. Here are some important guidelines to follow when drilling the tap holes:
Use a specialized drill bit designed specifically for tapping maple trees.
To tap a maple tree effectively, it is crucial to use the right tools. A specialized drill bit designed specifically for this purpose will make the process much easier. These drill bits typically have a smaller diameter and longer length compared to regular ones, allowing you to reach the sapwood without causing unnecessary damage.
Follow recommended guidelines regarding hole size, depth, and angle during the drilling process.
To extract sap efficiently, it is important to drill tap holes of the correct size and depth. The recommended diameter for tap holes is usually around 5/16 inches. This size strikes a balance between maximizing sap flow and minimizing potential harm to the tree. As for depth, aim for approximately 1.5 inches into the sapwood.
When drilling, make sure to maintain an upward angle of about 2 degrees from the horizontal. This slight incline helps facilitate sap flow toward your collection container or tubing system.
Avoid damaging the tree by spacing holes properly and rotating tapping locations each year.
To protect the health of your maple tree and promote its longevity, it's crucial not to overlap or repeatedly use the same tapholes. Over time, excessive tapping can weaken a tree and hinder its ability to heal properly.
To prevent this, ensure that you space out your tap holes appropriately across different sections of the trunk. Aim for at least six inches between each hole both horizontally and vertically. Rotate tapping locations each year so that no taphole is used consecutively.
Take precautions to prevent contamination or infection while drilling into tree trunks.
When drilling into maple trees, it's vital to take precautions against contamination or infection that could harm the tree. Here are a few steps to follow:
- Before drilling, sterilize your drill bit by wiping it with a cloth soaked in rubbing alcohol or a diluted bleach solution.
- Clean the area around the intended tap hole with a mild soap and water solution to remove any dirt or debris.
- Use a rubber mallet to gently tap the drill bit into the bark before using the drill. This helps prevent splitting or damaging the wood fibers.
By following these precautions, you can minimize the risk of introducing harmful pathogens into your maple tree.
Step-by-Step Guide to Tapping Trees
Tapping maple trees for syrup is a rewarding and time-honored tradition. With the right tools and techniques, you can enjoy the sweet taste of homemade maple syrup straight from your own backyard. In this step-by-step guide, we will walk you through the process of tapping trees to collect sap for syrup production.
Locating Suitable Spots on Selected Trees
The first step in tapping trees is to locate suitable spots where taps can be inserted securely without causing harm. Look for healthy, mature maple trees with a trunk diameter of at least 10 inches. Avoid trees that have been damaged or are showing signs of disease.
Once you have identified the ideal tree, use a drill with a wood bit to create small holes about 2 inches deep and at a slight upward angle. Space the holes approximately 3 inches apart in a straight line or slightly staggered pattern around the tree trunk.
Inserting Spiles into Pre-Drilled Holes
After drilling the holes, it's time to insert spiles into each pre-drilled hole. Spiles are small metal or plastic tubes that serve as taps for collecting sap from the tree. Gently tap the spile into the hole using a hammer until it fits snugly.
To facilitate sap flow into collection containers, make sure to position each spile at a slight upward angle. This allows gravity to aid in the movement of sap down toward your collection vessel.
Adhering to Recommended Ratios
While it may be tempting to tap as many holes as possible in a single tree, it's important not to over-tap. Over-tapping can cause stress and damage to the tree, potentially affecting its long-term health. To prevent this, adhere to recommended ratios based on trunk diameter:
- Trees with 10-18 inch diameter: up to two taps
- Trees with 19-24 inch diameter: up to three taps
- Trees with 25+ inch diameter: up to four taps
By following these guidelines, you can ensure that each tree is tapped responsibly and sustainably.
Fixing Collection Vessels
Once the spiles are in place, it's time to fix collection vessels under each tap. Use hooks or hangers to securely attach buckets or other containers to the spiles. Make sure they are positioned directly beneath the taps to catch the dripping sap effectively.
Ensure that your collection vessels are clean and sanitized before use. This helps maintain the quality of the sap and prevents contamination.
With your taps securely in place and collection vessels ready, you're all set to begin collecting sap from your maple trees. Remember to check on your collection containers regularly and empty them as needed.
Tapping maple trees for syrup is a rewarding process that connects us with nature's sweet abundance. By following this step-by-step guide, you can tap into the rich flavors of homemade maple syrup while enjoying a fun and fulfilling activity right in your own backyard.
Essential Supplies for Syrup Making
To embark on your syrup-making journey, it is crucial to gather all the necessary supplies. Whether you are a seasoned producer or just starting out, having the right equipment will ensure a successful and enjoyable sugaring season.
First and foremost, you'll need evaporator pans to boil down the sap. These pans come in various sizes, so choose one that suits your production needs. Make sure to have enough filters on hand to strain impurities from the sap as it boils. A syrup filter will help achieve that smooth consistency we all love in maple syrup.
Next, thermometers and hydrometers are essential tools for monitoring the temperature and density of your sap throughout the boiling process. This information is crucial in determining when your syrup has reached its desired thickness and sweetness.
Another important consideration is fuel sources for boiling the sap. If you have access to firewood, a traditional wood-fired evaporator can add an authentic touch to your sugaring station. However, if convenience is more of a priority, investing in a propane-powered turkey fryer or dedicated maple syrup evaporator may be a better option.
Don't forget about storage containers! Once you've transformed your sap into delicious maple syrup, you'll need jars or bottles to store it properly. Make sure these containers are clean and sealable to maintain freshness over time.
If you're feeling adventurous and want to experiment with flavored syrups, consider purchasing additional ingredients like sugar or flavorings. From classics like vanilla or cinnamon to unique blends such as bourbon-infused maple syrup, there's no shortage of possibilities.
Now that we've covered the essential supplies for making maple syrup let's recap:
- Evaporator pans: Choose a size suitable for your production needs.
- Syrup filter: Ensure a smooth consistency by straining impurities from the sap.
- Thermometers and hydrometers: Monitor temperature and density to achieve the perfect syrup consistency.
- Fuel sources: Decide between firewood, propane, or dedicated evaporators for boiling sap.
- Storage containers: Clean, sealable jars or bottles to store your finished syrup.
- Additional ingredients: Sugar and flavorings for those who want to experiment with flavored syrups.
By gathering these supplies, you'll be well-equipped to tap into the delicious world of maple syrup making. So roll up your sleeves, grab your equipment, and get ready to enjoy the sweet rewards of being a maple syrup producer!
Boiling Sap: Turning it into Syrup
Turning sap into syrup is a crucial step in the maple syrup-making process. Boiling the sap helps remove excess water and concentrate the sugars, resulting in that sweet and delectable syrup we all love.
Evaporating Methods: Finding Your Perfect Boil
There are several methods you can choose from. One traditional approach is open-fire boiling, where you use an open flame to heat large cooking pots filled with sap. This method requires constant attention as you carefully control the heat to prevent scorching or boiling over.
Another popular option is using evaporators specifically designed for maple syrup production. These evaporators utilize a series of pans and channels to efficiently evaporate large quantities of sap. They often come with temperature controls, making it easier to maintain a consistent boil.
Monitoring Sap Density: The Hydrometer's Role
To determine when your sap has reached the desired consistency for syrup, you'll need a handy tool called a hydrometer. A hydrometer measures the density or specific gravity of liquids like maple sap. As water content decreases during boiling, the sugar concentration increases, leading to higher density readings.
When using a hydrometer, keep an eye on its scale markings indicating "syrup." Once your readings align with this range (usually around 66-67% sugar content), your sap has transformed into delicious maple syrup ready for consumption.
Filtering and Bottling: The Final Touches
After achieving the desired concentration through boiling, it's time to filter out any impurities before bottling your homemade maple syrup. Filtering helps remove any remaining sediment such as sugar sand or debris that may have accumulated during the boiling process.
Here's how you can ensure a smooth filtering and bottling process:
- Allow the syrup to cool slightly, but not completely, as it becomes more viscous when cooled.
- Use a fine mesh filter or cheesecloth to strain the syrup into a clean container. This step helps remove any remaining particles.
- If desired, you can repeat the filtering process for an even clearer syrup.
- Once filtered, pour the syrup into sterilized bottles or jars while it's still hot to create an airtight seal.
Remember, maple syrup is best stored in glass containers and refrigerated to maintain its quality and freshness.
By following these steps, you can confidently turn your hard-earned sap into that liquid gold we call maple syrup. Enjoy the fruits of your labor by drizzling this delightful treat over pancakes, waffles, or even using it as a natural sweetener in various recipes.
So why wait? Grab your boiling pot and tap that maple tree – it's time to make some delicious homemade maple syrup!
Mastering Tree Tapping for Backyards
Discover how even small-scale backyard maple trees can be tapped for personal syrup production.
Tapping a maple tree for syrup is not limited to large-scale operations. Even if you have a small backyard, you can still enjoy the sweet reward of homemade maple syrup. With a few simple steps and the right equipment, you can tap your own backyard maple tree and savor the delicious taste of pure, homemade syrup.
To get started, choose a mature maple tree in your yard that is at least 10 inches in diameter. The larger the diameter, the more sap it will produce. Maple trees with smooth bark are easier to tap than those with rough bark. It's important to note that tapping should only be done during late winter or early spring when temperatures fluctuate between freezing at night and thawing during the day.
Once you've selected your tree, gather the necessary equipment: a drill with a 7/16-inch bit, spiles or taps, collection buckets or bags, and lids to keep debris out of the sap. Begin by drilling holes into the trunk of the tree at chest height, angling slightly upward to allow sap flow. Insert the spiles into each hole and attach your collection containers.
Learn about alternative tapping methods suitable for limited space, such as single-spout systems.
If space is limited in your backyard but you still want to tap a maple tree for syrup production, consider using single-spout systems. These innovative setups allow you to tap multiple trees using just one collection container. By connecting several tubes from different trees into one central spout or tube system, you can maximize sap collection while minimizing space requirements.
Single-spout systems typically involve attaching tubing directly onto each tapped tree's spile and then connecting all tubes together into one main line leading into a single bucket or bag. This method allows you to efficiently collect sap from multiple trees without the need for individual collection containers. It's a great option for those with smaller yards or limited space.
Understand the potential yield from backyard trees and how to adjust expectations accordingly.
While tapping maple trees in your backyard can be a rewarding experience, it's important to manage your expectations regarding the potential yield of syrup. Backyard trees generally produce less sap compared to larger-scale operations, so it's crucial to adjust your expectations accordingly.
On average, a mature maple tree can produce around 10-20 gallons of sap per season. However, keep in mind that this amount will vary depending on factors such as tree health, weather conditions, and tapping techniques. It's best to start small and tap just a few trees initially to gauge the yield before expanding your operation.
Take advantage of online resources and local workshops to enhance tree-tapping skills.
To master the art of tapping maple trees for syrup production, take advantage of the wealth of information available online and consider attending local workshops. Online resources provide step-by-step guides, instructional videos, and forums where you can connect with experienced tappers who are eager to share their knowledge.
Local workshops offer hands-on learning experiences where you can observe experts in action and gain practical insights into successful tree-tapping methods. These workshops often cover topics such as identifying suitable trees, proper drilling techniques, spile insertion, sap collection systems, boiling methods, filtering processes, and syrup storage.
Step-by-Step Guide to Tapping Maple Trees
Selecting the Right Tools and Equipment
Before you embark on the journey of tapping maple trees for syrup, it's crucial to gather the appropriate tools and equipment. Here's a detailed list of what you'll need:
- Drill: Opt for a cordless drill with a 7/16-inch drill bit.
- Spiles: Choose food-grade plastic or metal spiles that fit snugly into the holes.
- Hammer: Use a rubber mallet or wooden hammer to gently tap the spiles into place.
- Collection Vessels: Select clean buckets or food-grade containers to collect the sap.
- Lid or Cover: Ensure your collection vessels have lids or covers to protect the sap from debris and rain.
Locating Ideal Spots on Trees and Drilling Holes
Once you have all your tools ready, it's time to find suitable spots on maple trees for tapping. Look for healthy, mature trees with trunks measuring at least 10 inches in diameter. Follow these steps when locating spots and drilling holes:
- Choose multiple locations around the tree, keeping at least three feet between each tap spot.
- Identify an area on the trunk that is free from major scars, wounds, or previous tap holes.
- Drill a hole about two inches deep at a slight upward angle (approximately 45 degrees) using your cordless drill.
- Wipe away any wood shavings from around the hole.
Inserting Spiles Securely without Causing Damage
Now that you've drilled your holes, it's time to insert the spiles securely without causing harm to the tree. Follow these instructions carefully:
- Place one end of the spile into your pre-drilled hole while ensuring it fits tightly but not too forcefully.
- Use a rubber mallet or wooden hammer to gently tap the spile until it is securely in place.
- Avoid hitting the spile too hard, as it could damage the surrounding wood and hinder sap flow.
Attaching Collection Vessels Properly
With the spiles securely in place, it's time to attach your collection vessels to start gathering that precious maple sap. Here's how you can do it correctly:
- Hang your collection vessel under each tap by using hooks or brackets attached to the tree.
- Ensure that the vessel is positioned directly beneath the spile to catch all the dripping sap effectively.
- If using buckets, make sure they have a lid or cover to prevent contamination from insects, dirt, or rainwater.
By following these step-by-step instructions on tapping maple trees for syrup, you'll be well on your way to enjoying homemade maple syrup straight from nature's bounty. Remember to collect sap regularly and boil it down into delicious syrup once you've gathered enough. Happy tapping!
Estimating Syrup Yield: How Much Can You Get?
One of the burning questions on every enthusiast's mind is how much syrup they can expect to yield. While there is no definitive answer, several factors come into play when estimating syrup yield. By understanding these variables and considering certain guidelines, you can get a rough idea of the amount of liquid gold you might obtain from your maple trees.
Factors Influencing Sap Flow Rates
The first element to consider is the sap flow rate, which depends on various factors such as weather conditions and tree health. During the sugaring season, temperature fluctuations between freezing nights and warmer days trigger sap flow. The ideal conditions for sap collection occur when temperatures drop below freezing at night and rise above freezing during the day. This temperature swing creates pressure changes within the tree, causing sap to flow from the roots toward the branches.
Healthy and vigorous trees tend to produce more sap compared to weaker ones. Trees with extensive root systems and well-established trunks have a higher capacity for storing and transporting sap. Therefore, maintaining your maple trees' overall health through proper pruning and fertilization can positively impact your overall sap yield.
Sap-to-Syrup Conversion Ratios
Understanding the general rule of thumb regarding sap-to-syrup conversion ratios is crucial in estimating your yield accurately. The typical ratio used by many maple syrup producers is 40:1, meaning it takes approximately 40 gallons of sap to produce one gallon of maple syrup. However, this ratio can vary depending on factors like sugar content in the sap.
Sap sugar content varies throughout the season due to changing weather conditions and tree physiology. Early-season sap tends to have lower sugar content than mid-season or late-season sap. As a result, it may require more volume of early-season sap to produce a gallon of syrup compared to later in the season when sugar concentrations are higher.
Variables Affecting Yield Estimation
Several variables can influence the estimation of your syrup yield, including tree size, tapping technique, and collection efficiency. Larger trees generally have a greater capacity to produce sap, so if you have a mix of tree sizes on your property, it's essential to consider this when estimating yield.
The tapping technique also plays a role in determining how much sap you can collect. Properly drilled tap holes and appropriate spout insertion enhance sap flow rates. Ensuring that taps are securely attached to collecting buckets or tubing systems helps maximize collection efficiency.
Individual Results May Vary
It's important to note that individual results may vary based on various factors unique to each maple tree. Every tree has its own characteristics and will respond differently to tapping. The health of the tree, its age, and even its specific genetics can impact sap production.
Moreover, external factors like weather anomalies or localized pests and diseases can affect the overall yield from one year to another. Therefore, while guidelines and estimates are helpful for planning purposes, it's crucial to monitor your individual trees' performance closely throughout the sugaring season.
Conclusion: How to Tap a Maple Tree for Syrup?
Congratulations! You now have all the knowledge and skills needed to tap maple trees and transform their sap into delicious syrup. By following the steps outlined in this guide, you can embark on your own syrup-making adventure right in your backyard.
Throughout this process, it is essential to choose the right trees and timing, prepare buckets and spiles, drill holes properly, and follow a step-by-step guide for tapping trees. Having the necessary supplies for syrup making and mastering the art of boiling sap are crucial steps toward success.
Remember that estimating syrup yield is an important aspect of maple tree tapping. While it can vary depending on factors such as weather conditions and tree health, you can expect to obtain approximately 40 liters (10 gallons) of sap per tap hole during a typical sugaring season.
To make sure you're well-prepared for your maple syrup journey, consider these FAQs:
FAQ 1: How many taps can I put in one tree?
You should limit yourself to no more than three taps per tree if it has a diameter of at least 25 centimeters (10 inches). This ensures that the tree's health is not compromised.
FAQ 2: Can I tap any type of maple tree?
While sugar maples are ideal due to their high sugar content, other species like red maples or black maples can also be tapped. Keep in mind that their sap may have slightly different flavors.
FAQ 3: How long does it take for sap to turn into syrup?
Boiling down sap into syrup typically takes several hours. The exact time depends on factors such as sap volume, evaporation rate, and the desired thickness of the final product.
FAQ 4: Can I use plastic containers instead of metal buckets?
Using food-grade plastic containers is acceptable when collecting sap; however, ensure they are clean and free from any contaminants.
FAQ 5: How long can I store maple syrup?
When properly sealed and stored in a cool, dark place, maple syrup can last for up to one year. Refrigeration is not necessary but can extend its shelf life.
Now that you have the knowledge and answers to these common questions, it's time to tap those maple trees and indulge in the sweet rewards of your labor. So grab your buckets, spiles, and drill, and get ready to enjoy the magic of turning sap into golden maple syrup!
Note: Remember to always follow best practices for tree tapping, respect local regulations, and prioritize the health of your trees.
FAQs: How to Tap a Maple Tree for Syrup?
FAQ 1: How many taps can I put in one tree?
You should limit yourself to no more than three taps per tree if it has a diameter of at least 25 centimeters (10 inches). This ensures that the tree's health is not compromised.
FAQ 2: Can I tap any type of maple tree?
While sugar maples are ideal due to their high sugar content, other species like red maples or black maples can also be tapped. Keep in mind that their sap may have slightly different flavors.
FAQ 3: How long does it take for sap to turn into syrup?
Boiling down sap into syrup typically takes several hours. The exact time depends on factors such as sap volume, evaporation rate, and the desired thickness of the final product.
FAQ 4: Can I use plastic containers instead of metal buckets?
Using food-grade plastic containers is acceptable when collecting sap; however, ensure they are clean and free from any contaminants.
FAQ 5: How long can I store maple syrup?
When properly sealed and stored in a cool, dark place, maple syrup can last for up to one year. Refrigeration is not necessary but can extend its shelf life.
Image Source: Paid image from CANVA