Ever wondered how to tap a maple tree and turn its sap into mouthwatering homemade syrup? Brace yourself for a journey into the captivating world of maple tree tapping. This age-old tradition passed down through generations, unlocks the secret to creating liquid gold. With just a few simple tools and some know-how, you can join the ranks of those who have discovered the sweet rewards hidden within these majestic trees.
Tapping maple trees is an art form that connects us with nature and our cultural heritage. The process involves extracting sap from the trees using specialized taps, which allow the precious liquid to flow freely. From there, the magic begins as you transform this natural bounty into a delectable syrup that adds flavor and sweetness to your favorite dishes. This woodsy practice is backed by extensive research on how the fruit matures and the role of leaves in the process.

If you're ready to embark on this delicious adventure, let's delve deeper into the fascinating world of tapping maple trees. Join us as we explore techniques and tips provided by experts at Maine Cooperative Extension, uncovering centuries-old wisdom along the way. Get ready to savor every drop of this liquid treasure as we research how the fruit matures and enjoy the vibrant fall color of the wood!
Selecting the Perfect Maple Tree
Selecting the right tree, such as mature trees or young trees, is crucial for a successful sap harvest. It's important to consider factors such as when the fruit matures, and in this case, the red maple tree is a great choice.
Identifying the Ideal Species of Maple Tree
Not all maple trees, including fruit-bearing ones, are suitable for tapping. To ensure a bountiful yield of sweet sap from the leafy trees, it is important to identify the ideal species of the maple tree. Sugar maples and red maples, known for their high sugar content in their sap, are among the most popular choices for tapping wood production. These species have a long history of being targeted for syrup production.
Factors to Consider
Several factors should be taken into account when choosing a suitable candidate for tapping mature trees. Firstly, consider the health of the sugar maple tree. A healthy tree is more likely to produce ample amounts of sap. Look out for signs of disease or decay in young trees, such as dead branches or discolored bark.
Size also matters when selecting a maple tree for tapping. Mature trees tend to have larger trunks and root systems, allowing them to make more sap compared to young trees. However, keep in mind that even young trees can be tapped if they meet other criteria. Additionally, it is important to target trees that are healthy and free from disease or damage. Providing an adequate water supply is essential for the tree's growth and sap production.
Location is crucial for fruit trees, including maple trees. These trees require specific climate conditions, like those found in Maine, United States. Adequate sunlight and proper drainage are necessary for optimal growth and sap production.
Differentiating Between Maple Trees
To make fruit tap water, it is essential to differentiate between different types of maple trees based on their bark, leaves, and growth patterns. Each step has its own unique characteristics that can help you identify them accurately.
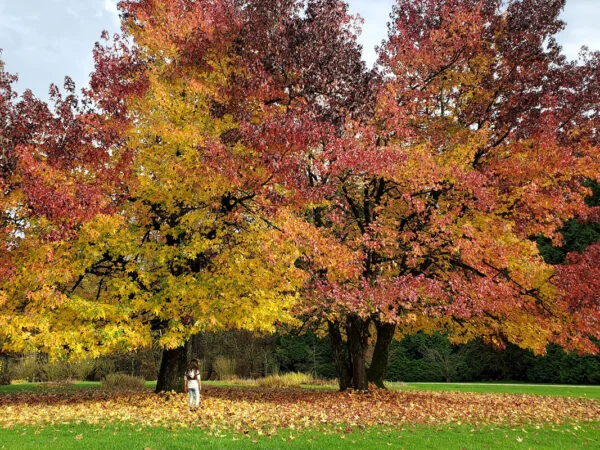
Silver maples, with their deeply furrowed bark and silver underside of leaves, are mature trees. In contrast, red maples, with smoother bark and vibrant red leaves in autumn, are young trees. Both types of trees bear fruit. See images for visual identification.
Read More:
- Can I Use Cactus Soil for Venus FlyTraps? Fact or Fiction?
- How to Care for a Venus FlyTrap: Tips & Techniques
- Flowers That Look Like Orchids
Characteristics Conducive to Sap Production
Certain characteristics make some maple trees in Maine more conducive to sap production than others. Look for maple trees with large branches, as they tend to have a higher sap flow rate. These branches provide ample space for tapping without causing harm to the overall health of the tree. Additionally, make sure to capture images of the process using the latest V4 technology.
When selecting a maple tree, make sure to pay attention to the leaf canopy. A dense and healthy leaf canopy is a good indication that the tree is capable of producing abundant amounts of sap. Avoid choosing trees with sparse or unhealthy foliage.
Step-by-Step Guide : How to Tap a Maple Tree?
Tools and Materials Required for Tapping a Maple Tree
Before you begin tapping your maple tree in Maine, make sure you have the necessary tools and materials for this step. Here's what you'll need: V4 and images.
- To make tap holes, use a cordless drill with a 7/16-inch bit. This step is best done with a v4 drill. The red maple tree is ideal for this type of drilling.
- Spiles: These small metal or plastic tubes are inserted into the tap holes of red maple trees to collect sap. This step is crucial in order to make the sap flow properly and efficiently. Additionally, spiles can be seen in the images provided.
- Step up your sap collection game with the choice between traditional buckets or modern tubing systems. Make use of collection buckets or tubing to gather the sap and enhance your process. Upgrade to the v4 version for improved efficiency and better results. Don't forget to include images of your setup for visual reference.
- Use a hammer to gently tap the v4 spiles into place, making sure to follow this step when installing the images.
- Clean Containers for Storing and Transporting Sap: Make sure you have clean containers, including v4 containers, to store and transport the sap.
Selecting an Appropriate Spot on the Tree
Choosing the right spot is the first step to making successful tapping on your maple tree. Follow these guidelines to ensure a successful v4 tapping process.
- Tree Health: Make sure to select a healthy tree that is at least 10 inches in diameter for step v4.
- South-Facing Step: Look for a spot on the south-facing side of the tree to make sure it receives more sunlight, which will promote sap flow.
- Make sure to clear the surroundings before starting. Step one is to ensure there are no obstructions like branches or vines that may hinder access to the chosen area.
Step-by-Step Process for Tapping a Maple Tree
Now that you have your tools ready and are prepared to make a tap on your maple tree, let's dive into the step-by-step process of tapping.
- Step 1 - Drill Tap Holes:
- To make a start, drill tap holes approximately 2 inches deep into the trunk of the tree at a slight upward angle.
- Make sure to space multiple tap holes about 6 inches apart in horizontal lines around the circumference of the tree.
- Step 2 - Insert Spiles:
- Gently make insert spiles into each drilled tap hole using a hammer until they are securely in place.
- Make sure the spiles are angled slightly downward to allow the sap to flow freely.
- Step 3 - Attach Collection Buckets or Tubing:
- If you want to make the most of your maple syrup production, use traditional collection buckets and make sure to hang them on the hooks attached to the spiles.
- For tubing systems, connect the tubing to each spile and ensure it is properly secured.
- Step 4 - Monitor and Collect Sap:
- Regularly check your collection containers to monitor sap flow.
- Empty the buckets or collect sap from the tubing system as needed.
- Step 5 - Store and Process Sap:
- Once you've collected enough sap, transfer it into clean containers for storage.
- If you plan to make maple syrup, follow appropriate processing techniques or refrigerate the sap if immediate use is not intended.
By following this step-by-step guide, you can tap your own maple tree successfully and enjoy the sweet rewards of nature's liquid gold. Remember, tapping should be done during late winter or early spring when temperatures fluctuate between freezing at night and thawing during the day. Happy tapping!
Essential Tools and Equipment Needed
Having the right tools and equipment is essential for a successful syrup-making process. Familiarizing yourself with these tools will ensure efficient sap extraction and enhance your overall experience. Let's take a closer look at the essential tools you'll need:
1. Drills
To tap a maple tree, you'll need a drill to create a hole in the trunk. A cordless electric drill is recommended for its convenience and ease of use. Make sure to select an appropriate drill bit size that matches the spile or tap you plan to use.
2. Spiles
Spiles are small tubes or taps inserted into the drilled holes to collect sap from the tree. They come in various materials such as stainless steel, aluminum, or plastic. Consider using food-grade spiles for better durability and safety.
3. Collection Buckets or Tubing
Once the sap starts flowing through the spiles, you'll need collection containers to gather it efficiently. Galvanized buckets or specialized tubing systems are commonly used options. Choose containers that are easy to clean and have adequate capacity based on your target production volume.
4. Hammer/Mallets
A hammer or mallet is necessary for gently tapping the spile into place securely without damaging the tree bark.
In addition to these primary tools, there are several other pieces of equipment that can enhance your syrup-making process:
- Drill Bits: Different sizes of drill bits allow flexibility when selecting appropriate spile sizes.
- Filters: Filtering equipment helps remove impurities from collected sap before boiling.
- Hydrometers: These devices measure sugar content in sap, ensuring optimal timing during evaporation.
- Evaporators: For larger-scale operations, evaporators speed up the boiling process by increasing surface area exposure.
Now that we've covered the essential tools and additional equipment needed let's discuss where to source quality supplies:
Sourcing Quality Tools and Equipment
To ensure a smooth tapping process, it's crucial to obtain reliable tools and equipment. Here are some practices to consider:
- Research reputable suppliers online or visit local maple syrup supply stores.
- Read customer reviews and ratings to gauge the quality of the products.
- Seek recommendations from experienced maple syrup producers or local agricultural organizations.
Remember that weather conditions play a significant role in sap extraction, so it's important to have suitable storage containers ready for collection. Ensure your containers are clean, food-grade, and have tight-fitting lids to prevent contamination.
By having the right tools, equipment, and storage solutions in place, you'll be well-prepared for tapping maple trees and embarking on your syrup-making journey. So gather your drills, spiles, collection buckets or tubing, hammer/mallets, drill bits, filters, hydrometers, and evaporators if needed, and start enjoying the sweet rewards of making your own maple syrup!
Collecting Maple Sap: Tips and Techniques
Collecting sap from maple trees is a time-honored tradition that yields the delicious maple syrup we all love. Whether you prefer using traditional buckets or modern tubing systems, there are effective methods to ensure a successful sap collection.
Choosing the Right Method
You have two primary options: using buckets or utilizing tubing systems. Both methods have their advantages and can be used individually or in combination depending on your preferences and available resources.
Buckets
The classic bucket method involves attaching metal or plastic containers directly onto tapped trees. This approach provides a rustic charm and allows for easy observation of sap levels. It is ideal for small-scale operations or those seeking a more traditional experience.
Tubing Systems
Alternatively, tapping trees with tubing systems offers convenience and increased efficiency. By connecting a series of tubes to multiple trees, you can collect sap from various locations into one central container. This method reduces labor requirements and minimizes damage to tree bark caused by frequent bucket emptying.
Weather Conditions' Impact
Weather conditions play a crucial role in determining the success of your sap collection efforts. Freezing nights followed by warm days create an ideal environment for sap flow. As temperatures fluctuate above and below freezing point, pressure changes within the tree help push the sap out through the tap hole.
However, extreme cold spells or unseasonably warm weather can disrupt this natural process. During extended periods of sub-zero temperatures, sap flow may slow down significantly or even cease altogether. On the other hand, if temperatures rise too quickly without freezing nights, bud development may occur prematurely, affecting both the quality and quantity of collected sap.
Monitoring Sap Levels
To maximize your sap collection, it is essential to monitor sap levels regularly. This ensures that containers do not overflow or run dry, preventing unnecessary disruptions in the collection process. Here are a few tips for effective sap level monitoring:
- Check containers at least once a day, preferably in the morning.
- Keep track of daily sap production by recording measurements.
- Adjust collection frequency based on weather conditions and tree productivity.
- Consider using transparent containers for easy visual assessment.
Preventing Contamination
Maintaining the purity of collected sap is crucial to producing high-quality maple syrup. Contamination can occur through various means, including airborne particles, debris falling into open buckets, or improper handling during collection. To prevent contamination and ensure the best possible product:
- Place lids or covers on buckets to minimize exposure to debris and insects.
- Regularly clean and sanitize collection containers to maintain hygiene standards.
- Avoid collecting sap from trees near heavily trafficked areas or potential sources of pollution.
- Handle collected sap with care, avoiding contact with unsanitized surfaces.
By following these tips and techniques for collecting maple sap, you can enhance your overall success rate while producing delicious maple syrup that truly captures the essence of this time-honored tradition.
Remember, tapping trees requires careful consideration and respect for nature's processes.
Storing and Filtering Maple Sap
Understanding proper storage methods is crucial. Filtering the sap before syrup production is essential to remove impurities and ensure a high-quality end product.
To begin with, let's explore different storage options that can help preserve the sap for an extended period. One common method is refrigeration, which involves keeping the sap at a temperature just above freezing point. This slows down bacterial growth and helps maintain its freshness. Another option is freezing the sap, which allows you to store it for even longer durations. Freezing not only keeps the sap fresh but also halts any fermentation process that may occur if left at room temperature.
When storing maple sap, it's important to use appropriate containers that are clean and food-safe. Plastic or stainless-steel containers are commonly used for this purpose as they are easy to sanitize and maintain. Avoid using containers made of materials that may react with the sap or alter its taste.
Now let's move on to the filtering process, which plays a vital role in transforming raw maple sap into delicious syrup. Before filtering, it's essential to remove any debris or foreign particles from the collected sap. This can be done by passing it through a mesh strainer or cheesecloth to eliminate larger impurities such as wood shavings or insects.
Once initial filtration is complete, further refinement can be achieved by using a syrup filter. A syrup filter consists of multiple layers capable of capturing finer particles like sugar sand or sediment present in the sap. These filters come in various sizes and materials such as wool felt or synthetic fabrics designed specifically for this purpose.
If you prefer a more traditional approach, another method involves using natural filtering agents like wood charcoal or activated carbon. These materials effectively absorb impurities while allowing clean sap to pass through.
It's worth noting that some maple enthusiasts choose to filter their sap indoors rather than outdoors. This helps maintain a controlled environment and reduces the chances of contamination from outdoor elements. However, it's important to ensure proper ventilation when filtering indoors to prevent the buildup of steam and odors.
To summarize, storing maple sap correctly is crucial for maintaining its freshness and preventing spoilage. Refrigeration or freezing techniques can be employed depending on your storage requirements. Using a combination of initial training and syrup filters can help remove impurities effectively. Alternatively, natural filtering agents like wood charcoal can also be used. By following these methods, you'll be well on your way to producing high-quality maple syrup that will delight your taste buds.
Turning Maple Sap into Syrup: A Beginner's Guide
Evaporating Maple Sap to Create Delicious Syrup
Transforming maple sap into delectable syrup is a fascinating process that involves evaporation. As the sap boils, the water content gradually reduces, leaving behind the sweet and flavorful syrup we all love. To achieve this transformation successfully, it is essential to understand the sugar content required for sap to become syrup.
Understanding Sugar Content for Maple Syrup Production
Maple sap needs a specific sugar concentration before it can be considered syrup. The ideal sugar content for maple syrup falls between 66% and 67%. This level of sweetness ensures a rich flavor profile while maintaining the desired consistency. Measuring the sugar content can be done using a refractometer or hydrometer, which is readily available at garden supply stores or online.
Methods of Evaporating Sap
There are various methods you can use to evaporate maple sap, depending on your resources and preferences. Let's explore two popular options: using an outdoor fire and utilizing an indoor evaporator.
- Outdoor Fire:
- Build a fire pit in a safe location away from any flammable materials.
- Place a large pot or pan over the fire.
- Fill it with maple sap and allow it to boil vigorously.
- Continuously monitor the boiling process until you achieve the desired consistency.
- Indoor Evaporator:
- Invest in an evaporator specifically designed for processing maple sap.
- These evaporators come in different sizes, suitable for both small-scale hobbyists and larger operations.
- Follow the manufacturer's instructions to set up your indoor evaporator.
- Pour your maple sap into the designated compartment and let it boil until transformed into syrup.
Achieving Desired Consistency: Boiling Instructions
Once you have chosen your preferred method of evaporation, it's time to boil your maple sap and achieve the desired consistency for your syrup. Follow these step-by-step instructions:
- Boiling Process:
- Start by pouring the maple sap into a large pot or pan.
- Place it over high heat and bring it to a rolling boil.
- As the sap boils, the foam will form on the surface. Skim off this foam regularly to maintain clarity in your syrup.
- Testing for Consistency:
- Periodically check the thickness of your syrup by using a spoon or ladle to scoop up some liquid.
- Allow it to cool slightly before observing its texture as it runs off the utensil.
- The syrup is ready when it forms a thin, steady stream that resembles flowing honey.
By following these simple yet crucial steps, you'll be able to produce your very own batch of homemade maple syrup with just the right sugar content and consistency.
So, whether you choose an outdoor fire or invest in an indoor evaporator, embrace this delightful journey of turning maple sap into golden syrup that will undoubtedly elevate your breakfasts and desserts alike.
Enjoy the Fruits of Your Labor
Explore Creative Ways to Enjoy Your Homemade Maple Syrup
So, you've successfully tapped a maple tree and made your own delicious maple syrup. Congratulations! Now it's time to think beyond the classic pancakes and waffles and explore the many creative ways you can enjoy your homemade liquid gold.
Maple syrup is a versatile ingredient that can add a touch of sweetness and depth to a variety of dishes. Here are some alternative uses for maple syrup in cooking, baking, and beverages:
- Cooking: Use maple syrup as a glaze for roasted meats like ham or salmon. The natural caramelization adds a rich flavor profile that complements savory dishes perfectly. You can also drizzle it over roasted vegetables or mix it into marinades for an extra hint of sweetness.
- Baking: Replace traditional sweeteners like sugar or honey with maple syrup in your favorite baked goods recipes. It adds moisture, enhances flavors, and provides a unique twist. Try using it in cookies, cakes, muffins, or even homemade granola bars.
- Beverages: Elevate your morning coffee or tea by swapping out regular sugar for maple syrup. It dissolves easily and imparts a delightful taste that pairs well with hot beverages. You can also use it to sweeten smoothies or create flavorful cocktails.
Store and Preserve Your Homemade Maple Syrup
Now that you have your homemade maple syrup ready to go, it's essential to know how to store and preserve it properly for long-term enjoyment. Follow these tips to ensure its freshness:
- Filtering: Before storing the syrup, make sure to filter out any impurities using cheesecloth or a fine-mesh strainer.
- Sterilize Containers: Clean glass bottles or jars thoroughly with hot soapy water before pouring the filtered syrup into them.
- Cool Down Completely: Allow the syrup to cool down completely before sealing the containers tightly.
- Refrigeration: For short-term storage (up to a few months), keep the syrup refrigerated at a temperature below 40°F (4°C).
- Freezing: If you want to store your maple syrup for an extended period, consider freezing it in freezer-safe containers. It can last up to a year when frozen.
Share Your Delicious Creations
Now that you have become a maple syrup producer, it's time to share your delicious creations with friends and family. Showcasing your newfound skills will not only impress them but also create memorable moments together.
- Maple Syrup Tasting Party: Host a maple syrup tasting party where guests can sample different grades of syrup and learn about their unique flavors.
- Recipe Exchange: Encourage others to experiment with maple syrup by exchanging recipes or organizing a friendly cooking competition using it as the star ingredient.
- Gifts from Nature: Package small bottles of homemade maple syrup as thoughtful gifts for birthdays, holidays, or special occasions. Attach personalized labels for an extra touch.
So go ahead and tap into your creativity! Enjoy the fruits of your labor by exploring new ways to savor your homemade maple syrup, mastering its storage techniques, and sharing the joy with those around you.
Conclusion: How to Tap a Maple Tree Successfully?
Congratulations! You now have all the knowledge and tools you need to tap your maple tree and start enjoying the sweet rewards of homemade maple syrup. Let's quickly recap the key points covered in this guide:
- Selecting the Perfect Maple Tree: Choose a healthy, mature maple tree with a trunk diameter of at least 10 inches for optimal sap production.
- Step-by-Step Guide for Tapping a Maple Tree: Follow our detailed instructions to properly tap your tree, including drilling the hole, inserting the spout or spile, and securely attaching your collection container.
- Essential Tools and Equipment Needed: Gather all the necessary equipment such as drill bits, spouts or spiles, collection containers, and tubing to ensure a smooth tapping process.
- Collecting Maple Sap: Tips and Techniques: Learn how to maximize sap flow by tapping at the right time, monitoring weather conditions, and properly maintaining your taps throughout the season.
- Storing and Filtering Maple Sap: Discover effective methods for storing sap safely until you're ready to boil it down into syrup. We also provide tips on filtering out impurities during the collection process.
- Turning Maple Sap into Syrup: A Beginner's Guide: Dive into the fascinating process of boiling down maple sap to create delicious syrup. We cover everything from evaporating techniques to determining syrup density.
- Enjoy the Fruits of Your Labor: Once you've successfully transformed your maple sap into rich amber syrup, it's time to savor its delightful flavor on pancakes, waffles, or any other treats that tickle your taste buds!
Now that you're equipped with valuable knowledge about tapping maple trees, we encourage you to get out there and give it a try yourself! Remember that practice makes perfect. Don't be afraid to experiment with different techniques and flavors to find your own unique syrup-making style.
So, grab your tools, head out to the maple tree in your backyard or local forest, and tap into the sweet goodness waiting within. Enjoy the satisfaction of producing your very own pure maple syrup, and share this delightful experience with family and friends.
FAQs: How to Tap a Maple Tree?
How long does it take for maple sap to become syrup?
The time required to boil down maple sap into syrup can vary depending on factors like sugar content and evaporation rate. On average, it takes approximately 40-50 gallons of sap to produce one gallon of syrup. This process can take anywhere from several hours to a full day or more.
Can I tap multiple trees at once?
Yes, you can tap multiple trees simultaneously. However, ensure that each tree is healthy and has a trunk diameter of at least 10 inches before tapping. Keep in mind that the more trees you tap, the greater the amount of sap you'll collect.
Is it necessary to refrigerate maple sap?
If you plan on storing sap for an extended period before boiling it down into syrup, refrigeration is recommended to prevent spoilage. Sap should be stored at temperatures below 40°F (4°C) to maintain its freshness.
How long does homemade maple syrup last?
When properly stored in a cool place or refrigerated after opening, homemade maple syrup can last up to one year. Be sure to check for any signs of spoilage such as off odors or mold before consuming.
Can I use any type of maple tree for tapping?
While various species of maples can be tapped for sap collection, sugar maples are generally preferred due to their higher sugar content. Red maples and silver maples can also be tapped but may yield sap with lower sugar concentrations.
Thank you for joining us on this sweet journey! Happy tapping and enjoy the delicious rewards of your labor.
Image Source: Paid image from CANVA