Curious about how to transplant an aloe vera plant? Whether you're rescuing an overgrown succulent or propagating new ones, mastering the art of transplanting is key. Discover the dos and don'ts, from choosing the right soil mix to handling those spiky leaves with care. Ready to give your aloe vera a fresh start? Learn how to ensure a smooth transition for your aloe vera and watch it thrive in its new home.
Key Takeaways
- Prepare Properly: Before transplanting your aloe vera plant, ensure you have the right tools and soil mix ready.
- Handle with Care: When repotting, gently loosen the roots and place the plant in a new pot at the same depth as before.
- Provide Adequate Care: After transplanting, place your aloe vera in a sunny spot, water sparingly, and avoid overwatering.
- Consider Propagation: Aloe offshoots, also known as pups, can be split from the main plant and propagated separately for new growth opportunities.
- Monitor Progress: Watch for signs of stress or overwatering post-transplant to address any issues promptly.
- Seek Help When Needed: If you encounter challenges during or after transplantation, refer to troubleshooting tips or FAQs for guidance.
Understanding Aloe Transplantation

Signs of a Need to Repot
Aloe vera plants exhibit overcrowding in their pots when roots outgrow the container space. Look for stunted leaf growth or wilting leaves, which signal restricted root expansion in plants. The plant may also appear top-heavy, struggling to support its weight.
Benefits of Repotting
Repotting aloe vera facilitates healthier growth by providing more space for root development. It prevents root-bound issues, ensuring optimal nutrient absorption and water intake. Repotting enhances the plant's aesthetic appeal, promoting overall vitality.
Choosing the Right Time
When your aloe vera plants show signs of outgrowing their current pot, it's time to consider repotting. Optimal timing coincides with the plant being ready for propagation, ensuring successful new growth. During the active growing season, typically spring or early summer, repotting can be most beneficial.
Preparing for Repotting
Selecting the Right Soil
When repotting an aloe vera plant, it is crucial to choose soil that drains well. Opt for a mix with good aeration to prevent root rot. A recommended blend includes carbon-negative biochar and plant-based compost for optimal growth.
Choosing a New Pot
For successful repotting, select a pot that is slightly wider than the aloe plant's current container. Porous pots are preferable as they help with drainage, preventing overwatering and root rot issues. Consider the pot's depth to ensure there is enough space for the roots to spread comfortably.
Gathering Tools and Materials
Before starting the repotting process, ensure you have all the necessary tools and materials ready. Prepare the new pot with the appropriate soil mix before transferring the plant. Have a trowel or shovel on hand to assist with the repotting process efficiently. Keep gloves nearby to protect your hands while handling the plant.
Step-by-Step Guide to Repotting Aloe Vera
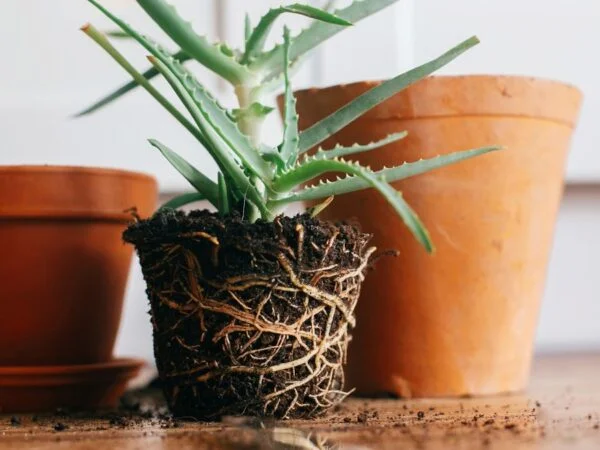
Removing the Aloe Plant
Carefully loosen the plant from its current pot. Gently remove excess soil from the roots for a smooth transition. Handle the plant delicately to avoid any damage during the process.
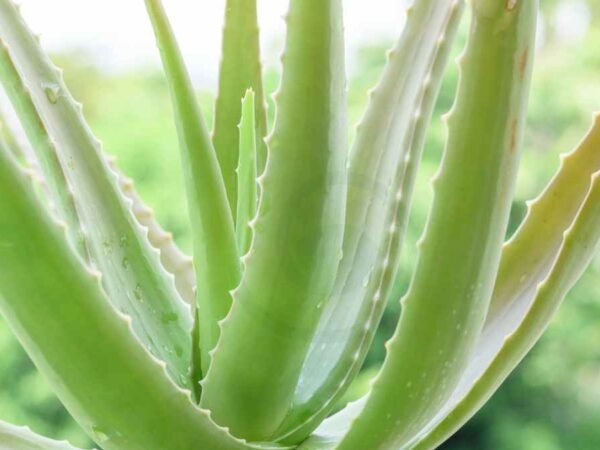
Inspecting the Root System is crucial. Check for any signs of root rot or damage. Look for healthy white roots, which indicate a thriving plant. Trim any damaged or rotting roots before proceeding with repotting to ensure optimal growth.
Splitting Aloe Pups
Separate aloe pups from the main plant gently to promote new growth. If necessary, replant the main plant in a suitable pot to encourage better development. Repot each new plant in appropriate soil to support their growth and well-being.
Preparing the New Pot is essential for successful repotting. Fill the new pot with well-draining potting mix to prevent waterlogging and promote proper drainage. Make sure that the pot has adequate drainage holes to prevent water accumulation, which can harm the plant. Center the aloe vera plant carefully in its new home to provide ample space for growth.
Best Practices for Aloe Care Post-Transplant
Ideal Soil Mix
When transplanting an aloe vera plant, ensure you use a soil mix that offers good aeration and nutrients. Avoid mixes with unsustainable additives that may harm the plant. Consider using a mix containing carbon-negative biochar and plant-based compost for optimal growth.
Proper Container Selection
For successful transplantation, select a container slightly larger than the root ball to provide ample space for root expansion. Opt for containers equipped with drainage holes to prevent waterlogging, promoting healthy root development. Choose containers made of porous materials to allow excess moisture to evaporate.
Light Requirements
After repotting, place your aloe vera plant in indirect sunlight to prevent stress on the newly transplanted roots. Avoid exposing the plant to direct sunlight immediately after repotting, as this can lead to sunburn. Ensure the plant receives sufficient light to support its growth and development.
Watering Techniques
To prepare your plant for transplantation, water it 24 hours before repotting to ensure it is adequately hydrated. After transplanting, water the plant gently to help it settle into its new environment. Be cautious not to overwater the plant, as excessive moisture can lead to root rot, compromising its health.
Splitting and Propagating Aloe Pups
Identifying Pups Ready for Separation
Aloe pups, also known as offshoots, are miniature versions of the parent plant with their own roots. These pups should be mature enough to thrive independently. Opt for pups that exhibit vibrant health.
How to Separate Pups Safely
To separate aloe pups from the main plant, gently detach them ensuring no harm is done. Delicately handling the pups prevents any potential damage. It's crucial to keep each pup's root system intact during separation.
Potting Aloe Pups
After separating the aloe pups, repot each one in appropriate potting soil. The pots used for repotting should have proper drainage holes to prevent waterlogging. Once potted, lightly water the newly transplanted aloe pups.
Ensuring Successful Growth After Transplantation
First Watering Post-Transplant
After transplanting your aloe vera plant, water it lightly to avoid overwhelming the roots with excess moisture. Allow the plant to gradually adjust to the new soil, ensuring a smooth transition. Avoid overwatering immediately after transplanting as it can lead to root rot.
Adjusting to Light Conditions
Gradually introduce your repotted aloe vera to sunlight by starting with indirect light exposure. Monitor the plant's reaction to these light changes, ensuring it adapts well. Avoid sudden exposure to intense sunlight, which can cause sunburn and stress the plant.
Monitoring Growth and Health
Keep a close eye on any new growth that emerges after repotting your aloe vera. Watch for signs of stress or wilting, indicating potential issues with the transplant. Regularly monitor the overall health of the plant by checking its leaves, color, and firmness.
Troubleshooting Common Post-Transplant Issues
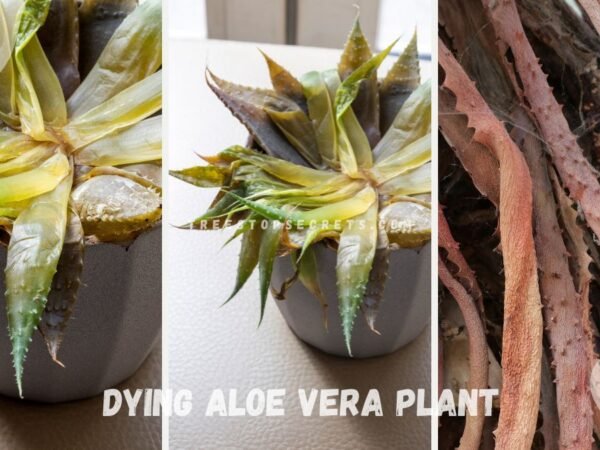
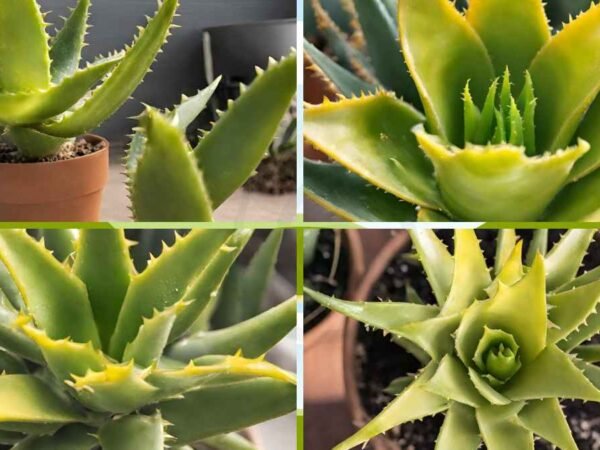
Signs of Stress in Aloe Plants
Aloe plants may exhibit wilting or yellowing leaves, indicating stress post-transplantation. These signs suggest potential issues with the plant's adjustment to its new environment. Changes in leaf color or texture can also signify stress, requiring immediate attention.
To effectively troubleshoot these problems, it is essential to check for root rot or mushy stems. These issues can arise due to overwatering or poor drainage after transplanting. By addressing these underlying causes promptly, you can help your aloe plant recover from stress and thrive in its new pot.
Addressing Over or Underwatering
Adjusting watering practices is crucial in managing post-transplant stress in aloe plants. Regularly checking soil moisture levels allows you to determine whether the plant is receiving adequate water. By tailoring the watering frequency to meet the plant's specific needs, you can prevent issues related to over or underwatering.
Correcting watering problems promptly is vital for maintaining the health of your aloe plant. By identifying and addressing over or underwatering issues, you can ensure that the plant receives the right amount of moisture to support its growth and development after transplantation.
Dealing with Pest Infestations
Following a transplant, aloe plants are susceptible to pest infestations that can further stress the plant. It is crucial to inspect the plant for signs of pests, such as webs, holes in leaves, or visible insects. Prompt detection allows for timely intervention to prevent infestations from escalating.
When addressing pest issues in the garden, consider using natural remedies for pest control to minimize chemical exposure and protect the plant's overall health. Treating any infestations promptly with appropriate measures helps safeguard your aloe plant against potential damage caused by pests.
Frequently Asked Questions
Best Time to Repot Aloe Vera
When transplanting an aloe vera plant, the best time is when it starts outgrowing its current pot. This typically happens when you notice the roots pushing against the pot's edges. Repotting during the plant's active growing season ensures successful acclimatization.
Consider repotting your aloe vera when the main plant has reached a mature stage suitable for propagation. This stage indicates that the plant is robust enough to handle the stress of being transplanted. Ensuring proper timing enhances the chances of a successful transplant.
How Often to Water After Repotting
After transplanting your aloe vera, it's crucial to water lightly initially. This allows the plant to adjust to its new soil environment without being overwhelmed by excessive moisture. Light watering promotes healthy root development post-transplantation.
Give your aloe vera time to settle into its new soil before resuming regular watering routines. Adjust the frequency of watering based on the moisture levels in the soil. Monitoring and adapting your watering schedule accordingly will help prevent issues related to over or under-watering.
When to Start Fertilizing
After repotting your aloe vera plant, refrain from fertilizing for at least a month. This waiting period allows the plant to recover from any shock caused by transplanting and establish itself in its new environment. Delaying fertilization minimizes stress on the plant.
Select a balanced fertilizer specifically formulated for aloe vera plants once you decide to start fertilizing. Choosing an appropriate fertilizer ensures that your plant receives the necessary nutrients for healthy growth and development. Begin fertilizing during the active growing season for optimal results.
Summary
You now have the knowledge and confidence to successfully transplant your aloe vera plant. By understanding the process, preparing diligently, following the step-by-step guide, and implementing best practices, you ensure your aloe's health post-transplant. Remember to troubleshoot any issues that may arise and propagate pups for more plants. With these tips, your aloe vera will thrive in its new home.
Take action now and apply these insights to give your aloe vera the best chance at flourishing after transplantation. Your efforts will be rewarded with a healthy and vibrant plant that adds beauty to your living space. Keep learning and growing as a plant parent!
Frequently Asked Questions
How often should I transplant my aloe vera plant?
Transplant your aloe vera plant every 2-3 years to refresh the soil and provide more space for growth. Look for signs like crowded roots, slow growth, or water drainage issues to determine if it's time for a new pot.
Can I use regular soil for transplanting my aloe vera plant?
No, aloe vera plants require well-draining soil to prevent root rot. Use a cactus or succulent mix combined with perlite or sand for better drainage. Avoid heavy soils that retain moisture, as they can harm the plant.
Should I water my aloe vera plant before or after transplanting?
Wait at least a week after transplanting to allow the roots to settle before watering. Overwatering immediately after transplanting can lead to root rot. Resume watering when the soil is dry about an inch deep.
How long does it take for an aloe vera plant to recover after being transplanted?
It may take 1-2 weeks for your aloe vera plant to fully recover from transplantation shock. During this period, place the plant in indirect sunlight, avoid watering too frequently, and refrain from fertilizing until it shows signs of new growth.
Can I propagate my aloe vera plant during the transplant process?
While it's possible to propagate your aloe vera plant during transplantation by separating offsets (pups), it's generally recommended to focus on one task at a time. Propagation requires careful handling and attention, so consider doing it separately for better success rates.
Image Source: Paid image from CANVA