Repotting phalaenopsis orchids is a crucial aspect of their care, ensuring healthy growth and vibrant blooms. Whether you're a beginner or an experienced gardener, understanding the process of maintaining these exquisite houseplants is essential. In this guide, we'll delve into the step-by-step procedure for repotting your phalaenopsis orchids, providing valuable tips on timing, materials, and techniques.
Phalaenopsis orchids have captivated enthusiasts for centuries with their stunning beauty and resilience. As we explore the art of repotting these delicate yet hardy flowers using moss and a suitable medium, we will unlock the secrets to fostering their longevity and vitality in your home or garden.
Recognizing Repotting Time
It's crucial to recognize the signs indicating that your orchid needs repotting. Overcrowded roots spilling over the pot is a clear indication that the orchid has outgrown its current container, hindering further growth. Repot the orchid in a larger container with fresh medium. Stagnant growth and lack of blooms signify that the plant may be struggling due to limited space for root expansion. Another sign is when the potting medium breaks down or develops mold, which can suffocate the roots and prevent proper nutrient absorption.
During this time, you might notice that your phalaenopsis orchid isn't thriving as it should be. The lack of new growth or flowers could indicate that it's time to repot it. If you observe any of these signs in your orchid, it's important to consider repotting with a new medium as a solution to promote healthier growth and blooming.
Choosing the best repotting medium is essential for ensuring successful transplanting without causing stress to the plant. After your orchid has finished blooming is an ideal time for repotting since it allows ample recovery period before entering its next blooming phase. Early spring presents optimal conditions for new growth after repotting, providing favorable temperatures and longer daylight hours conducive to recovery and adaptation. It's advisable to avoid repotting during extreme temperatures such as winter frost or summer heat waves, as these conditions can shock the plant and impede its ability to acclimate to a new environment effectively.
Key Takeaways
-
Timing is Key: Recognize the signs indicating the need to repot your phalaenopsis orchid, such as overcrowded roots or poor drainage.
-
Use the Right Tools: Gather the necessary repotting materials, including a new pot, fresh potting mix, and sterilized cutting tools, to ensure a successful repotting process.
-
Handle with Care: When repotting the orchid from its old pot, be gentle with the roots and avoid causing damage to the plant.
-
Trim with Caution: Trim the orchid roots and leaves carefully, removing any dead or rotting parts while preserving healthy sections to promote new growth.
-
Perfect Potting Mix: Prepare a well-draining potting mix suitable for phalaenopsis orchids, ensuring proper aeration and moisture retention for healthy root growth.
-
Gentle Repotting: When repotting the orchid in a new container, position it carefully in the center of the pot and avoid burying the leaves to prevent rotting.
Gathering Repotting Materials
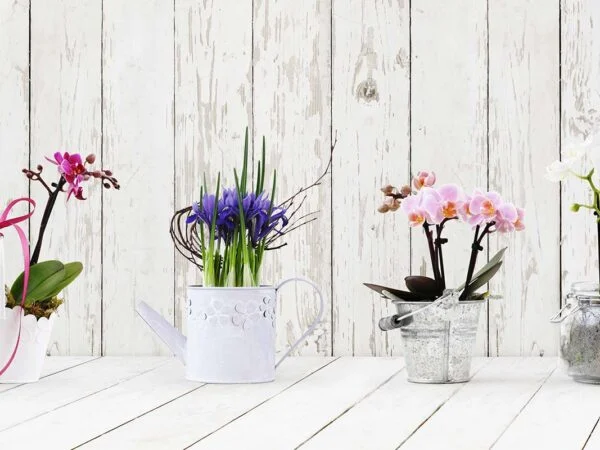
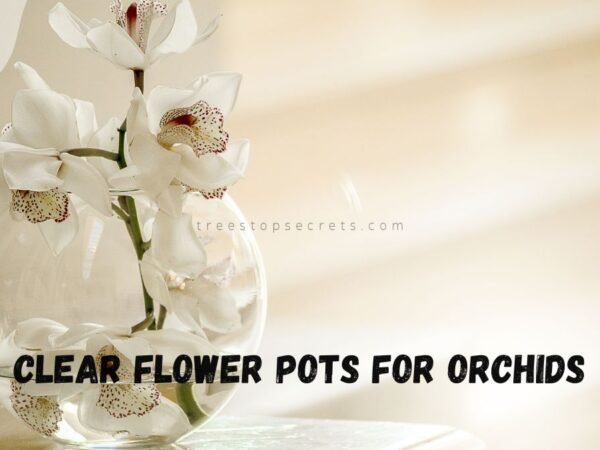
When repotting phalaenopsis orchids, it's crucial to gather the right materials. First, select a clear pot that allows for easy root inspection when repotting. This is important for monitoring the plant's health and ensuring proper growth. Choose a pot with adequate drainage and ventilation to prevent waterlogging and repot to prevent root rot.
The selected pot should provide a snug fit for the roots without being too tight. This ensures that the roots have enough space to grow and expand while still maintaining stability within the pot. A well-fitted pot promotes healthy root development and overall plant vitality.
Next, prepare a suitable potting mix by combining bark, sphagnum moss, and perlite in balanced proportions. The bark provides structure and stability, while sphagnum moss retains moisture and supports root health. Perlite aids in drainage and prevents soil compaction.
It's essential to sterilize the potting mix before use to eliminate any potential contaminants that could harm the orchid. Sterilization helps maintain a clean environment for the plant's roots and reduces the risk of disease or pests.
Finally, consider adjusting pH levels if necessary to create an optimal growing environment for your phalaenopsis orchid. Ensuring a balanced pH level in the potting mix supports nutrient absorption by the roots and promotes overall plant vigor.
Removing Orchid from Old Pot
It's essential to avoid damaging the delicate leaves and stems. Supporting the plant while handling is crucial to prevent any breakage or bending of the stems and leaves. By providing gentle support, you can minimize stress on the orchid during this process.
Root inspection is a vital step in repotting phalaenopsis orchids. Checking for healthy white or green roots is important as these indicate a thriving root system. On the other hand, removing old, mushy, or decaying roots is necessary to promote better growth in the new pot. Ensuring that there are no signs of pests or diseases on the roots will help maintain your orchid's health.
Trimming Orchid Roots and Leaves
Trimming the roots and leaves is a crucial step in ensuring the plant's health. Before diving into this process, it's essential to identify which roots need trimming. Look for any dead or rotting roots that are brown, mushy, or have a foul odor. These unhealthy roots can hinder the orchid's growth and lead to further issues if left unaddressed.
Once you've identified the problematic roots, use clean, sharp scissors to make precise cuts. It's important to leave the healthy roots untouched as they play a vital role in absorbing water and nutrients for the plant. By focusing only on removing the damaged portions, you can promote new root growth without causing unnecessary harm.
In addition to identifying which roots to trim, it's crucial to prioritize sanitation when handling cutting tools. Before using them, be sure to thoroughly disinfect your scissors with rubbing alcohol or hydrogen peroxide. This simple yet critical step helps prevent the spread of infections from one part of the plant to another during trimming.
Furthermore, maintaining sharp blades on your cutting tools ensures clean cuts that minimize damage and promote quicker healing for your orchid. Dull blades can cause jagged edges that may lead to tearing rather than precise cutting—potentially harming healthy parts of the plant in the process.
Preparing New Potting Mix
When repotting phalaenopsis orchids, it's crucial to prepare a new potting mix that provides the right balance of moisture retention and aeration. This can be achieved by mixing components like bark, sphagnum moss, and perlite. The goal is to create an environment where the roots have access to oxygen while retaining adequate moisture.
Customizing the mix based on your local climate is essential. For example, in humid climates, you may want a mix with more aeration to prevent waterlogged roots. Conversely, in drier climates, increasing the moisture retention capacity of the mix can help prevent rapid drying out of the roots.
Avoiding compacted or waterlogged media is vital for phalaenopsis orchids as their roots are susceptible to rot if they're constantly sitting in water. Compacted media can also restrict airflow around the roots, leading to suffocation and root damage.
Moistening the potting mix before use is an important step prior to repotting phalaenopsis orchids. Hydrating dry potting mix thoroughly ensures that it doesn't draw moisture away from your plant's delicate root system after repotting.
Before using the moistened mix for repotting, allow excess water to drain out completely. Achieving proper moisture levels before repotting helps ensure that your orchid's new home isn't too soggy or too dry—both conditions that could harm its delicate root system.
Repotting in New Container
Orchid Positioning
When repotting a phalaenopsis orchid, it's crucial to position the plant properly in the new container. Center the orchid carefully, ensuring that its roots are evenly distributed around the pot. This helps promote balanced growth and stability for the plant. Make sure to secure the orchid at an appropriate height within the new container.
To position your phalaenopsis orchid effectively, gently place it in the center of the new pot, allowing ample space for new growth. Then, adjust any roots that may be leaning more to one side by gently spreading them outwards. By doing so, you help create an environment where all parts of your orchid receive equal access to nutrients and water.
Adding Media Around Roots
Once your phalaenopsis orchid is positioned correctly in its new container, it's time to add media around its roots. Carefully fill any gaps with fresh potting mix while avoiding damage to delicate root structures. After adding each layer of media, lightly tap on the sides of the pot to settle it evenly around the roots.
As you fill up space with fresh media during repotting, ensure there are no air pockets left around your orchid’s roots as they can lead to issues like dehydration or unstable anchorage for your plant. Properly settling down and securing your phalaenopsis will provide a stable foundation for healthy growth.
Post-Repotting Care
Initial Watering Technique
After repotting your phalaenopsis orchid, it's crucial to water lightly. This helps the plant adjust to its new environment without being overwhelmed. Overwatering can lead to root rot, so it's important to be cautious. Give the orchid some time to settle in before resuming regular watering.
When you repot a phalaenopsis orchid, you should avoid overwatering as this can cause the roots to rot. Allow the plant some time for adjustment before returning to its regular watering schedule.
Adjusting Light and Temperature
Maintaining consistent light levels is essential after repotting your phalaenopsis orchid. Direct sunlight should be avoided initially as the plant may be more sensitive during this period of adjustment.
It's important to monitor temperature changes post-repotting as sudden fluctuations can stress the plant. Consistency in temperature will help support the orchid’s recovery and adaptation process.
Salvaging Improperly Potted Orchids
Recognizing Potting Errors
Improper potting of phalaenopsis orchids can lead to various issues that affect their health and growth. Signs of root suffocation include tightly packed growing medium, which inhibits airflow and water drainage. This can cause the roots to rot due to excessive moisture retention. Dehydration is evident when the growing medium dries out too quickly or if there's inadequate water absorption by the roots. Mold growth on the surface of the growing medium indicates excessive moisture, often caused by a lack of proper drainage in the pot.
Yellowing leaves are a common indicator of nutrient deficiencies resulting from improper potting. When essential nutrients aren't readily available in the growing medium, orchids may exhibit yellow or discolored leaves, stunted growth, and poor flowering. These signs highlight crucial underlying issues that need to be addressed promptly for optimal plant health.
Corrective Repotting Steps
To salvage improperly potted phalaenopsis orchids, it's essential to reassess both the pot size and media composition used during repotting. A larger pot with adequate drainage holes helps prevent root suffocation and allows better air circulation around the roots. The choice of appropriate media composition is vital for maintaining ideal moisture levels while providing sufficient aeration for healthy root development.
Correctly diagnosing any existing root issues is crucial before proceeding with corrective repotting steps. Carefully inspecting the roots for signs of decay or damage enables targeted intervention to address these problems effectively without causing further harm to the plant.
Taking prompt action is imperative in preventing further damage caused by improper potting conditions. Once signs of improper potting are recognized, swift corrective measures should be taken to ensure that phalaenopsis orchids have an environment conducive to their well-being.
Ongoing Phalaenopsis Care Tips
Fertilizing After Repotting
After repotting your phalaenopsis orchids, it's crucial to wait 4–6 weeks before applying any fertilizer. This waiting period allows the plant to adjust and recover from the repotting process. Lowering the concentration of fertilizer during the initial stages of application is essential for preventing stress on the newly potted orchid. By diluting the fertilizer, you're providing a gentler introduction of nutrients, aiding in the recovery phase.
Once this initial recovery period has passed, it's time to resume regular fertilization. A balanced fertilizer should be applied according to label instructions. This ensures that your phalaenopsis receives all necessary nutrients for healthy growth and blooming without overwhelming its delicate system after being repotted.
Monitoring for Pests and Diseases
Vigilant observation is key. Regular checks during the initial recovery period are vital as these plants can be more susceptible to stress-related issues post-repotting.
Prompt treatment is crucial if any pests or diseases are detected on your phalaenopsis orchids after repotting. Whether it's mealybugs, aphids, scale insects, or fungal infections like root rot, addressing these issues swiftly will prevent them from escalating and causing harm to your beloved plants. Keep a watchful eye on their overall health and appearance during this critical stage.
Final Remarks
Congratulations on making it through the repotting process! Your Phalaenopsis orchid is now on its way to thriving in its new home. Remember, patience is key as your orchid adjusts to the change. Keep a close eye on it and continue providing the care it needs. Don't hesitate to reach out to fellow orchid enthusiasts or local gardening communities if you have any questions or need extra support. With time and attention, your orchid will reward you with stunning blooms and vibrant growth.
Now, go show off your green thumb and enjoy the beauty of your flourishing Phalaenopsis orchid! Happy growing!
Frequently Asked Questions
When is the best time to repot a phalaenopsis orchid?
The best time to repot a phalaenopsis orchid is after it has finished blooming and before it starts developing new flower spikes. This typically occurs in the spring or early summer.
What materials do I need for repotting my phalaenopsis orchid?
You will need a new pot, fresh potting mix suitable for orchids, scissors or pruning shears, and gloves. You may want to have some cinnamon powder on hand to help seal any cuts on the roots.
How should I remove my phalaenopsis orchid from its old pot?
Gently hold the base of the plant with one hand while using your other hand to carefully tilt and slide out the plant from its old pot. Be cautious not to damage the delicate roots during this process.
Is it necessary to trim both roots and leaves when repotting a phalaenopsis orchid?
It's generally recommended only to trim damaged or rotting roots. As for leaves, trimming is usually unnecessary unless they are clearly unhealthy or yellowing.
What's involved in post-repotting care for my newly potted phalaenopsis orchid?
After repotting, place your orchid in an area with indirect light and maintain proper humidity levels. Avoid watering immediately; wait at least 5-7 days before resuming regular watering.
Image Source: Paid image from CANVA