For centuries, orchids, a floral plant, have captivated enthusiasts with their delicate beauty and enchanting fragrance. Orchid replanting is a crucial aspect of caring for these stunning flowers, ensuring their longevity and continued bloom. Whether you are a seasoned gardener or new to the world of orchids, understanding the process of replanting is essential for maintaining healthy plants.
Key Takeaways
- Recognize when to repot: Look for signs like crowded roots, poor drainage, or the orchid growing out of its pot.
- Gather the right materials: Prepare a new pot, fresh potting mix, scissors, and gloves before starting the repotting process.
- Follow a step-by-step guide to repot orchids: Carefully remove the orchid from its current pot, trim any dead roots, and place it in the new pot with fresh mix.
- Secure the orchid properly: Ensure the plant is stable in its new pot and avoid over-packing the mix around the roots when you repot orchids.
- Provide post-repotting care: Water the orchid lightly, avoid direct sunlight for a few days, and monitor its progress for any signs of stress.
- Healthy orchids lead to beautiful blooms: By giving your orchid the right care and attention during repotting, you set the stage for vibrant root and healthy growth.
Recognizing the Need to Repot
Overgrowth Signs
When checking your orchid for repotting, observe roots pushing up above the pot rim. If you notice roots extending into the air, it's a clear sign of overgrowth. Another key indicator is when the plant appears potbound.
Bad Potting Mix
To determine if your orchid needs repotting, examine the current potting mix for any signs of decomposition. Be cautious of sphagnum moss, as it can cause root rot issues. Always opt for fresh and high-quality bark mix.
Tangled Roots
During the repotting process, gently untangle the roots of the orchid to ensure proper growth. Trim away any damaged roots to promote healthy development. Give the roots a thorough rinse to refresh them for optimal growth.
Gathering Materials
Selecting the Right Pot
When repotting orchids, it's crucial to select a pot that is one size larger than the original. This allows ample space for the roots to grow freely. Ensure that the new pot has adequate drainage holes to prevent water accumulation, which can lead to root rot. Consider choosing a pot made from materials like clay or plastic, as they provide good airflow and insulation for optimal orchid growth.
Drainage Essentials
Proper drainage is essential for the health of your orchid. Opt for pots with excellent drainage to avoid waterlogging, which can suffocate the roots. Using a well-draining bark mix in the potting medium will help maintain healthy root conditions by allowing excess water to escape easily. Avoid using pots without drainage holes, as they can trap water and cause root rot over time.
Repotting Tools
Before starting the repotting process, gather the necessary tools for a successful transplant. Pruners or a sharp pruning knife are essential for trimming any damaged or overgrown roots. Have scissors or a razor blade on hand for precise cutting of old roots or dead plant matter. It's also advisable to wear gloves to protect your hands from any sharp edges or potential irritants during the repotting process.
Step-by-Step Guide
Unpotting Orchids
When replanting orchids, start by carefully removing them from their current pots. Gently shake off any excess potting mix to expose the roots. Inspect the roots closely for any signs of damage or disease.
Media Removal
Next, it's crucial to remove the old potting media without harming the delicate roots. Shake off any remaining media to reveal the root system clearly. Make sure all old media is cleared away before proceeding with repotting.
Orchid Division
For orchids with multiple pseudobulbs, consider dividing them for optimal growth. Separate the orchids with caution to prevent root damage. After division, repot each orchid into suitable pots for individual development.
Placing in New Pot
When placing the orchid in the new pot, ensure it is settled at the correct depth for healthy growth. Spread out the roots evenly within the new pot to encourage proper nutrient absorption. Position the orchid centrally to promote balanced and symmetrical growth.
Securing the Orchid
Fixing in Place
- Secure the orchid in the pot using fresh bark mix.
- Gently press down the mix to stabilize the plant without compacting too tightly around the roots.
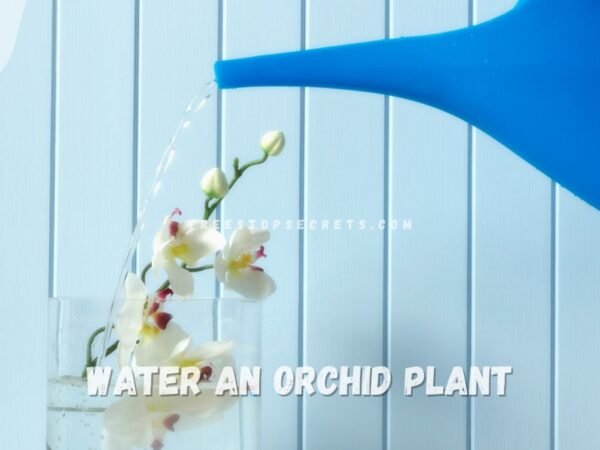
Watering After Repotting
- Water the orchid lightly post-repotting to prevent overwatering issues.
- Allow the plant time to adjust to its new environment before resuming regular watering.
- Monitor soil moisture levels diligently to avoid potential root rot problems.
Post-Repotting Care
Updating Labels
When orchid replanting, it's crucial to update plant labels with the new repotting date. This helps track the plant's growth progress accurately. Include specific care instructions post-repotting to ensure the orchid receives proper attention. Label the orchid with its species name for easy identification, aiding in tailored care.
Monitoring Growth
After orchid replanting, keep track of new growth patterns to assess the plant's response to the repotting process. Monitor the health of the orchid's leaves and roots regularly to detect any signs of stress or nutrient deficiencies. Note any changes in flowering frequency or plant vigor, indicating the success of the replanting endeavor.
Closing Thoughts
You've learned the essential steps to successfully repot your orchid and ensure its continued growth and blooming. By recognizing the signs, gathering the right tools, following the step-by-step guide, securing your orchid correctly, and providing post-repotting care, you've set your plant up for success. Remember, healthy roots lead to beautiful blooms!
Now it's time to put your newfound knowledge into action. Grab those supplies, examine your orchid, and give it the care it deserves. Your orchid will thank you with vibrant colors and thriving growth. Happy replanting!
Frequently Asked Questions
Is it necessary to repot orchids?
Yes, it is essential to repot orchids periodically to refresh their growing medium, provide more space for roots, and ensure proper drainage for healthy growth.
What materials are required for orchid replanting?
You will need a new pot with drainage holes, fresh orchid potting mix, scissors or pruning shears, gloves, and a watering can.
How do I secure the orchid after replanting?
After placing the orchid in the new pot with fresh medium, gently pack the mix around the roots, ensuring they are stable but not overly compacted.
What care should be provided post-repotting an orchid?
Post-repotting care involves placing the orchid in indirect light, avoiding watering for a few days to allow roots to adjust, and maintaining regular watering thereafter.
When is the best time to repot an orchid?
The ideal time to repot an orchid is after it has finished blooming. This period allows the plant to recover from any stress caused by the repotting process without affecting flowering.
Image Source: Paid image from CANVA