Curious about how to propagate Phalaenopsis orchids from cuttings? You're in the right place. This age-old practice has been a favorite among horticulturists for decades because it's a cost-effective way to expand your orchid collection while ensuring genetic diversity by seed. In this guide, we'll delve into the nitty-gritty of propagating these stunning blooms from cuttings, providing you with step-by-step instructions and essential tips for success.
Whether you're an experienced gardener or just starting your green thumb journey, learning how to propagate Phalaenopsis orchids from stems can be both rewarding and exciting. So, if you've ever wondered about propagating your orchid family without breaking the bank or simply want to try something new with your gardening skills, stay tuned as we uncover the secrets of cut and hormones to expand these exquisite plants.
Key Takeaways
-
Propagating phalaenopsis orchids from cuttings can be a rewarding and cost-effective way to expand your collection of orchids.
-
To successfully propagate phalaenopsis orchids, focus on using the appropriate propagation method based on the type of orchid and its current growth stage.
-
When using stem cuttings, keiki propagation, layering, dividing, or back bulb propagation for orchid care, ensure that you follow proper techniques and use sterile tools to minimize the risk of infection.
-
After propagating orchids, provide them with the right aftercare, including proper humidity, temperature, and light conditions to encourage healthy growth.
-
Avoid common myths and misconceptions about orchid propagation, such as the belief that all orchids can be propagated in the same way or that propagation always leads to successful growth.
-
By understanding the specific needs of phalaenopsis orchids and following the recommended propagation methods, you can increase your chances of successfully propagating these beautiful plants.
Propagation Basics
Phalaenopsis Orchids
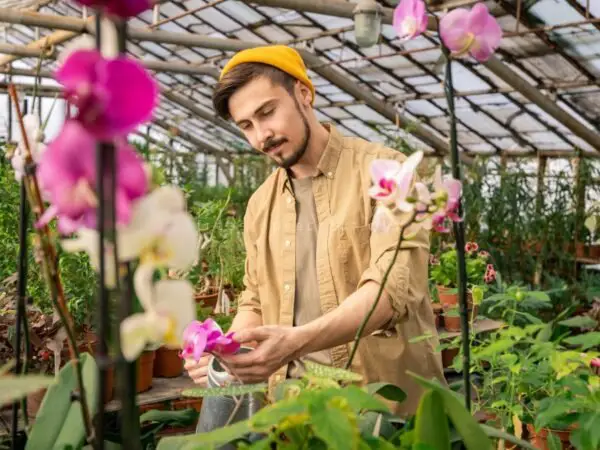
Phalaenopsis orchids, also known as moth orchids, are cherished for their striking and long-lasting blooms. Originating from Southeast Asia and Australia, these elegant plants have captured the hearts of many plant enthusiasts worldwide. Their popularity stems from the wide range of colors and patterns they display during flowering.
Propagation Methods
There are several methods to consider. One common approach is through keiki propagation, where small plantlets develop on the flower spike or along the stem of the mother plant. Another method involves division, which entails separating a mature orchid into two or more sections to create new plants. Each method has its own set of advantages and considerations that can influence successful propagation.
Understanding how to propagate phalaenopsis orchids is essential for expanding your collection or sharing these beautiful plants with others. Selecting the most suitable propagation method based on factors such as available resources, time constraints, and desired outcomes will significantly impact your success in creating new plants from existing ones.
Monopodial Growth
The monopodial growth pattern exhibited by phalaenopsis orchids plays a pivotal role in their care and propagation techniques. With their single upward-growing stem structure, these delicate flowers require specific attention.
Preparing for Propagation
To successfully propagate phalaenopsis orchids from cuttings, it's crucial to gather the necessary supplies. These include sterilized cutting tools and rooting hormone. The use of sterilized tools helps prevent the spread of diseases and ensures that the cuttings are made cleanly. Rooting hormone aids in stimulating root growth, increasing the chances of successful propagation. Having these supplies readily available streamlines the entire process and sets the stage for a successful outcome.
Before embarking on the propagation journey, it's essential to conduct a thorough health check on the parent orchid plant. By carefully examining its leaves, stems, and roots, you can assess its overall health and detect any signs of disease or stress. A healthy parent plant is more likely to produce viable offspring through propagation. Conversely, a stressed or diseased plant may not yield successful results when propagating from cuttings.
Assessing whether there are suitable nodes on your phalaenopsis orchid is also an important step in preparing for propagation. Nodes are areas along the stem where new growth occurs and where roots will emerge once propagated. Identifying viable nodes ensures that you select optimal sections for cutting to maximize success rates during propagation.
Stem Cuttings Technique
Cutting Process
When propagating phalaenopsis orchids from cuttings, the cutting process plays a crucial role. Making precise cuts on the orchid stem or root system is essential for successful propagation. Careful consideration must be given to where and how the cuts are made to ensure that new growth is promoted without causing excessive stress to the parent plant. By utilizing proper cutting techniques, you can minimize stress on the parent plant and encourage healthy development in the new cuttings.
For instance, when taking stem cuttings from a phalaenopsis orchid, it's important to use a sharp, sterilized knife or scissors to make clean cuts. The selected portion of the stem should ideally have at least two nodes present as this will increase the chances of successful rooting. By ensuring that your cutting tool is sanitized and sharp, you reduce the risk of introducing infections or damaging the plant during this process.
Caring for Cuttings
After making cuttings from your phalaenopsis orchid, providing proper care becomes paramount in encouraging root development and overall success in propagation. It's crucial to create an environment that fosters growth by maintaining optimal moisture levels and environmental conditions for your cuttings. This involves monitoring them closely for signs of progress while ensuring they receive adequate light without being exposed to direct sunlight which could cause damage.
To illustrate, after taking stem cuttings from your phalaenopsis orchid, consider using a suitable rooting hormone before planting them into a well-draining medium such as sphagnum moss or perlite mix. This will aid in stimulating root growth and increasing their chances of successfully establishing themselves as independent plants.
Keiki Propagation Method
Identifying Keikis
Keikis are small versions of the parent plant that grow along the flower spike or nodes. Recognizing these tiny offshoots is crucial for propagation. By identifying keikis, you can focus your efforts on propagating these specific parts.
For instance, if you notice a miniature version of the orchid plant growing along the stem, that's likely a keiki. These little plants usually have their own roots and may even start developing leaves.
Identifying keikis is essential because it allows you to target specific areas for propagation. Instead of randomly choosing sections for propagation, recognizing keikis ensures a higher success rate in establishing new plants.
Harvesting Keikis
Detaching Keikis
When detaching keikis from the parent plant, precision and care are vital to prevent damage. Proper detachment techniques ensure both the survival and successful establishment of keikis as independent plants.
Imagine detaching a baby orchid from its parent - it requires gentle handling to avoid harming either plant. This delicate process plays a significant role in ensuring that both the original plant and the detached offspring thrive after separation.
Timely detachment also contributes to overall health; waiting too long might cause overcrowding among plants while detaching too early could hinder proper development.
Proper detachment techniques not only safeguard the well-being of both parent and offspring but also pave the way for successful growth as individual entities.
Planting Keikis
Once detached, planting keikis in an appropriate growing medium is crucial for their continued development. Providing suitable support and moisture levels aids in their successful establishment as new plants.
Consider this step similar to transplanting seedlings into soil: it's about creating an environment where they can flourish independently with adequate resources like water and nutrients.
Layering for Propagation
Layering Technique
Layering is a method of propagating phalaenopsis orchids by encouraging aerial roots to grow into a separate container while still attached to the parent plant. This technique allows new plants to develop their own root systems before being detached from the parent, promoting their independence and survival. By allowing the new plants to form strong roots prior to separation, layering increases their chances of successful growth and establishment.
This method can be particularly effective when attempting to propagate multiple new plants from a single parent. It offers an efficient way to produce several new orchids without causing harm or stress to the original plant. As such, it's an excellent option for growers looking to expand their collection or share orchids with friends and family.
Growing in Moss
When using the layering technique for propagating phalaenopsis orchids, growing them in moss provides an ideal medium for root development and stability. The moss retains moisture essential for healthy growth while also facilitating adequate airflow around developing roots. This combination fosters favorable conditions that support robust root systems, contributing significantly to the overall health and vigor of propagated orchids.
Choosing the right growing medium is crucial during post-propagation care as it directly impacts the well-being of newly established plants. Moss serves as an excellent choice due to its ability to maintain consistent moisture levels without waterlogging, which could lead to root rot issues commonly encountered with other substrates like soil or bark.
Dividing Orchids
Knowing when to divide phalaenopsis orchids is crucial for successful propagation. Dividing them at the right time increases the likelihood of survival and subsequent growth of divided sections. Typically, it's best to divide phalaenopsis orchids after they have finished flowering and during their active growing season.
During this time, the plant is in a phase of active growth, making it more resilient to the division process. If you wait too long after flowering or attempt division during dormancy, the plant may struggle to recover from being divided. This can lead to poor outcomes in terms of survival and new growth.
When dividing phalaenopsis orchids, there are specific steps that should be followed for optimal results. First, carefully remove the orchid from its pot and gently shake off excess soil from the roots. Then, identify healthy pseudobulbs with good root systems that can be separated into individual plants. It's important not to damage or break these healthy parts during separation as this could hinder their ability to thrive independently.
Division Steps
After identifying suitable pseudobulbs for division, use a clean cutting tool such as scissors or gardening shears to separate them from each other while ensuring each divided section has enough roots attached for sustenance. Once separated, place each new division into an appropriate-sized pot with fresh potting mix designed specifically for orchids.
This will provide them with a fertile environment in which they can establish themselves and grow successfully as individual plants. After repotting your divisions, water them lightly but regularly until they show signs of new growth indicating successful establishment in their new pots.
Identifying Back Bulbs
In addition to dividing phalaenopsis orchids, another method of propagation involves identifying back bulbs on existing plants that can be removed and potted separately to grow into independent plants. Back bulbs are older pseudobulbs on an orchid plant that may no longer produce flowers but still have viable dormant buds capable of generating new shoots and roots when potted appropriately.
Back Bulb Propagation
Encouraging growth in phalaenopsis orchids from cuttings is a crucial step in the propagation process. Once you have identified the back bulbs and separated them from the main plant, it's essential to create an optimal environment for new growth.
To encourage growth, provide the back bulbs with ideal conditions such as warmth, humidity, and indirect sunlight. Placing the cuttings in a transparent container or a plastic bag helps retain moisture and creates a greenhouse effect that promotes healthy growth. Using a well-draining potting mix specifically designed for orchids can support their development.
Regular misting or watering of the medium without soaking it will help maintain proper moisture levels. This ensures that the cuttings do not dry out while allowing air circulation around them. It's important to avoid overwatering as excessive moisture can lead to rotting of the delicate new roots and shoots.
Creating a suitable microclimate by covering the container with clear plastic or placing it in an enclosed space with stable temperature and humidity levels can significantly enhance root formation and overall growth. This method simulates natural conditions found in tropical environments where phalaenopsis orchids thrive.
Another effective way to encourage growth is by providing gentle bottom heat through specialized heating mats designed for plant propagation. These mats emit low-level warmth that aids root development without causing harm to delicate tissues.
Myth Busting
When propagating phalaenopsis orchids, there are common myths that need debunking to ensure successful cultivation from cuttings.
-
Myth: Back bulbs cannot produce viable plants.
-
Fact: While back bulbs may take longer than other methods of propagation, they are capable of producing healthy plants given proper care.
-
Myth: Rooting hormone is necessary for successful propagation.
-
Fact: Phalaenopsis orchids generally do not require rooting hormone when propagated from back bulbs due to their natural propensity for developing roots under favorable conditions.
-
Myth: Cuttings should be placed directly into soil after separation.
-
Fact: Placing freshly separated back bulbs directly into soil may hinder their ability to establish new roots due to potential shock; instead, they should be provided with appropriate growing conditions until signs of active growth appear.
Debunking these myths serves as valuable guidance when embarking on propagating phalaenopsis orchids from cuttings while ensuring informed decisions based on factual information rather than misconceptions.
Avoiding Common Myths
Myth Busting
There are several myths that can lead to confusion and frustration. One common myth is that orchid cuttings need to be sealed with wax or cinnamon after being taken. However, this is not necessary as the wounds of the cuttings will naturally callus over without any intervention. Another misconception is that using rooting hormone is essential for successful propagation. In reality, phalaenopsis orchids are often able to root successfully without the use of rooting hormone, especially when using the water culture method.
It's also important to dispel the myth that only professional growers can successfully propagate phalaenopsis orchids from cuttings. With proper knowledge and care, hobbyists and beginners can achieve successful results too. Some believe that propagating orchids from seeds is easier than using cuttings, but in fact, seed propagation requires specialized equipment and a high level of expertise compared to using stem or leaf cuttings.
Best Practices
To ensure successful propagation of phalaenopsis orchids from cuttings, it's crucial to follow best practices throughout the process. First and foremost, selecting a healthy parent plant with no signs of disease or pests is essential for obtaining viable cuttings. When taking stem or leaf cuttings, use a clean cutting tool to prevent introducing pathogens into the wound.
After taking the cutting(s), allow them sufficient time to callus before placing them in their chosen propagation medium—this helps reduce the risk of rotting. It's also important not to bury the nodes (the areas where roots will emerge) too deeply in the medium as this could impede root growth.
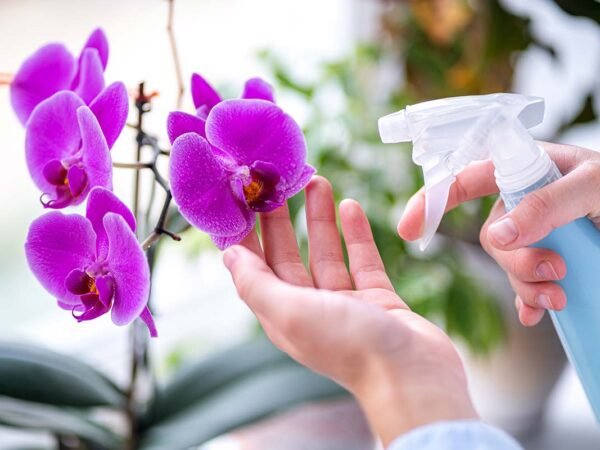
Furthermore, maintaining an appropriate level of humidity around the newly propagated plants helps prevent desiccation while they establish themselves. This can be achieved by covering them with a clear plastic dome or placing them in a humid environment such as a terrarium until new growth appears.
Post-propagation Care
Once your phalaenopsis orchidcutting has developed roots and new leaves have emerged post-propagation care becomes crucial for its long-term health and development. One key factor in post-propagation care involves transitioning your young plants gradually into their future growing conditions; abrupt changes could shock them. Additionally providing adequate light exposure without direct sunlight promotes healthy growth; indirect bright light works well.
Aftercare of Propagated Orchids
Post-Propagation Care
Once you have successfully propagated your phalaenopsis orchids from cuttings, it's crucial to provide them with proper aftercare to ensure their healthy growth. After the propagation process, the newly propagated orchids will need specific attention and care to thrive in their new environment.
Firstly, it's important to continue providing the right amount of moisture for the newly propagated orchids. You should keep the growing medium slightly moist but not waterlogged. Overwatering can lead to root rot, while underwatering can cause stress on the young plants. Keep a close eye on the moisture level by checking it regularly and adjusting your watering schedule as needed.
Maintaining an optimal temperature is essential for monitoring growth post-propagation. Phalaenopsis orchids typically thrive in temperatures between 65°F and 80°F (18°C - 27°C). Ensure that the environment where your propagated orchids are placed provides consistent temperatures within this range. Sudden fluctuations or prolonged exposure to extreme temperatures can negatively impact their growth and overall health.
Monitoring Growth
After propagating phalaenopsis orchids from cuttings, closely monitoring their growth is vital for ensuring they establish themselves successfully in their new growing medium. Regularly inspecting the plants allows you to identify any issues early on and take necessary actions promptly.
Keep an eye out for signs of new leaf or root development, which indicates that your propagated orchids are adapting well to their new environment. Healthy new growth is a positive indication that they are thriving post-propagation. On the other hand, if you notice wilting leaves or stunted growth, it could be a sign of inadequate care or environmental stress.
Summary
Congratulations on reaching the end of this propagation guide! You've learned various techniques for propagating Phalaenopsis orchids, from stem cuttings to keiki propagation and back bulb propagation. Remember, successful propagation requires patience, attention to detail, and a bit of trial and error. Now that you have the knowledge, it's time to get your hands dirty and start propagating your beautiful orchids. Don't be afraid to experiment and find the method that works best for you and your plants. Happy propagating!
Frequently Asked Questions
How do I propagate phalaenopsis orchids from cuttings?
To propagate phalaenopsis orchids from cuttings, you can use the stem cutting technique or the keiki propagation method. Both methods involve taking a healthy part of the plant and encouraging it to grow into a new orchid.
What is back bulb propagation?
Back bulb propagation involves using the dormant buds on old pseudobulbs to grow new plants. It's like giving these little bulbs a second chance at life, allowing you to create new plants from mature ones without harming the original plant.
Can I divide my orchid for propagation?
Yes, dividing your orchid is an effective way to propagate it. By carefully separating the rhizome and roots into sections with at least three healthy growths each, you can create multiple new plants that will continue to thrive.
How should I care for propagated orchids after propagation?
After propagating your orchids, ensure they have proper humidity, warmth, and light. Keep them in a stable environment away from direct sunlight until they establish themselves. Regularly check for signs of stress or disease as they acclimate to their new growing conditions.
Is layering an effective method for propagating phalaenopsis orchids?
Layering is indeed an effective method for propagating phalaenopsis orchids. By encouraging aerial roots along a stem to develop into individual plants while still attached to the mother plant, you can efficiently expand your collection of beautiful blooming flowers.
Image Source: Paid image from CANVA